Why Dryer Vent Exhaust Replacement Matters for Your Home
Dryer vent exhaust replacement is a critical home safety upgrade. If your clothes take longer to dry, your laundry room is unusually hot, or you smell something burning when the dryer runs, it’s time for a replacement. A clogged or damaged vent is inefficient and a serious fire hazard.
Quick Answer: When to Replace Your Dryer Vent
Replace your dryer vent immediately if you notice:
- Longer drying times (clothes need multiple cycles)
- Excessive heat in your laundry room or on the dryer exterior
- Burning smell during dryer operation
- Visible lint around your outdoor vent opening
- Damaged or crushed vent hose
- Old plastic or vinyl vent materials (these are fire hazards)
Here’s why this matters: lint is highly flammable, and restricted airflow causes your dryer to overheat. According to real-world testing, homeowners who replaced an 8-foot plastic flex hose with a smooth metal vent shaved 10 minutes off drying time for a full load of clothes. That’s energy savings and reduced fire risk.
Most dryer vent problems stem from poor materials (plastic or foil vents that trap lint), improper installation (too many turns or excessive length), or age and wear. The good news is that replacing a dryer vent is a manageable DIY project, typically costing $150 to $250 for materials. Alternatively, you can hire a professional for $140 to $275.
This guide covers everything from identifying the need for replacement to choosing materials and safe installation. For Long Island homeowners and businesses, proper dryer vent installation is key to protecting your property.

Dryer vent exhaust replacement vocab to learn:
Why and When to Replace Your Dryer Vent
Your dryer vent is a critical safety and efficiency component that removes hot, moist air and lint from your home. A malfunctioning vent can cause problems ranging from inefficiency to serious fire hazards. For homeowners in Nassau County and Suffolk County, poor dryer performance is often caused by the vent, not the appliance itself.
Signs Indicating a Dryer Vent Exhaust Replacement is Needed
Here are the key indicators that it’s time for a dryer vent exhaust replacement:
- Clothes take too long to dry: The most common sign. If clothes need multiple cycles or take much longer to dry, airflow is likely restricted.
- Dryer is hot to the touch: An overheated dryer or a hot laundry room means heat isn’t venting properly, straining your appliance.
- Burning smell during operation: A serious red flag. This often means lint is overheating in the vent, posing an immediate fire risk.
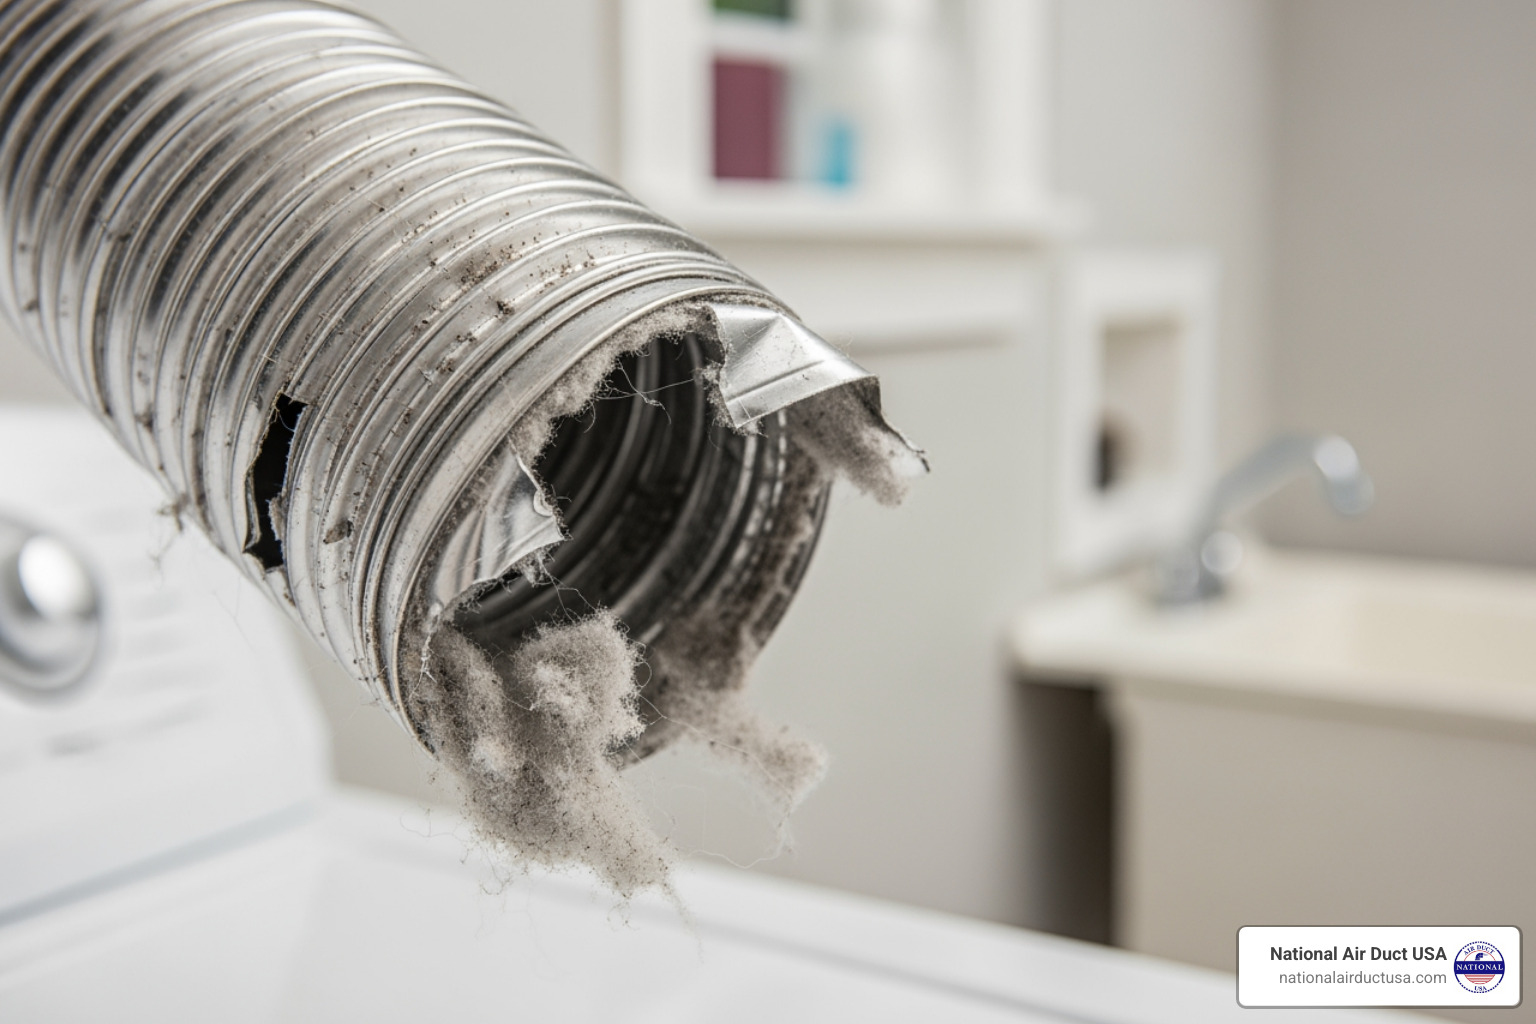
- Visible damage to the hose: A crushed, kinked, or torn vent hose behind the dryer severely impedes airflow and needs immediate attention.
- Lint accumulation outside: Excessive lint buildup around the exterior vent cover, or a flap that doesn’t open fully, indicates a blockage.
- Dryer shuts off mid-cycle: Many dryers have a safety feature that shuts them off when they overheat, often caused by a clogged vent.
- Musty odor on clothes: A musty smell on “freshly” dried clothes indicates trapped moisture, which can lead to mold and mildew in the vent.
- Outdated materials like plastic or vinyl: Flexible plastic or vinyl vents are a fire hazard and not code-compliant. They trap lint and crush easily. If you have one, upgrade to metal immediately.
For more information on keeping your dryer vent clear, consider our Dryer Vent Cleaning services.
The Hidden Dangers: Fire Hazards and Inefficiency
The consequences of ignoring these signs can be severe. A compromised dryer vent is a serious threat to your home and family.
- Lint is highly flammable: Lint is combustible fuel. When it builds up in a vent, restricted airflow causes the dryer to overheat, creating a high risk of ignition and house fires.
- A new vent improves dryer performance: A clean metal vent allows hot air to escape efficiently. Your dryer works less, reducing drying times and appliance wear. Replacing an 8-foot plastic hose with a smooth metal vent saved 10 minutes off the drying time of a full load.
- Energy efficiency gains: Shorter drying times mean lower energy bills. Ensuring your dryer runs efficiently reduces electricity or gas consumption.
- Health and safety standards: Official guidelines, like those in the National Standards for the Physical Inspection of Real Estate: Clothes Dryer Exhaust Ventilation, classify issues like restricted airflow and unsuitable duct materials as “Life-Threatening” deficiencies. This underscores the critical importance of a properly functioning dryer vent.
Choosing the Right Dryer Vent Materials
When it comes to dryer vent exhaust replacement, your material choice is paramount for your home’s safety and your dryer’s performance. Not all vent materials are created equal.

Here’s a breakdown of the common types and why we strongly recommend certain options:
Rigid Metal Vents: The Gold Standard
Rigid metal vents (aluminum or galvanized steel) are the “gold standard” for dryer venting.
- Pros: Their smooth interior offers the best airflow, minimizing lint buildup. They are durable, fire-resistant, and won’t crush or kink, making them ideal for long, straight runs.
- Cons: Less flexible, requiring more precise measurements and cuts during installation.
Semi-Rigid Metal Vents: Flexible and Safe
Semi-rigid metal vents offer a good balance of flexibility and safety.
- Pros: More flexible than rigid ducts, they are good for tight spaces and connections behind the dryer. They offer better airflow and durability than foil and are fire-resistant.
- Cons: More prone to lint buildup and crushing than rigid metal if not properly installed.
For more detailed information on proper vent installation, check out our Dryer Duct Installation guide.
Flexible Foil Vents: For Transitions Only
Flexible foil vents are the least recommended for general use.
- Pros: Highly flexible and inexpensive, making them easy to install in very tight spaces.
- Cons: Their ribbed interior restricts airflow and traps lint, increasing fire risk. They crush and tear easily and are often not code-compliant for full runs. Use only for short transitions (under 7¾ feet) from the dryer to the wall duct.
Why to Avoid Plastic/Vinyl Vents:
Never use flexible plastic or vinyl ducts. They are not fire-resistant, crush easily, and trap lint, creating an extreme fire hazard. Using them often voids dryer warranties. If you have one, a dryer vent exhaust replacement is urgent.
How Dryer Type Influences Material Choice:
Rigid metal is always the best choice. For high-capacity or frequently used dryers, which generate more heat and lint, a full rigid metal run is essential for safety and efficiency. For shorter runs, semi-rigid is acceptable for the transition.
Here’s a quick comparison:
| Feature | Rigid Metal Vents | Semi-Rigid Metal Vents | Flexible Foil Vents |
|---|---|---|---|
| Durability | Excellent | Good | Poor |
| Airflow | Excellent (smooth interior) | Good (smoother than foil) | Poor (ribbed interior) |
| Fire Resistance | Excellent | Excellent | Good (better than plastic) |
| Lint Buildup | Minimal | Moderate | High |
| Ease of Install | Moderate (less flexible) | Easy (more flexible) | Very Easy |
| Cost | Moderate | Low to Moderate | Low |
| Recommended Use | Main vent runs | Short transitions, tight spots | Very short transitions only (under 7¾ ft), not ideal |
The Complete Dryer Vent Exhaust Replacement Guide
With an understanding of the right materials, you’re ready for the dryer vent exhaust replacement process. While it may seem daunting, it’s a manageable DIY project for many Long Island homeowners.

Tools and Materials You’ll Need:
- New Dryer Vent Material: Rigid metal (aluminum or galvanized steel) pipe and elbows (4-inch diameter).
- Metal Foil Tape: Crucial for sealing joints. Never use duct tape.
- Hose Clamps: To secure connections.
- Measuring Tape: For accurate measurements.
- Tin Snips: For cutting metal ductwork.
- Screwdriver: For tightening clamps.
- Power Drill: If you need to create a new exterior opening.
- Hole Saw (4¼-inch): For new exterior openings.
- Caulk Gun and Exterior Caulk: For sealing the exterior vent hood.
- Vacuum Cleaner with Hose Attachment & Dryer Vent Brush Kit: For cleaning lint.
- Safety Gear: Work gloves (metal edges can be sharp!), safety glasses.
- Exterior Vent Hood: Ensure it has a louvered gravity damper and no screen.
Safety First!
Before starting, always prioritize safety:
- Unplug the Dryer: For electric dryers, pull the plug from the wall outlet.
- Turn Off Gas Supply: For gas dryers, turn the gas shut-off valve behind the dryer to the “off” position. This is critical to prevent gas leaks.
- Clear the Area: Pull the dryer away from the wall to give yourself ample working space.
Planning the Route
The golden rule of dryer venting is to keep the run as short and straight as possible. Every bend creates resistance and a spot for lint to collect.
- Vent Length Rules: A 4-inch diameter dryer duct should generally be 25 feet or less. You must subtract length for each turn:
- Subtract 5 feet for each 90-degree turn.
- Subtract 2.5 feet for each 45-degree turn.
- Pitch: If possible, pitch your ductwork slightly (about ¼-inch per foot) towards the outside to help moisture drain.
- Local Building Codes: Always check your local building codes in Long Island, Nassau County, or Suffolk County to ensure compliance with specific requirements.
Step 1: Removing the Old Vent
- Disconnect from Dryer and Wall: Loosen the clamps or peel away the tape securing the old vent to the dryer and wall duct.
- Carefully Pull Out the Old Vent: Gently detach the old vent, being careful to minimize any lint mess.
- Clean Lint from Exhaust Port and Wall Duct: This is a crucial step. Use a vacuum and dryer vent brush to thoroughly clean lint from the dryer’s exhaust port and the wall duct. Reach as far as possible to ensure a clean start for your new vent. Also, clean the exterior vent hood.
Step 2: A Step-by-Step Dryer Vent Exhaust Replacement
- Measure and Cut Duct Sections: Measure the path from your dryer to the wall duct, accounting for elbows. Use tin snips to cut the rigid metal pipe sections to length. Wear gloves to protect from sharp edges.
- Assemble Sections and Elbows: When connecting metal duct sections, ensure the crimped end of one pipe fits into the uncrimped end of the next, pointing towards the exterior. This allows lint to flow smoothly.
-
Seal All Joints with Metal Foil Tape: This is critical for preventing air and lint leaks. Securely apply heat-resistant metal foil tape around every joint for a tight, airtight seal. Never use standard duct tape.
-
Secure Connections with Clamps: Use hose clamps to firmly secure the metal duct to the dryer’s exhaust port and the wall duct. Tighten them until snug.
- Avoid Screws Inside the Duct: Do not use screws to join duct sections. Screw tips protrude into the duct, snagging lint and creating a fire hazard. Use only foil tape and clamps.
- Insulate (Optional but Recommended): If your vent runs through an unconditioned space like an attic, consider insulating the ductwork to prevent condensation.
Step 3: Connecting and Testing
- Attach to Dryer and Exterior Vent Hood: Connect the final sections to the dryer’s exhaust and the exterior vent hood.
- Carefully Reposition the Dryer: Gently push your dryer back into place, taking care not to kink or crush the new vent.
- Run the Dryer and Test Airflow: Plug your dryer in or turn on the gas supply. Run it on an air-fluff cycle. Go outside and check the exterior vent. The flap should open fully, and you should feel a strong stream of air. If airflow is weak, you’ll need to troubleshoot.
Post-Installation Care and Troubleshooting
Congratulations on your new dryer vent exhaust replacement! A proper installation improves dryer performance and home safety. Now, regular maintenance and troubleshooting are key to ensuring its longevity and efficiency.
Recommended Maintenance Schedule
Follow these best practices for preventative care:
- Clean the Lint Screen After Every Load: This is non-negotiable and your first line of defense against lint buildup.
- Inspect the Exterior Vent Cover Quarterly: Check the exterior vent hood to ensure the flap opens freely and isn’t blocked by lint, debris, or nests.
- Check Connections Annually: Once a year, pull your dryer out to inspect the connections. Ensure clamps are tight and foil tape is secure.
- Annual Professional Cleaning: Even with a new metal vent, lint accumulates. We recommend annual professional cleaning, especially for long runs or high-use dryers. Our NADCA-certified technicians in Long Island can thoroughly clean the system for optimal airflow and safety. Learn more about our Dryer Vent Cleaning Company.
Troubleshooting Common Issues After Installation
Even with a perfect installation, issues can arise. Here’s how to troubleshoot:
- Poor Airflow / Clothes Still Taking Too Long to Dry:
- Check for Kinks/Crushes: Pull the dryer out and ensure the transition duct isn’t kinked or crushed.
- Verify Exterior Vent: Go outside and confirm the vent flap is opening fully with no obstructions.
- Review Vent Length/Turns: Re-evaluate if your vent run exceeds recommended lengths or has too many turns.
- Dryer Gets Too Hot / Burning Smell Returns:
- Immediate Action: Unplug the dryer (or turn off gas) and stop using it.
- Check for Lint Buildup: Thoroughly clean the lint screen and inspect the dryer’s exhaust port for any lint.
- Professional Inspection: This is a serious sign. Contact a professional immediately to find and clear any deep blockages.
- Loose Connections / Air Leaks:
- Visual Inspection: Look for gaps in the foil tape or loose clamps.
- Re-tape/Tighten: Reapply foil tape or tighten clamps as needed.
- Unusual Noises:
- Vibrations: Ensure the dryer is level and not vibrating against the wall or vent pipe.
- Exterior Flap: Check if the exterior vent flap is rattling. Some noise is normal, but excessive noise might mean it’s damaged.
If these steps don’t resolve the issue, or if you’re uncomfortable, contact a professional for an inspection.
Frequently Asked Questions about Dryer Vent Replacement
Here are common questions from homeowners in Hicksville, Freeport, and across Nassau County about dryer vent replacement:
How much does a dryer vent replacement cost?
The cost for a dryer vent exhaust replacement varies based on a DIY vs. professional job, complexity, and materials.
- DIY Cost Range: If you do it yourself, materials typically cost between $150 to $250. This includes rigid metal ducting, elbows, foil tape, clamps, and an exterior vent hood.
- Professional Installation Cost: Hiring a professional might cost anywhere from $140 to $275 for labor and standard materials. Complex installations will cost more.
Factors Affecting Cost:
- Length and Complexity: Longer runs or routes with multiple turns increase costs.
- Type of Materials: Rigid metal is recommended, with slight price differences between aluminum and galvanized steel.
- Accessibility: Hard-to-reach vents (in crawl spaces or attics) may increase labor costs.
For an accurate estimate for your Long Island home, we encourage you to Get a Free Quote from us.
Are there differences when venting a gas vs. an electric dryer?
Yes, there are critical safety differences when venting a gas vs. an electric dryer.
- Gas Dryer Safety is Critical: Gas dryers produce deadly, odorless carbon monoxide (CO). A gas dryer must always be vented directly outside—never into a garage, attic, or crawl space, which can cause dangerous CO buildup. Ensure the exterior vent has proper clearance (at least 12 inches) from windows and doors to prevent exhaust from re-entering the home.
- Electric Dryers: Electric dryers don’t produce CO but still expel hot, moist air and lint. Venting outside is recommended to prevent mold and reduce fire risk. While ventless models exist, traditional electric dryers require external venting for safety and performance.
While both dryer types benefit from efficient external venting, the stakes are much higher for gas dryers due to the risk of carbon monoxide poisoning.
Where can I buy dryer vent replacement parts?
The right parts for your dryer vent exhaust replacement are available at most home improvement and hardware stores:
- Home Improvement Stores: Large chains like Home Depot and Lowe’s carry a wide variety of rigid and semi-rigid metal ducting, foil tape, clamps, and vent hoods.
- Hardware Stores: Your local hardware store is another good source for these items.
- Online Appliance Part Retailers: Websites specializing in appliance parts can also be a good option.
- Specialized HVAC or Ductwork Suppliers: These suppliers offer professional-grade materials.
Necessary Accessories to Look For:
- Rigid Metal Ductwork: 4-inch diameter, in 2-foot or 5-foot sections.
- Elbows: 45-degree and 90-degree elbows for navigating turns.
- Metal Foil Tape: Ensure it’s rated for high temperatures.
- Hose Clamps: Several 4-inch clamps to secure all connections.
- Exterior Vent Hood: Choose one with a louvered damper and no screen to allow lint to escape freely.
Conclusion: A Safer, More Efficient Home Awaits
A dryer vent exhaust replacement is a key investment in your home’s safety and efficiency. Replacing old or hazardous vents with proper metal ductwork provides many benefits:
- Improved Fire Safety: You drastically reduce the risk of lint-related dryer fires.
- Improved Energy Efficiency: Your dryer will work better, dry clothes faster, and use less energy, saving you money.
- Extended Dryer Lifespan: An efficient dryer experiences less wear and tear, extending its life.
- Better Indoor Air Quality: Proper venting prevents moisture buildup, reducing the risk of mold and mildew.
Using the right materials (rigid or semi-rigid metal) and proper installation techniques is crucial. While this is a manageable DIY task for many Long Island homeowners, professional help is recommended for complex runs or for peace of mind to ensure safety and code compliance.
At National Air Duct USA, we specialize in professional air duct and dryer vent services. Our NADCA-certified technicians are experts in proper dryer vent installation and replacement, ensuring your system is safe, efficient, and compliant. We’re here to help you achieve a cleaner, safer, and more efficient home.
Ready to upgrade your dryer vent system or need assistance with any aspect of your home’s air quality? Explore our professional services today and contact us for a consultation.