The Hidden Component That’s Costing You Money
Clean air conditioner coils inside house maintenance is one of those “out of sight, out of mind” tasks that many homeowners overlook. Yet these hidden components inside your indoor air handler are working overtime to keep your family comfortable.
Quick Answer: How to Clean Indoor AC Coils
- Turn off power at thermostat and breaker
- Remove access panel to reach evaporator coils
- Gently brush away loose debris with soft bristles
- Vacuum dirt and dust with brush attachment
- Apply no-rinse coil cleaner following product instructions
- Allow cleaner to work for specified time
- Reassemble unit and restore power
Your evaporator coils are the unsung heroes of your cooling system. They absorb heat from your indoor air and remove humidity – but only when they’re clean. According to research, dirty coils can use up to 40% more energy than clean ones while reducing cooling function by an estimated 30% or more.
As one HVAC expert puts it: “Many times, when it comes time to perform an annual maintenance service on your HVAC system, components that are out of sight inside the system cabinet or air handler enclosure are often forgotten about or overlooked.”
When dust builds up on these copper and aluminum components, it acts like a blanket – keeping heat in and preventing proper air circulation. The result? Higher energy bills, reduced comfort, and potential system breakdowns that could leave your family sweltering during New York’s hottest days.
Why Clean Evaporator Coils are a Breath of Fresh Air
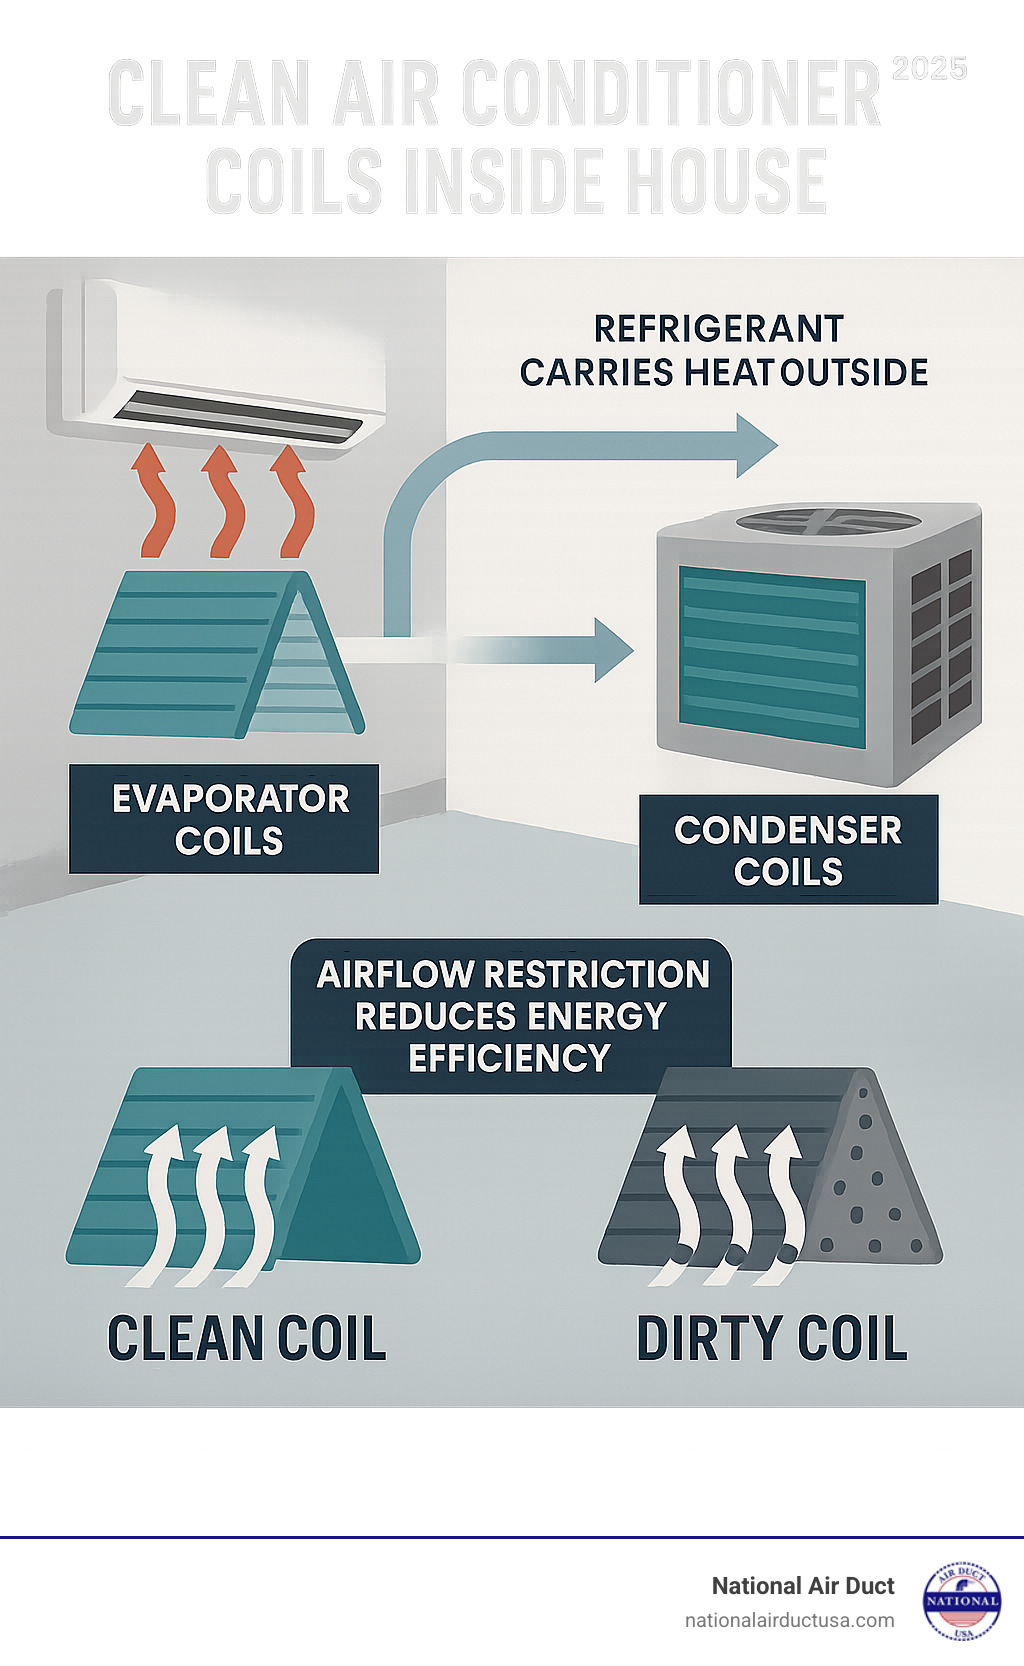
Your evaporator coils are the hardest-working components in your air conditioning system, and frankly, they deserve more credit. These copper and aluminum coils do the heavy lifting when it comes to heat absorption – they’re literally what makes your home feel cool and comfortable during those sweltering New York summers.
But cooling isn’t their only job. These coils are also your home’s dehumidification heroes. As warm, muggy air flows over the cold coil surface, moisture condenses and drips away into a drain pan. It’s like having a built-in humidity remover working 24/7 to keep your indoor air fresh and comfortable.
Here’s where things get problematic: dirty coil effects can turn your efficient cooling system into an energy-guzzling monster. When dust, pet hair, and grime coat these coils, it’s like wrapping them in a thick blanket. The result? Reduced cooling capacity because the coils can’t properly absorb heat from your indoor air.
This forces your AC system to work overtime, leading to higher energy bills and serious system strain. The U.S. Department of Energy guidance on AC maintenance emphasizes that regular coil cleaning is essential for keeping your system running efficiently.
| Feature | Evaporator Coils (Indoor Unit) | Condenser Coils (Outdoor Unit) |
|---|---|---|
| Location | Inside the house, usually in the air handler or furnace | Outside the house, in the main AC unit |
| Function | Absorb heat and humidity from indoor air, cooling it | Release absorbed heat to the outdoor air |
| Common Issues | Dust/mold buildup, frosting, reduced airflow, drain pan clogs | Dirt/debris buildup, bent fins, grass clippings, reduced heat dissipation |
| Cleaning Approach | Requires accessing internal panel, gentle brushing, vacuuming, no-rinse cleaners | Hosing down, brushing, specialized cleaners, more exposed to environmental debris |
The High Cost of Neglect
Let’s talk numbers – and they’re not pretty. Neglecting to clean air conditioner coils inside house can spike your energy consumption increase by a staggering up to 40% more energy use compared to clean coils. That’s real money coming out of your pocket every month.
The reduced cooling function is equally dramatic. We’re talking about a 30% or more drop in efficiency. Why? Because dust acts as an insulator, creating a barrier between your indoor air and the cold coil surface. Your system runs longer, works harder, and still can’t keep up with demand.
One of the scariest consequences is frozen coils. When airflow gets restricted by dirt buildup, the refrigerant inside gets too cold. Ice forms on the coil surface, blocking even more airflow and creating a vicious cycle that can lead to potential AC breakdown.
We’ve seen too many homeowners face expensive emergency repairs that could have been prevented with regular cleaning. If you’re dealing with system problems, our team can help with HVAC Repair.
Evaporator Coils vs. Condenser Coils
Understanding the difference between your indoor unit vs. outdoor unit coils helps you tackle maintenance more effectively. Your evaporator coils handle heat absorption from inside your home, while condenser coils focus on heat release to the outside air.
This means they face different cleaning needs. Indoor evaporator coils collect household dust, pet dander, and moisture-loving mold spores. They need gentle care because they’re surrounded by electrical components and delicate fins.
Outdoor condenser coils battle leaves, grass clippings, and environmental debris. They can handle slightly more aggressive cleaning, but still require careful attention to avoid damage.
The key is knowing which coil you’re dealing with and using the right approach for each. For comprehensive guidance on both types, check out our detailed information about Coil Cleaning.
Telltale Signs Your Indoor Coils Need Cleaning
Your air conditioning system has its own way of crying for help – you just need to know how to listen. Think of these warning signs as your AC’s polite way of saying, “Hey, I could really use some attention here!”
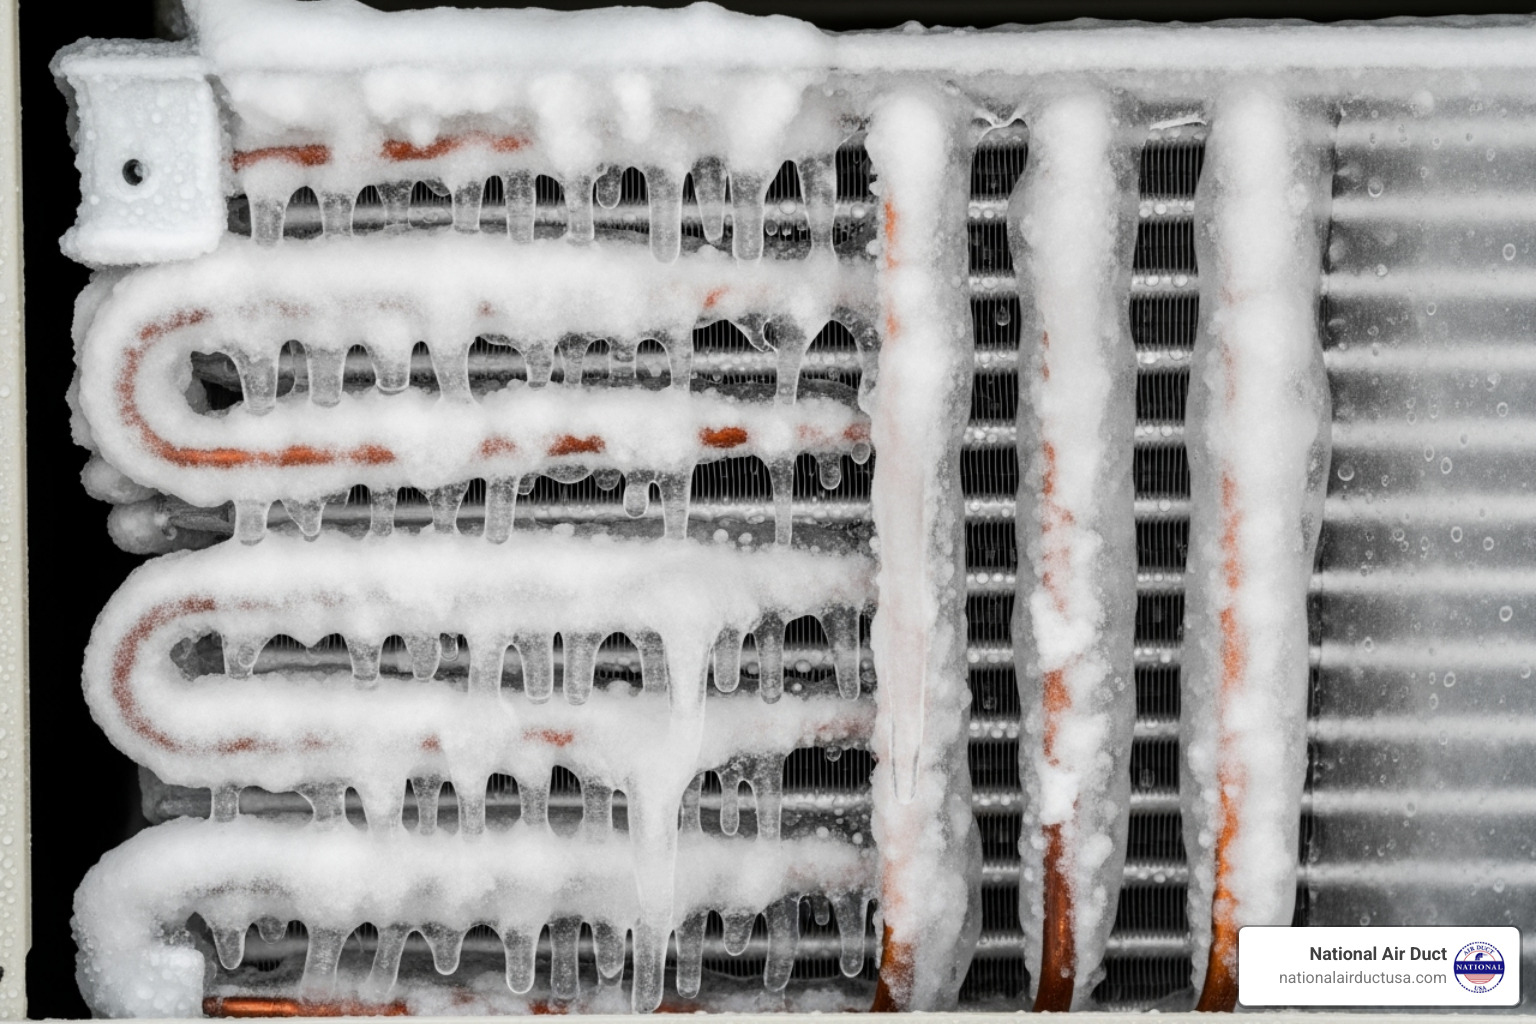
The first thing you’ll probably notice is reduced airflow from your vents. It’s like trying to breathe through a dirty filter – the air just doesn’t move like it should. When dust and debris coat your evaporator coils, they create a physical barrier that makes your system work much harder to push air through.
Weak cooling is another dead giveaway that it’s time to clean air conditioner coils inside house. Your AC might be humming along, but your home feels more like a sauna than the cool oasis you’re paying for. Dirty coils simply can’t absorb heat efficiently, leaving your system running constantly without delivering the comfort you expect.
Your nose often knows before your eyes do. Musty or unpleasant odors wafting from your vents signal that moisture is collecting on dirty coils, creating the perfect breeding ground for mold, mildew, and bacteria. If something smells “off” when your AC kicks on, biological growth is likely happening somewhere in your system.
Increased humidity in your home is particularly frustrating because your AC should be removing moisture, not leaving you feeling sticky and uncomfortable. When evaporator coils are clogged with dirt, they struggle with dehumidification – one of their most important jobs.
Your wallet will feel the impact too. Higher than usual utility bills often reflect an AC system working overtime to compensate for dirty coils. Research shows that neglected units use significantly more energy to perform at the same level, turning every cooling cycle into a costly endeavor.
Sometimes the evidence is right there in front of you. Visible dust or mold buildup on accessible parts of your system (always check with the power off!) tells the whole story. Physical signs like dust-caked fins or fuzzy mold growth mean the problem has moved beyond subtle hints to obvious necessity.
Finally, an AC that runs constantly without ever seeming to reach its target temperature is usually struggling with heat transfer. Clean coils allow efficient cooling cycles, while dirty ones force your system into marathon sessions that wear down components and spike energy consumption.
If any of these symptoms sound familiar, your evaporator coils are probably overdue for attention. The good news? Addressing these warning signs early can prevent the more expensive problems that come with prolonged neglect.
Your DIY Guide: How to Clean Air Conditioner Coils Inside House
Ready to roll up your sleeves and tackle those dirty coils yourself? Clean air conditioner coils inside house maintenance is definitely doable for homeowners who are comfortable with basic home projects. Think of it like giving your AC system a well-deserved spa day – and your wallet will thank you for it!
Before we jump in, let’s be clear: this guide is for folks who feel confident handling basic maintenance tasks. If you’re not comfortable working around electrical components or accessing your HVAC system, there’s absolutely no shame in calling the professionals. Safety always comes first.
Gathering Your Tools and Prepping for Safety
Picture this: you’re all motivated to clean those coils, but halfway through the job you realize you’re missing a crucial tool. Let’s avoid that frustration by gathering everything upfront.
You’ll need safety glasses to protect your eyes from flying dust and cleaning solutions, along with gloves to keep your hands clean and safe. A screwdriver (or better yet, a drill with screwdriver bits) will help you remove access panels quickly.
For the actual cleaning, grab a soft-bristled brush – a clean paintbrush works perfectly, or you can invest in a dedicated coil brush. Whatever you do, avoid hard bristles or wire brushes that can damage those delicate fins. You’ll also want a shop vacuum with brush attachment to suck up all that loosened debris without spreading it around your home.
The star of the show is no-rinse foaming coil cleaner specifically designed for evaporator coils. This stuff is magic – it foams up, penetrates deep into the coil, then condenses and carries the dirt away into the drain pan. Keep a spray bottle with water handy for light rinsing if needed, and don’t forget a flashlight to illuminate those hidden corners.
Now for the most important part – safety first! We cannot stress this enough. Before you touch anything inside your AC unit, you absolutely must turn off the power. Start by setting your thermostat to “Off,” then head to your breaker box and switch off the circuit breaker that controls your indoor air handler or furnace. This isn’t optional – it’s critical for preventing accidental electrocution. Double-check that the power is truly off before proceeding.
A Step-by-Step Method to Clean Air Conditioner Coils Inside House
With your tools ready and power safely disconnected, it’s time to get those coils sparkling clean. Your indoor evaporator coils are typically tucked away in a cabinet above your furnace or within your air handler unit. You’ll need to locate and remove the access panel first, which usually means unscrewing a few screws. Take a mental note (or even a quick photo) of how everything fits together – you’ll thank yourself later during reassembly.
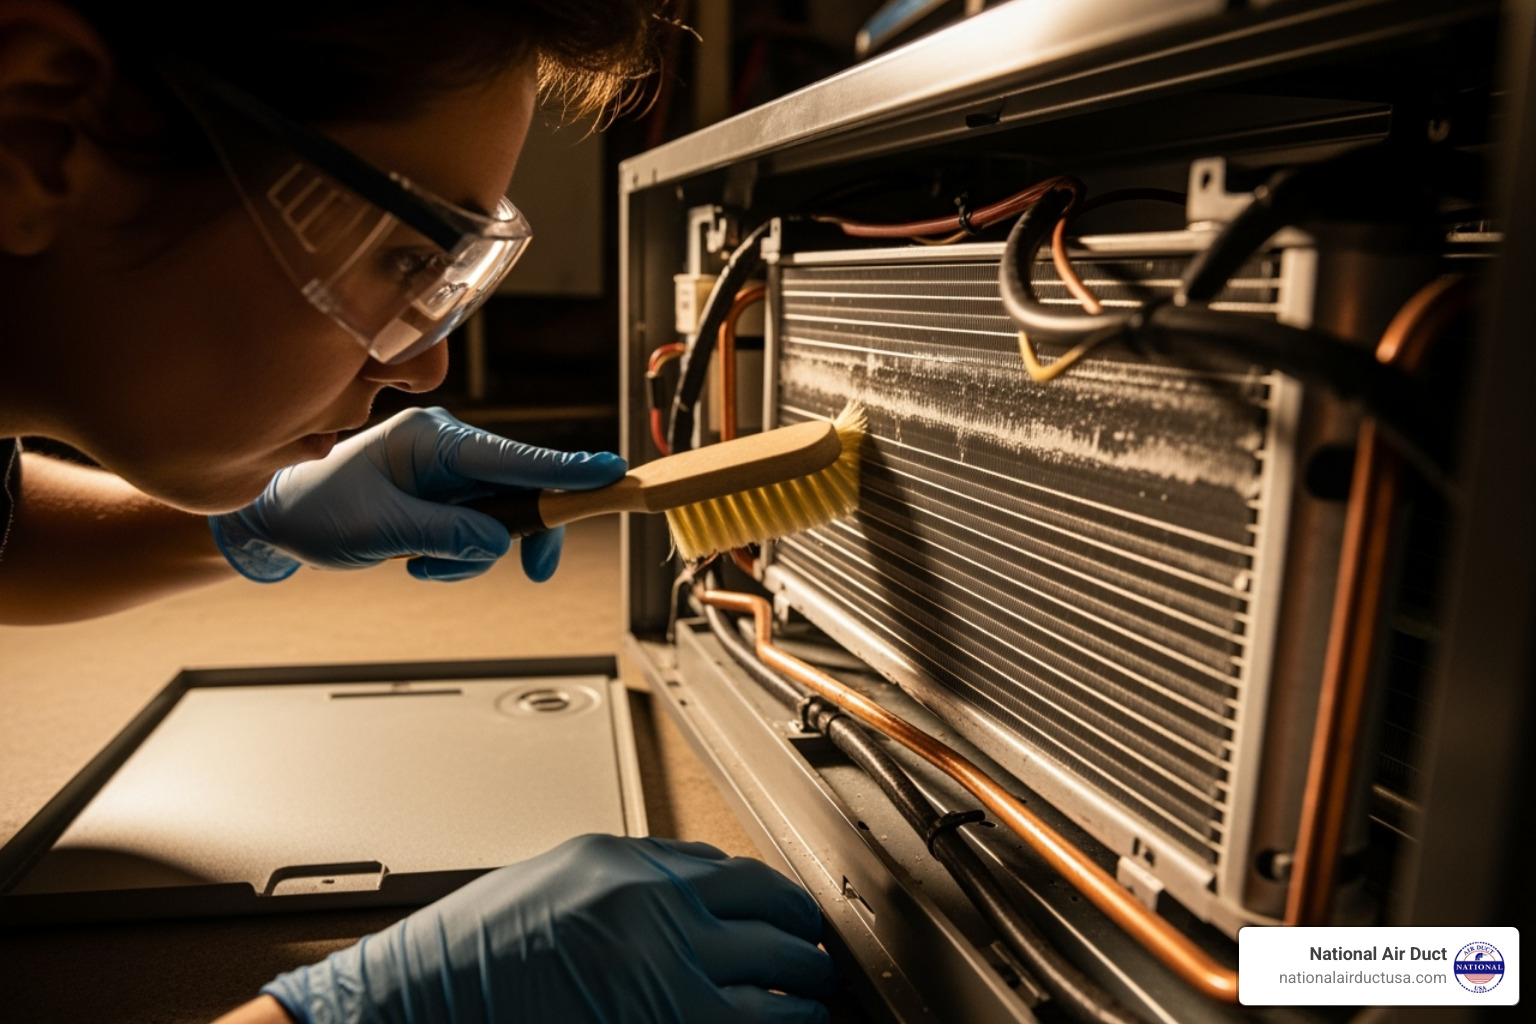
Once you’ve exposed those coils, start with gentle brushing using your soft-bristled brush. Work carefully along the direction of the fins – never against them – to sweep away loose dust, dirt, and debris. Dust on an evaporator coil acts like a blanket, so removing it is crucial for proper heat transfer.
As you brush, immediately vacuum up the loosened debris with your shop vacuum’s brush attachment. This prevents dirt from falling deeper into the unit or floating back into your home’s air. For light buildup, sometimes just blowing dirt off with compressed air (in the opposite direction of normal airflow) followed by vacuuming can do the trick.
Now comes the satisfying part – applying your no-rinse cleaner. Spray it evenly across the entire surface of the evaporator coil, making sure to follow the manufacturer’s instructions for application and dwell time. These cleaners are designed to foam up, break down years of grime, then self-rinse as your AC produces condensation during normal operation.
Allow the cleaner to work its magic for the specified time. The foam will loosen and encapsulate all that built-up dirt. When your AC runs again, the natural condensation process will cause the cleaner and dirt to drip into the condensate pan and flush out through the drain line. It’s like having a self-cleaning system!
Once you’re satisfied with the cleaning and any required waiting time has passed, carefully reassemble everything. Make sure all screws are properly tightened and the access panel is securely in place. Finally, restore power at your breaker box first, then at your thermostat. Your AC is now ready to run more efficiently than it has in months!
Potential Risks and What to Avoid
While cleaning your own coils can be incredibly rewarding (not to mention money-saving), there are some important pitfalls to avoid. Think of these as the “don’t try this at home” moments that could turn your DIY victory into an expensive lesson.
Those aluminum fins on your evaporator coils are surprisingly delicate – about as sturdy as aluminum foil. Too much pressure, a stiff brush, or cleaning at the wrong angle can easily bend or flatten them. Ironically, bent fins restrict airflow just like the dirt you’re trying to remove! If you do accidentally bend some fins, specialized fin combs can help straighten them, but prevention is definitely better than cure.
Be extra careful around refrigerant lines – those copper tubes carrying coolant throughout your system. Any punctures or bends that cause refrigerant leaks will require professional repair and can cost hundreds of dollars. Similarly, electrical components like the blower motor and wiring need protection from moisture during cleaning. Water and electricity are never friends.
Harsh chemicals are a big no-no for coil cleaning. Avoid anything abrasive or corrosive that isn’t specifically designed for AC coils. These can damage the copper or aluminum, cause corrosion, or leave harmful residues that you and your family will end up breathing. Stick to products clearly labeled for AC coil cleaning.
Never, ever use high-pressure water on indoor coils. Garden hoses and pressure washers might seem like they’d blast away stubborn dirt, but they’ll also bend fins, push debris deeper into the coil, and potentially damage sensitive components. A gentle spray bottle is all you need if any rinsing is required.
Sometimes DIY just isn’t enough. If your coils are heavily caked with years of buildup, covered in extensive mold, or if the access seems too complicated, it’s time to call in the professionals. We also recommend professional attention for comprehensive maintenance like Blower Cleaning to ensure your entire system is running at peak performance.
When to Skip the DIY and Call a Professional
Let’s be honest – sometimes the best tool in your toolbox is knowing when to put it down and pick up the phone instead. While we love empowering homeowners to tackle basic maintenance, there are definitely moments when your evaporator coils need more than a weekend warrior can safely provide.
Heavy mold growth is one of those red-flag situations. If you peek inside your unit and see what looks like a science experiment gone wrong – especially widespread black or fuzzy growth – it’s time to step back. Professional mold remediation requires specialized equipment and training to safely remove contamination without spreading spores throughout your home. Our NADCA-certified technicians have the proper protective gear and cleaning solutions to handle these situations safely.
When coils haven’t seen attention in years, significant dirt buildup can create a challenge that goes beyond what a simple no-rinse cleaner can handle. Think of it like trying to clean a really dirty oven with just a wet cloth – sometimes you need the heavy-duty approach that only professional equipment and stronger (yet safe) cleaning solutions can provide.
Suspected refrigerant leaks are absolutely in professional territory. If you notice ice forming on your coils despite cleaning, hear mysterious hissing sounds, or your AC just won’t cool effectively, refrigerant might be escaping. Handling refrigerant requires specific licensing and training – it’s not just about safety, it’s actually required by law.
Bent or damaged fins might seem like a small issue, but extensive damage can seriously impact your system’s efficiency. While you might straighten a few fins with a specialized comb, widespread damage often signals deeper problems that need professional assessment. According to Forbes data on coil replacement costs, evaporator coil replacement can range from $550 to $2,500 – definitely worth preventing with proper care.
If you’re simply uncomfortable with the process of accessing electrical components or working with cleaning chemicals, trust your instincts. Your safety and your AC system’s integrity are worth more than the cost of professional service.
After post-renovation dust presents a unique challenge. Construction and remodeling create incredibly fine particulate matter that can quickly overwhelm your HVAC system. This isn’t just about coils – your entire ductwork system likely needs attention. Our comprehensive Renovation Air Duct Cleaning service addresses the whole system, ensuring that construction dust doesn’t continue circulating through your home.
At National Air Duct USA, our NADCA certification means we follow the highest industry standards when we clean air conditioner coils inside house systems. We don’t just focus on one component – we clean your entire HVAC system, including air ducts, coils, drain pans, registers, grilles, air plenum, blower motor and assembly, heat exchanger, air filter, and air cleaner.
This comprehensive approach ensures that homeowners throughout New York get truly improved indoor air quality, better energy efficiency, and extended system life. Sometimes the best DIY decision is knowing when to call the pros.
Conclusion: The Payoff of Clean Coils
When you clean air conditioner coils inside house, you’re not just checking off another item on your maintenance list – you’re making a smart investment that pays dividends all summer long. Think of it as giving your hardworking AC system the spa day it deserves.
The change is remarkable. Your AC unit suddenly doesn’t have to struggle against that blanket of dust and grime anymore. It can finally breathe easy and do what it was designed to do: keep your family comfortable without breaking a sweat (or your budget).
Improved efficiency is the first reward you’ll notice. Your system will cool your home more evenly and reach your desired temperature faster. No more hot spots or rooms that never quite feel comfortable. Lower energy bills follow close behind – and who doesn’t love saving money? Dirty coils can force your system to use up to 40% more energy, so cleaning them is like getting a discount on your electric bill every month.
Better indoor air quality means your family breathes cleaner, fresher air. When coils are free from mold, dust, and other nasties, they can’t spread those contaminants throughout your home. Your allergies might thank you, and that musty smell will become a thing of the past.
Perhaps best of all, regular coil maintenance leads to an extended AC lifespan. A system that doesn’t have to work overtime is a system that lasts longer. You’ll postpone that expensive replacement conversation for years to come.
At National Air Duct USA, we’ve seen how proper HVAC maintenance transforms homes across New York. Whether you tackle the job yourself or trust our NADCA-certified professionals, the important thing is that you take action. For the ultimate peace of mind and a truly comprehensive clean, consider our professional HVAC system disinfection service.
Your family deserves to come home to clean, cool, comfortable air every day. Clean coils are your ticket to making that happen.

