Why a Clean Window AC Matters (And Why You’ve Been Ignoring It)
How to wash a window ac is simpler than you think. Here’s the quick version:
- Unplug the unit from the power source
- Remove and clean the filter with warm soapy water
- Vacuum the interior to remove dust and debris
- Spray coils and fins with a cleaning solution (hydrogen peroxide or coil cleaner)
- Let everything dry completely before reassembling
- Reinstall the filter and front cover, then plug it back in
If you’re like most homeowners, you probably haven’t thought about cleaning your window AC since you installed it. Maybe you’ve noticed it’s not cooling as well as it used to, or there’s a musty smell when it kicks on. That’s your unit crying for help.
Regular cleaning isn’t just about comfort—it’s about your health and your wallet. According to the Department of Energy, a dirty AC unit works harder to cool your home, consuming more energy and driving up your electricity bill. Even worse, if not cleaned properly, dust, dirt, and allergens can accumulate and create the perfect environment for mold and mildew, which negatively impacts indoor air quality.
The good news? You don’t need to be a DIY expert or spend hours on this task. Most window AC units can be cleaned in one to two hours with basic supplies you probably already have at home.
For Long Island homeowners, where summer humidity can turn an AC unit into a mold factory, regular maintenance is especially important. A clean unit runs more efficiently, lasts longer, and keeps your indoor air healthier for you and your family.

Quick look at how to wash a window ac:
Why Bother? The Benefits of a Clean Unit
Let’s face it, cleaning isn’t always at the top of our priority list, especially when it comes to appliances tucked away in a window. But when it comes to your window AC, the benefits of a little elbow grease (or, in our case, a lazy person’s approach) are substantial. We’re talking about more than just fresh air; we’re talking about saving money, extending the life of your unit, and creating a healthier home environment.
The U.S. Department of Energy recommends a thorough cleaning of your window air conditioner at least once a year, ideally before its first use of the season. This isn’t just a suggestion; it’s a golden rule for peak performance and longevity. For a deeper overview of routine upkeep (filters, coils, and general best practices), see the DOE guide: Maintaining Your Air Conditioner.
Improving Airflow and Efficiency
Imagine trying to run a marathon with a pillow over your face. That’s essentially what your window AC is doing when its coils and filters are clogged with dust and grime. It has to work much harder to pull in air, cool it, and push it back out. This extra effort translates directly into higher electricity costs for us. A clean AC unit operates more efficiently, cooling your space effectively while using less energy. This means a noticeable difference in your energy bill, which, let’s be honest, is a benefit we can all get behind.
Proper airflow is crucial for your unit to perform its primary job: cooling. When dust and debris accumulate on the evaporator and condenser coils, they impair the unit’s ability to transfer heat. This reduces its cooling performance and can even lead to premature failure. Regular maintenance can prevent costly repairs and replacements by allowing for early detection of issues. If your HVAC system as a whole could use a check-up, we offer comprehensive HVAC system cleaning services to ensure everything runs smoothly.
Health and Air Quality
Here’s a less pleasant thought: your window AC unit can become a breeding ground for all sorts of nasties if neglected. Dust mites, pollen, pet dander, and even mold spores love to settle in the damp, dark crevices of a dirty air conditioner. When the unit kicks on, it then blows these allergens and irritants directly into your living space.
This can lead to a host of health issues, from aggravating allergies and asthma to causing unexplained sicknesses like sore throats, headaches, and fatigue. Consumer Reports even highlights how a dirty AC could be making you sick: Could Your Air Conditioner Be Making You Sick?. By regularly cleaning your unit, we’re not just improving its performance; we’re actively reducing the presence of these airborne pollutants, leading to significantly improved indoor air quality. For those in Long Island with seasonal allergies, this can be a game-changer.
Preparation: Tools and Safety Measures
Before we dive into the nitty-gritty of how to wash a window ac, let’s make sure we’re prepared. The “lazy person’s guide” means we want to be efficient, and that starts with having everything we need within arm’s reach and ensuring we stay safe.

Safety Precautions Before You Start
This is perhaps the most crucial step, and one where laziness has no place. We must always unplug the air conditioner from its power source before starting any cleaning. This prevents the risk of electrical shock, which is definitely not a lazy way to spend an afternoon. If your unit is hardwired or you can’t reach the plug, switch off the circuit breaker that controls the unit.
Additionally, we recommend wearing protective gear. A good pair of rubber gloves will protect your hands from cleaning solutions and any sharp edges (those fins can be surprisingly pointy!). Safety goggles are also a smart idea to prevent dust, debris, or cleaning solutions from getting into your eyes. We also want to ensure we’re working in a well-ventilated area, especially when using cleaning chemicals. If you’re cleaning the unit outside, that’s perfect! If indoors, open windows.
Gathering Your Lazy Person’s Toolkit
You won’t need a professional’s arsenal for this, just a few common household items. Here’s what we suggest:
- Screwdriver/Wrench: To remove the front grille or access panel.
- Vacuum Cleaner with Brush Attachment: For easily sucking up loose dust and debris.
- Soft Brush: An old toothbrush or a small cleaning brush works wonders for tight spots.
- Mild Detergent: Dish soap or a gentle household cleaner.
- Warm Water: Your best friend for dissolving grime.
- Spray Bottle: Perfect for applying cleaning solutions.
- Hydrogen Peroxide (3% solution): An excellent anti-fungal cleaner that’s less corrosive than bleach.
- Fin Comb (Optional but Recommended): A specialized tool to straighten bent fins, significantly improving airflow. If you don’t have one, a thin, blunt knife can work in a pinch.
- Microfiber Cloths/Paper Towels: For wiping and drying.
- Bucket: To hold soapy water and rinse cloths.
- Optional: AC Coil Cleaner: A specialized product for deep cleaning coils.
Having these tools ready means less running around and more efficient cleaning. For comprehensive indoor air quality solutions that go beyond just your window AC, consider our air duct cleaning services to tackle dust and allergens throughout your entire home.
How to Wash a Window AC: The Step-by-Step Process
Alright, it’s time to get down to business! We’ve got our tools, we’re safe, and we’re ready to tackle how to wash a window ac with minimal fuss. The goal here is effective cleaning without unnecessary effort.
Step 1: Disconnect and Disassemble
First things first, and we can’t stress this enough: unplug the AC unit from its power source. Safety is paramount!
Once unplugged, it’s time to gently disassemble the unit. Most window AC units have a front cover or grille that can be removed. This usually involves unhooking clips, pressing tabs, or unscrewing a few screws. Consult your owner’s manual if you’re unsure – it’s often the quickest way to figure out how your specific model comes apart. We want to be careful not to force anything, as plastic components can be brittle.
After the front cover is off, set it aside. You might also need to remove the air filter at this stage, which is often located directly behind the front grille.
Step 2: Vacuuming the Interior
Now that the unit is open, we’ll see a collection of dust, pet hair, and other delightful debris. This is where our vacuum cleaner with a brush attachment comes in handy.
Gently vacuum the interior compartments, paying special attention to the evaporator coils (the metal fins you see inside the unit), the blower fan (the large, usually cylindrical fan), and the internal cabinet. Move the vacuum in the direction of the fins to avoid bending them. This step removes the bulk of the loose dirt, making the subsequent cleaning much easier. Think of it as clearing the path for a deeper clean.
Step 3: How to Wash a Window AC Filter
The filter is the frontline defense of your AC unit, trapping dust and allergens before they enter the system. This makes it one of the most important components to keep clean. The U.S. Department of Energy recommends cleaning or replacing filters once a month during peak usage seasons.
Here’s how to wash a window ac filter:
- Remove the filter: If you haven’t already, carefully pull out the filter. Some are reusable and washable, while others are disposable. If yours is disposable and looks heavily soiled or damaged, it’s best to replace it.
- Vacuum (if reusable): For reusable filters, you can give them a quick vacuum to remove loose surface dust.
- Wash: Fill a sink or bucket with warm water and a few drops of mild detergent. Immerse the filter and gently swish it around. For stubborn dirt, you can use a soft brush to scrub it lightly.
- Rinse: Rinse the filter thoroughly under running water until all soap residue is gone.
- Dry: This is a crucial step! Allow the filter to air dry completely. Place it on a towel or drying rack in a well-ventilated area, away from direct sunlight or heat. Reinstalling a damp filter can lead to mold and mildew growth, defeating the purpose of cleaning. This can take at least two hours, so plan accordingly.
| Cleaning Task | Frequency (Lazy Person’s Guide) |
|---|---|
| Filter Cleaning/Replacement | Monthly during peak season / Every 3 months |
| Coil & Interior Component Cleaning | Annually (before summer) / Every 3-6 months |
| Exterior Wipe Down | Monthly (during use) |
| Thorough Deep Clean | Annually |
Step 4: How to Wash a Window AC Coils and Fins
The coils and fins are where the magic happens – they transfer heat to cool your air. Unfortunately, they’re also notorious for collecting dirt, which significantly impacts your unit’s efficiency.
- Brush Away Debris: Use a soft brush (like a paintbrush or an old toothbrush) to gently brush away any remaining dust or debris from the evaporator coils (the ones on the inside) and the condenser coils (the ones on the outside, usually visible if you remove the outer casing). Be very gentle, as these fins are delicate and can bend easily.
- Apply Cleaner: For a deeper clean, we recommend using a specialized AC coil cleaner or a 3% hydrogen peroxide solution in a spray bottle. Spray the cleaner evenly over the coils. Follow the product instructions for coil cleaners, as some require rinsing and others don’t. If using hydrogen peroxide, let it sit for 10-20 minutes.
- Rinse (if needed): If your coil cleaner requires rinsing or you used hydrogen peroxide, gently rinse the coils with a light stream of water from a spray bottle. Be careful not to get water on any electrical components. The water will drain out through the unit’s normal drainage system.
- Clean the Drip Pan: Below the evaporator coils, you’ll find the drip pan, which collects condensation. Empty any standing water and clean it with warm soapy water. Inspect the drain hole for blockages and clear any debris.
Advanced Maintenance: Coils, Fins, and Mold
Now that we’ve covered the basics, let’s look at a couple of “advanced” steps that aren’t much harder but make a huge difference in your unit’s performance and your home’s air quality.
Straightening Bent Fins
Those delicate aluminum fins on your evaporator and condenser coils are crucial for heat exchange. When they get bent (which happens easily), they restrict airflow and reduce your AC’s efficiency. This can lead to increased energy consumption and less effective cooling.
How to fix them:
- Identify Bent Fins: Look closely at the coil fins. If they’re flattened or bent, they’re hindering airflow.
- Use a Fin Comb: A fin comb is a simple, inexpensive tool designed to gently comb through the fins and straighten them. Choose the correct spacing on the comb for your unit’s fins.
- Gentle Approach: Slowly and carefully run the fin comb through the bent sections, working in the direction of the fins. If you don’t have a fin comb, a small kitchen knife or even a credit card can be used carefully, but always push in the direction of the fins to avoid further damage.
- Observe Improvement: Straightening these fins allows air to flow freely over the coils again, boosting your AC’s efficiency and cooling power.
Preventing Mold and Mildew Growth
One of the most common complaints about window ACs is that musty odor, a tell-tale sign of mold or mildew. Preventing this growth is key for both air quality and unit longevity.
- Antifungal Cleaners: After vacuuming and cleaning, we recommend spraying the interior surfaces, especially the drip pan and coils, with a 3% hydrogen peroxide solution. Hydrogen peroxide is an effective antifungal cleaner and is less corrosive to metal parts than bleach, making it a safer choice for your unit. Let it sit for a bit, then wipe or rinse lightly if necessary.
- Moisture Control: Mold loves moisture. To prevent its growth, ensure all components are completely dry before reassembling the unit. After cleaning, we often recommend running the AC on its “fan only” setting for a few hours to thoroughly dry out any lingering moisture inside the unit. Running the AC for a few hours a week, even in cooler weather, can also help keep the unit dry and improve air quality.
- Regular Cleaning: The best prevention is consistent cleaning. By cleaning your filter monthly and the internal components seasonally, you significantly reduce the chances of mold taking root.
Cleaning the Exterior Housing
While the internal components are the most critical for performance, don’t forget the exterior! The part of the unit that sits outside your window can accumulate leaves, dirt, and other debris.
- Remove Debris: Carefully brush off any loose leaves, twigs, or large dirt particles from the exterior casing and the condenser coils (the metal fins on the back of the unit).
- Hose Down (Carefully!): With the unit still unplugged, you can gently hose down the exterior and the condenser coils with a light stream of water. DO NOT use a pressure washer, as the force can easily bend delicate fins and damage components. Be mindful of electrical connections; if possible, cover them with plastic before hosing.
- Wipe Down: Use a damp cloth with mild detergent to wipe down the plastic or metal exterior housing, then rinse with a clean, damp cloth.
- Dry: Allow the exterior to air dry completely before reassembly or plugging the unit back in.
Troubleshooting and Professional Help
Even after a good cleaning, sometimes your window AC might still throw you a curveball. Or perhaps you’re facing an issue that feels beyond a lazy person’s DIY skills. Don’t sweat it; we’ve got some tips.
If your unit isn’t cooling effectively, makes unusual noises, or has a pungent smell even after cleaning, it might be time to call in the pros.
When to Consider Professional Services
While we encourage DIY cleaning for regular maintenance, there are times when professional help is essential. We, at National Air Duct USA, are experts in HVAC system health, and we know when a job requires more than a spray bottle and a vacuum.
Consider calling us if you encounter:
- Persistent Pungent Smells: A lingering musty or burning odor could indicate a deeper mold problem or an electrical issue.
- Frozen Coils: If your coils are freezing up, it could point to refrigerant issues or severe airflow problems that cleaning alone can’t fix.
- Electrical Issues: Any flickering lights, strange buzzing sounds from the electrical panel, or the unit not turning on after cleaning (and you’ve checked the plug/breaker) should be handled by a professional.
- Weak Airflow or Reduced Cooling Post-Cleaning: If your unit is still struggling to cool or push air, there might be internal mechanical problems, such as a failing blower motor or compressor.
- Water Leakage: While a clogged drain line can cause leaks, persistent water leakage could indicate a damaged drain pan or other internal issues.
- Error Codes: Many modern units display error codes. Consult your manual, but often these signify issues best handled by a technician.
- Visible Mold Beyond Simple Surface Growth: If you see extensive mold growth in areas you can’t easily reach or clean, professional mold remediation for your HVAC system might be necessary.
Professional services can include a thorough inspection, advanced cleaning of components you can’t easily access, and repairs. Our NADCA-certified technicians are equipped to handle complex issues, ensuring your unit runs safely and efficiently. Investing in professional services guarantees the job is done right, extending the lifespan of your AC unit while enhancing its performance. Check out our full range of services for all your HVAC and indoor air quality needs in Long Island.
Reassembly and Final Testing
Once all components are sparkling clean and, most importantly, completely dry, it’s time to put everything back together.
- Reinstall Filter: Carefully slide your clean, dry filter back into its slot.
- Reattach Face Panel: Align the front cover or grille and secure it with its clips, tabs, or screws. Ensure everything is properly aligned and snug.
- Plug In: Plug the AC unit back into its power source.
- Test Operation: Turn the unit on and run it on a low cool setting. Listen for any unusual noises and check that air is flowing strongly and cooling effectively. You should immediately notice the difference in airflow and the absence of any unpleasant odors.
For seasonal storage, if you remove your unit for the winter (highly recommended for Long Island homeowners!), ensure it’s thoroughly cleaned and dried before putting it away in a clean, dry area. This prevents pest infestation, mold, and mildew growth during the off-season, making next year’s startup a breeze.
Frequently Asked Questions about Window AC Cleaning
We know you’ve got questions, and we’ve got answers! Here are some common queries about how to wash a window ac.
How often should I clean my window air conditioner?
For optimal performance and air quality, we recommend a thorough cleaning of your window AC unit at least once a year, preferably before its first use of the season. This deep clean involves the coils, fins, and interior. However, the filter should be cleaned much more frequently – at least once a month during peak usage seasons. If you have pets, allergies, or live in a particularly dusty area in Long Island, consider cleaning the filter every two weeks. Although proper maintenance can extend your filter’s life, it should be replaced every 6 weeks to 6 months.
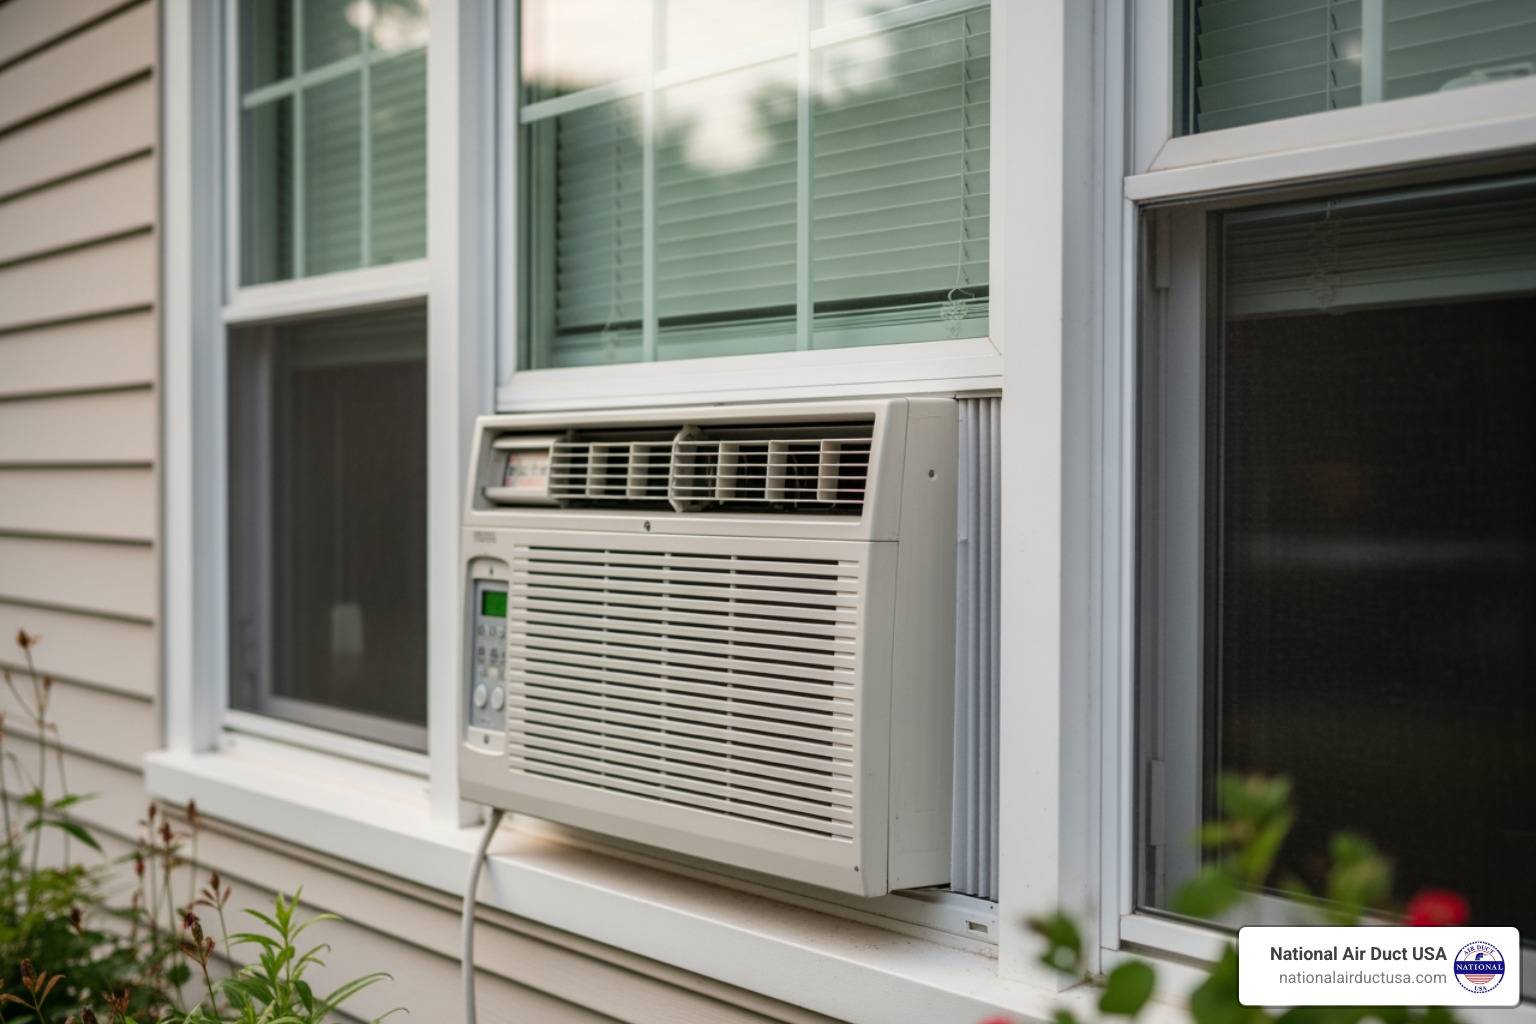
Can I hose down my window AC unit while it is in the window?
While some sources suggest a very gentle rinse for the exterior, we generally do not recommend hosing down your window AC unit while it is still in the window. This is because of the risk of water damage to your window frame or sill, and the potential for water to seep into electrical components that aren’t designed to get wet from the inside. If you need to clean the exterior portion that faces outside, it’s safer to either remove the unit from the window or, if it’s securely installed, carefully use a spray bottle with a gentle stream of water, ensuring electrical parts are covered and the unit is unplugged. It’s always best to perform a full cleaning with the unit removed from the window if possible.
What is the best way to kill mold in my air conditioner?
The best way to kill mold in your window AC unit is by using a 3% hydrogen peroxide solution. After unplugging the unit and removing the filter and front panel, vacuum away any loose debris. Then, liberally spray the affected areas, especially the coils and drip pan, with the hydrogen peroxide solution. Let it sit for 10-20 minutes, then wipe down or gently rinse if necessary. Hydrogen peroxide is effective at killing mold spores and is less corrosive to metal components than bleach. Always ensure the unit dries completely before reassembly to prevent future mold growth. For severe or recurring mold issues, especially those extending into your home’s ductwork, we recommend professional air duct cleaning services.
Conclusion
So there you have it: how to wash a window ac without breaking a sweat (or the bank). Regular cleaning is a simple, effective way to ensure your unit provides efficient cooling, improves your indoor air quality, and lasts for years to come. By dedicating just an hour or two a few times a year, you’re not just cleaning an appliance; you’re investing in your comfort, health, and energy savings.
We understand that sometimes life gets in the way, or a cleaning job might feel too big to tackle alone. That’s where we come in. At National Air Duct USA, we specialize in ensuring your entire HVAC system, from air ducts to coils, is clean and running at peak performance. For homeowners in Long Island, Westbury, Hempstead, Garden City, Hicksville, Freeport, Nassau County, and Suffolk County, we’re your local experts for clean air and system efficiency.
Don’t let a dirty AC unit leave you sweating through the summer. If your window AC needs a deeper dive, or if you’re looking for comprehensive air duct and HVAC cleaning for your entire home, our NADCA-certified technicians are ready to help.
Schedule your professional cleaning service now and breathe easier knowing your home’s air is as fresh and clean as it can be.