The Hidden Key to Home Comfort and Lower Bills
Cleaning AC coils inside house is one of the most overlooked maintenance tasks that can dramatically improve your air conditioner’s performance. These coils – specifically your indoor evaporator coils – are the heart of your cooling system, but they’re often forgotten because they’re tucked away inside your air handler.
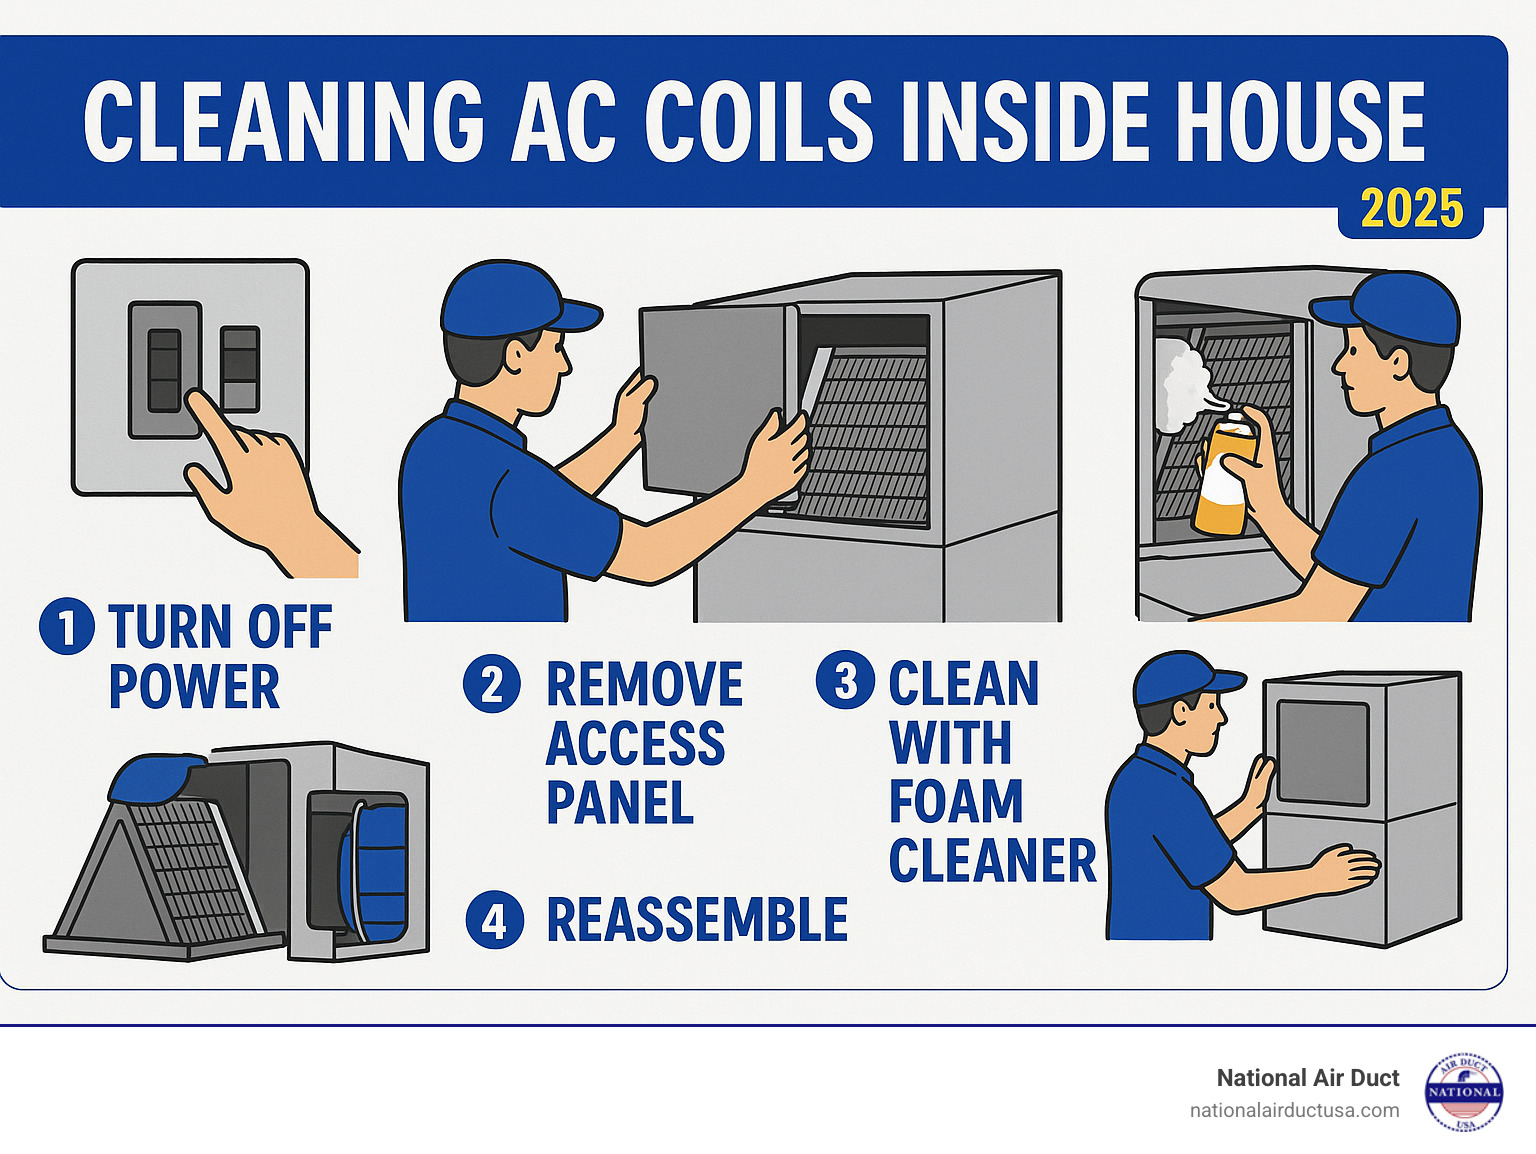
Quick Answer: How to Clean AC Coils Inside Your House
- Turn off power at the thermostat and circuit breaker
- Remove the access panel to expose the evaporator coils
- Gently brush away debris with a soft brush or vacuum
- Apply no-rinse foaming cleaner and let it work for 5-10 minutes
- Rinse carefully with a spray bottle (minimal water)
- Allow to dry completely before reassembling
- Replace the panel and restore power
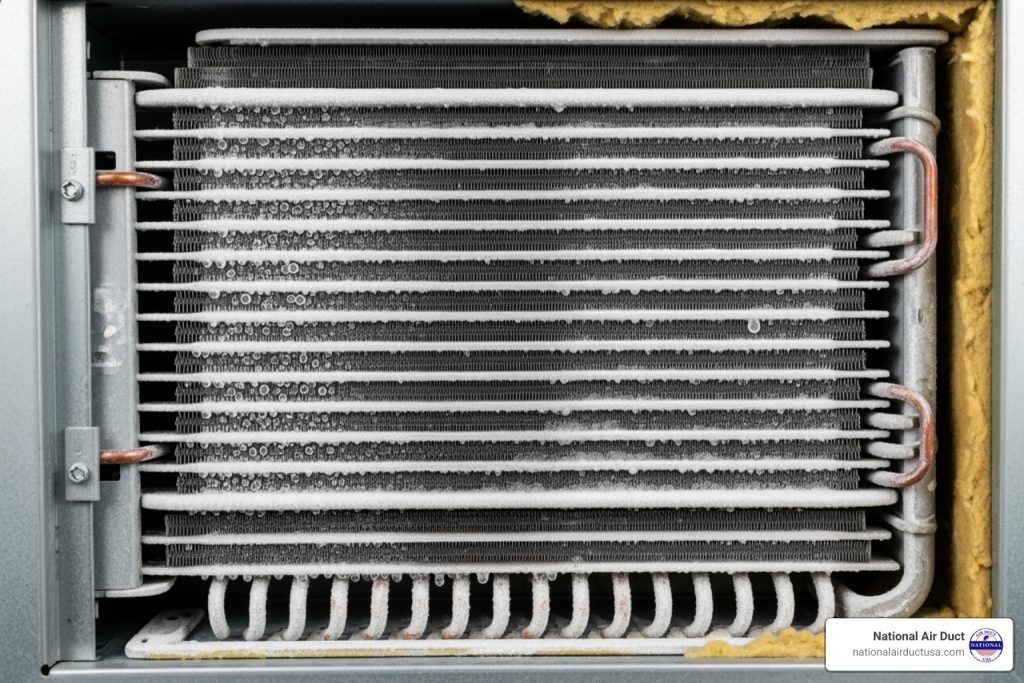
Your evaporator coils work incredibly hard. They absorb heat from your home’s air while also removing moisture – that’s how your AC both cools and dehumidifies. But here’s the problem: these coils collect dust, dirt, pet dander, and even mold over time.
When coils get dirty, your system can use up to 40% more energy and lose 30% of its cooling capacity. That means higher bills, less comfort, and potential breakdowns. In New York’s humid climate, dirty coils can also become breeding grounds for mold and bacteria, directly impacting your family’s air quality.
The good news? With the right approach and tools, you can clean these coils yourself – or know when it’s time to call in the professionals.
What are Evaporator Coils and Why are They Important?
Imagine your home’s air conditioner as a giant, incredibly efficient sponge for heat. At the heart of this “sponge” are the AC coils. Specifically, when we talk about cleaning AC coils inside house, we’re focusing on the evaporator coils.
These unsung heroes are located within your indoor air handling unit – usually hidden away in a closet, attic, or basement. Their primary function is to capture the heat from your home’s indoor air. As warm air from your living space passes over these coils, the refrigerant inside them absorbs the heat, changing from a low-pressure liquid into a low-pressure gas. This process is crucial for cooling your home.
But there’s more! Evaporator coils also play a vital role in dehumidification. As the warm, humid air touches the cold surface of the coils, moisture condenses out of the air, much like water droplets forming on a cold glass. This condensed water then drips into a drain pan and is channeled away, reducing the humidity in your home and making it feel much more comfortable. This is why you often see water draining from your AC unit.
Both evaporator coils and their outdoor counterparts, the condenser coils, are typically made of copper tubing encased by aluminum fins. While evaporator coils capture heat, condenser coils (also commonly called the fan coils) release this trapped heat into the air around the outdoor unit. Understanding this distinction is key to proper AC maintenance. You can learn more about the difference between a fan coil and evaporator coil.
Because evaporator coils are constantly interacting with the air circulating through your home, they are prone to accumulating dust, dirt, pet dander, and other airborne particles. These invisible components are often forgotten or overlooked during annual maintenance, precisely because they’re out of sight inside the system cabinet or air handler enclosure. Yet, their cleanliness is paramount to your home’s comfort, energy efficiency, and indoor air quality.
The Big Payoffs: Why Clean Coils Matter

Here’s the truth: cleaning AC coils inside house isn’t just about having a tidy air conditioner. It’s about real benefits that show up in your monthly bills, your family’s health, and how long your system lasts. Let me walk you through why this simple maintenance task can make such a big difference.
Boost Efficiency and Lower Your Utility Bills
Picture this: your evaporator coils are like a sponge trying to soak up heat from your home’s air. When they’re clean, they work beautifully. But when they’re covered in dust and grime? It’s like trying to absorb water with a sponge that’s already full of mud.
That layer of dirt acts like a blanket, preventing your coils from doing their job of heat absorption. Your AC notices something’s wrong and works overtime trying to cool your home. The result? Energy consumption shoots up by as much as 40%, and your cooling function drops by 30% or more.
This isn’t just about comfort – it’s about money. When your system strains against dirty coils, your utility bills climb month after month. Even worse, all that extra work puts serious stress on your compressor, the most expensive part of your AC system. Compressor failure from overwork can cost thousands to repair.
The good news? Clean coils restore proper system efficiency almost immediately. Your AC can finally breathe easy, your bills drop, and you get the cool comfort you’re paying for. For more ways to keep your entire system running smoothly, check out our guide on how to clean a central AC unit. You can also find helpful guidance on home efficiency from trusted sources.
Improve Your Home’s Indoor Air Quality
Your evaporator coils see every bit of air that circulates through your home. That means they collect everything floating in that air too – dust, pet allergens, pollen, and yes, even mold and bacteria.
When coils stay dirty, they become like a petri dish for these unwanted guests. Every time your AC runs, it picks up these contaminants and spreads them throughout your house. You might notice persistent odors, stuffiness, or find that family members are sneezing more often.
Mold growth is especially concerning in our humid New York climate. Those damp, dirty coils create the perfect environment for mold spores to multiply. Before you know it, you’re breathing in these particles every day.
Regular coil cleaning stops this cycle at the source. Instead of recirculating pollutants, your system moves clean, fresh air through your home. The difference in air quality can be remarkable – and your family’s lungs will thank you. If you’re concerned about air quality throughout your ductwork, our air duct cleaning services can help with comprehensive indoor air improvement.
Avoid Expensive Repairs and Replacements
Nobody wants to get hit with a massive repair bill on the hottest day of summer. Yet that’s exactly what happens when dirty coils finally cause your system to fail.
Here’s how it usually unfolds: dirty coils can’t absorb heat properly, so the refrigerant stays too cold. This causes frozen coils – yes, even in summer heat. A frozen evaporator coil means no cooling, and if you keep running the system, you risk serious damage.
Overheating is another common problem. When your AC works overtime against dirty coils, components get much hotter than they’re designed to handle. This can lead to refrigerant leaks, electrical failures, and complete system breakdown.
The numbers are sobering. Coil replacements can cost anywhere from $600 to $2,000. A failed compressor? Even more expensive. Complete system replacement? We’re talking thousands upon thousands of dollars.
The beautiful thing about cleaning AC coils inside house is that it prevents most of these problems before they start. It’s like changing the oil in your car – a small investment that protects a much bigger one. Clean coils mean system longevity, reliable cooling, and peace of mind that your AC will be there when you need it most.
How to Perform a DIY Cleaning of AC Coils Inside the House
Ready to tackle this important home maintenance task? Cleaning AC coils inside house might sound intimidating, but it’s actually a straightforward weekend project that most homeowners can handle. Think of it as giving your AC system a much-needed spa day – and your wallet will thank you later.
The key to success lies in proper preparation and taking your time. This isn’t a race, and rushing through the process can damage delicate components or, worse, put your safety at risk. Let’s walk through everything you need to know to get those coils sparkling clean.
What Tools Do I Need for Cleaning AC Coils Inside the House?
Before you dive in, take a trip to your garage, basement, or local hardware store to gather your supplies. Having everything ready before you start makes the whole process much smoother – trust me on this one!
Safety gear is your first priority. You’ll need safety glasses to protect your eyes from dust and cleaning spray, plus work gloves to keep your hands safe from sharp metal fins and cleaning chemicals. Don’t skip these – dirty coils can harbor some pretty nasty stuff.
For accessing your system, grab a screwdriver or nut driver to remove the access panel. A flashlight or headlamp is essential too, since coils are usually tucked away in dark spaces where you can barely see what you’re doing.
Your cleaning arsenal should include a soft-bristled brush (an old paintbrush works great), a shop vacuum with brush attachment for sucking up loosened debris, and a spray bottle for gentle rinsing. The star of the show is commercial no-rinse foaming coil cleaner – this specialized product does the heavy lifting by dissolving grime without requiring a thorough rinse.
Don’t forget a fin comb for straightening bent aluminum fins, and drop cloths or old towels to protect your floors from drips. These simple tools make all the difference between a professional-looking job and a messy disaster.
Step-by-Step Guide for Cleaning AC Coils Inside the House
Now comes the satisfying part – actually cleaning those coils! Follow these steps carefully, and you’ll have your system running like new.
Turn off the power first – and I can’t stress this enough. Head to your thermostat and switch the system off, then find the circuit breaker that controls your air handler and flip it to “off.” This might be labeled as “Furnace,” “AC Handler,” or something similar. Safety isn’t negotiable here.
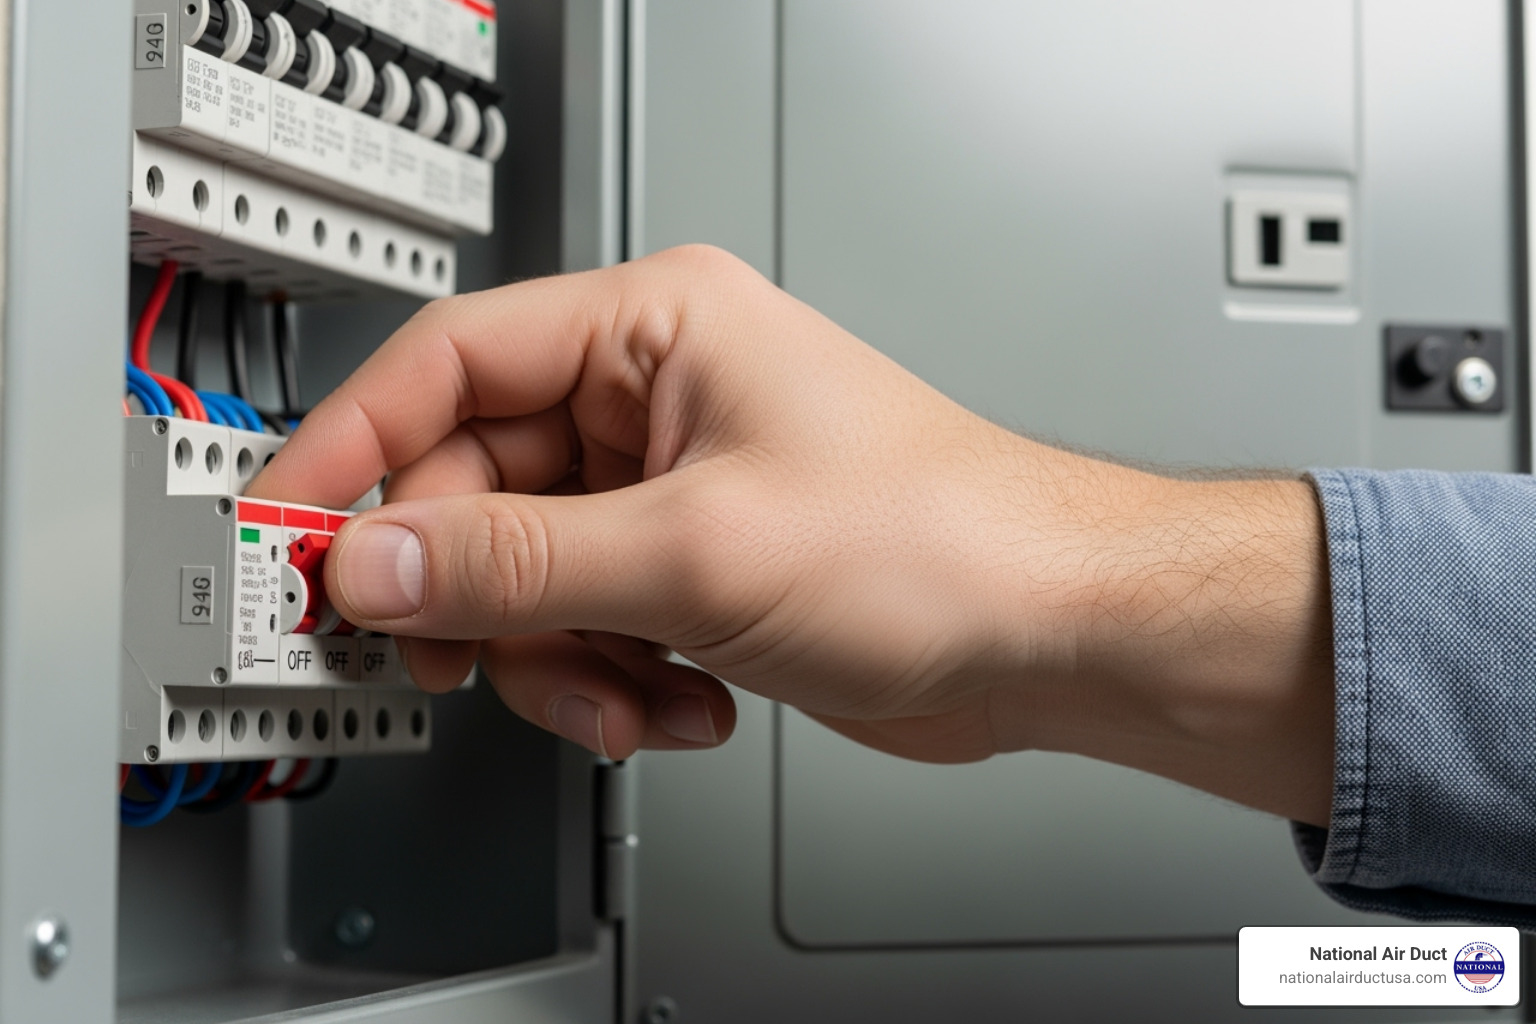
Locate your evaporator coils by finding the indoor air handler unit, usually tucked away in a basement, attic, or utility closet. Remove the access panel by unscrewing the fasteners – sometimes there’s HVAC tape sealing the edges that you’ll need to peel back gently. Keep those screws in a safe place where they won’t roll away!
Start with gentle brushing to remove loose debris. Use your soft brush to carefully dislodge dust, pet hair, and other buildup from the coil surface and aluminum fins. These fins are surprisingly delicate, so treat them like you’re dusting fine china. As you brush, use your shop vacuum to immediately suck up the loosened dirt.
If you notice bent fins, now’s the time to use that fin comb. Gently slide it through the damaged areas to straighten them out. Proper airflow depends on these fins being in good shape, so this small step can make a big difference in your system’s performance.
Apply your foaming cleaner according to the manufacturer’s instructions. Spray an even coat across the entire coil surface and watch the foam expand and work its magic. Most no-rinse cleaners are designed to dissolve dirt and grime, then drip harmlessly into the condensate drain pan below. Let it sit for the recommended time – usually 5 to 10 minutes.
Rinse carefully if needed. Many modern cleaners are truly “no-rinse,” but if you’re dealing with heavy buildup or your product requires it, use your spray bottle to apply a light mist. The key word here is “light” – you want just enough water to help dissolved dirt drip away, not enough to soak electrical components or create water damage.
Allow everything to dry completely before closing up the system. This is where patience pays off. Leave that access panel open and let air circulation do its work. Depending on humidity, this could take an hour or more.
Reassemble and restore power once you’re certain everything is dry. Replace the access panel, secure it with those screws you kept safe, and reapply any HVAC tape if needed. Head back to the circuit breaker, flip it on, then return to your thermostat and set your desired temperature.
Congratulations! You’ve just completed an important maintenance task that will keep your home comfortable and your energy bills reasonable. Your AC system is now ready to work efficiently all season long.
DIY Don’ts and When to Call a Professional
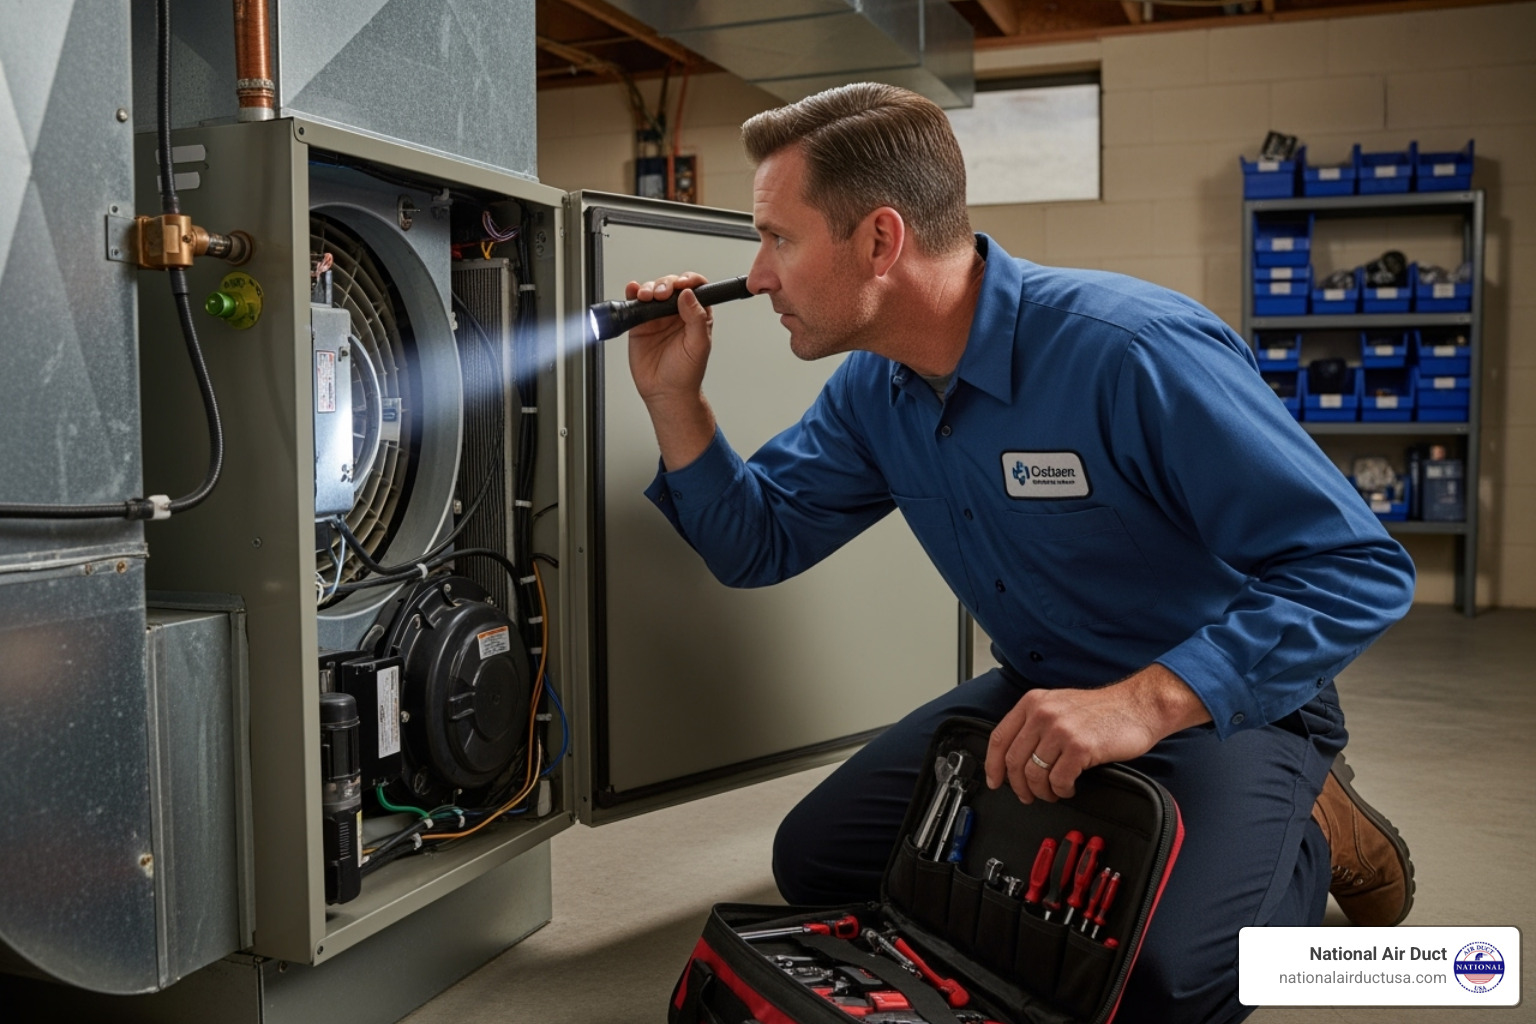
Here’s the thing about cleaning AC coils inside house – while it’s definitely a doable DIY project, there are some real pitfalls that can turn your money-saving maintenance into an expensive mistake. Think of it like cooking: you can make a great meal at home, but you wouldn’t use dish soap instead of olive oil, right?
Your evaporator coils are surprisingly delicate, and one wrong move can cost you hundreds or even thousands in repairs. Let’s talk about the big no-nos and when it’s time to wave the white flag and call in the pros.
What to Avoid When Cleaning Your Coils
The road to AC disaster is paved with good intentions and the wrong cleaning supplies. Bleach might seem like the ultimate grime-fighter, but it’s actually your coil’s worst enemy. Same goes for ammonia and other harsh household cleaners. These chemicals are corrosive bullies that can eat away at your aluminum fins and copper tubing, leaving you with leaks and a very expensive repair bill.
Abrasive brushes and steel wool are another rookie mistake. Those delicate fins bend easier than a politician’s promises, and once they’re damaged, your heat transfer efficiency goes right out the window. Stick to soft-bristled brushes – your coils will thank you.
Here’s a big one: never, ever bring a pressure washer to an evaporator coil fight. High-pressure water doesn’t discriminate – it’ll flatten those fins faster than you can say “oops” and potentially force water into electrical components where it definitely doesn’t belong. For indoor coils, a gentle spray bottle is your best friend, and even then, use it sparingly.
Electrical components and water are like oil and water – they don’t mix, and bad things happen when you force them together. Always keep moisture away from wiring, circuit boards, and other electrical parts. This is why turning off the power isn’t just a suggestion – it’s a life-saving necessity.
Solvents and random household cleaners might seem tempting, but they can strip protective coatings and damage materials in ways you won’t notice until it’s too late. When it comes to coil cleaners, stick with products specifically designed for the job.
Signs You Need an Expert
Sometimes, despite your best DIY intentions, it’s time to admit that this job needs a professional touch. And that’s perfectly okay! Knowing when to call for backup is actually a sign of wisdom, not defeat.
If your coils look like they’ve been through a dust storm and are deeply impacted with dirt that won’t budge with gentle cleaning, it’s time to call in reinforcements. Professional HVAC technicians have specialized equipment like steam cleaners and commercial-grade solutions that can tackle years of buildup safely.
Significant mold growth is another red flag. A little surface mold? You can probably handle that. But if your coils look like a science experiment gone wrong, there might be a deeper moisture problem that needs professional diagnosis. Mold isn’t just gross – it’s a health hazard that can keep coming back if the root cause isn’t addressed.
Extensively bent or damaged fins are beyond what a simple fin comb can fix. If large sections of your coil look like they’ve been through a blender, a professional can assess whether repair or replacement is needed.
Refrigerant leaks are definitely not DIY territory. If you hear hissing sounds, see ice forming on clean coils, or your system just won’t cool despite your cleaning efforts, step away from the toolbox. Refrigerant requires special certification to handle, and it’s not something to mess around with.
Sometimes, even after a thorough cleaning, your system still won’t cool effectively. This usually means there’s a bigger issue at play – maybe a clogged drain line, a failing compressor, or low refrigerant levels. These problems require professional diagnosis and repair.
At National Air Duct USA, our NADCA-certified technicians understand that every HVAC system has its quirks. We’ve seen it all, from simple cleaning jobs to complex repairs, and we’re always ready to help homeowners in New York and surrounding areas. Whether you need a professional coil cleaning or more comprehensive HVAC repair, we’re here to keep your home comfortable and your system running efficiently.
There’s no shame in calling for professional help. Sometimes the smartest DIY decision is knowing when not to DIY!
Frequently Asked Questions about Indoor Coil Cleaning
We get it – you probably have more questions swirling around in your head about keeping those coils spotless. After helping countless homeowners in New York tackle their AC maintenance, we’ve heard just about every question you can imagine about cleaning AC coils inside house. Let’s explore the most common ones.
How often should I clean my indoor AC coils?
Here’s the golden rule: annual cleaning is your baseline. Most HVAC pros (ourselves included) recommend giving those coils a thorough cleaning at least once a year, preferably in late spring before you really need that AC humming.
But life isn’t always that simple, is it? Some homes need more frequent attention. If you’ve got pets shedding everywhere, you’re looking at more frequent cleanings – maybe twice a year. Those adorable fur babies create a lot of dander that loves to stick to coils.
High-pollen areas are another story entirely. If you live somewhere that turns your car yellow every spring, your coils are probably getting hit just as hard. And if there are smokers in the house, that sticky residue acts like a magnet for dirt and dust.
The best approach? Do a visual inspection every few months when you’re changing your air filter. Pop open that access panel and take a peek. If you see visible buildup, don’t wait for your annual cleaning schedule – tackle it then and there.
What are the most common signs my evaporator coils are dirty?
Your AC is actually pretty chatty when something’s wrong – you just need to know what to listen for. The most obvious sign is reduced airflow coming from your vents. If that breeze feels more like a gentle whisper than a proper flow, dirty coils might be choking your system.
Weak cooling is the big red flag. When your AC runs and runs but your home stays stubbornly warm, those coils are probably coated with grime that’s blocking heat absorption. It’s frustrating, especially during those sweltering New York summers.
Musty odors wafting from your vents? That’s often mold and mildew having a party on your dirty coils. The combination of moisture and accumulated dirt creates the perfect breeding ground for these unwelcome guests.
Here’s a scary one: AC freezing up. When coils get really dirty, airflow gets so restricted that the coil temperature drops too low. Moisture freezes right on the coil, creating an ice barrier that makes everything worse. If you see ice on your indoor unit, turn it off immediately and call for help.
Don’t ignore higher energy bills either. When your system works harder because of dirty coils, it guzzles more electricity. And if you can actually see visible dirt or mold when you peek at the coils, well, that’s pretty much a neon sign saying “clean me now!”
Does cleaning AC coils really make the air colder?
This is such a great question, and the answer is a resounding yes – but maybe not exactly how you’re thinking. Cleaning AC coils inside house doesn’t magically drop the temperature of the air shooting out of your vents, but it absolutely makes your home feel significantly cooler and more comfortable.
Think of it this way: when coils are dirty, that layer of grime acts like a winter coat wrapped around your heat exchanger. It blocks improved heat transfer, which is literally your AC’s main job. Clean those coils, and suddenly your system can absorb heat from your indoor air like it was designed to do.
The result? Increased efficiency means your AC doesn’t have to run as long or work as hard to reach your target temperature. Better performance translates to more consistent cooling throughout your home. Your living space genuinely feels cooler because the system is finally working at full capacity again – that’s restored cooling capacity in action.
It’s like taking the brakes off your car. The engine isn’t more powerful, but suddenly you can actually use all that power effectively. Regular maintenance keeps your AC performing exactly as the engineers intended, and that makes a world of difference in your daily comfort. For more comprehensive maintenance tips, check out our full range of AC maintenance guidance.
Conclusion: Maintain Your Comfort and Efficiency
Taking care of your evaporator coils isn’t just another item on your home maintenance checklist – it’s one of the smartest investments you can make in your family’s comfort and your wallet’s happiness. Throughout this guide, we’ve explored how cleaning AC coils inside house transforms your air conditioning system from a struggling, energy-guzzling machine into the efficient cooling powerhouse it was designed to be.
The numbers speak for themselves: clean coils can slash your energy consumption by up to 40% while restoring 30% or more of your cooling capacity. That translates into real money back in your pocket every month, not to mention the peace of mind that comes with breathing cleaner, healthier air.
But here’s what really matters – this isn’t about perfection. It’s about progress. Whether you tackle the job yourself with our step-by-step guide or recognize when it’s time to call in the professionals, you’re taking proactive steps that will pay dividends for years to come. Your AC system will run smoother, last longer, and keep your home comfortable even during New York’s most sweltering summer days.
Some situations definitely call for expert hands. Heavily soiled coils, mold growth, refrigerant leaks, or persistent performance issues are all signs that professional intervention will save you time, money, and potential headaches down the road.
At National Air Duct USA, our NADCA-certified technicians understand that your home’s comfort system is more than just equipment – it’s what keeps your family comfortable and healthy. We’re here when you need that extra level of expertise and care.
Ready to give your AC system the attention it deserves? Schedule your professional coil cleaning service today and find what a difference truly clean coils can make in your home’s comfort and efficiency.

