Why Installing Germicidal UV Light is a Game-Changer for Your Home
Learning how to install germicidal uv light in your HVAC system can significantly improve your home’s air quality and your family’s health. While your HVAC system provides comfort, its dark, moist interior is an ideal breeding ground for mold, bacteria, and viruses.
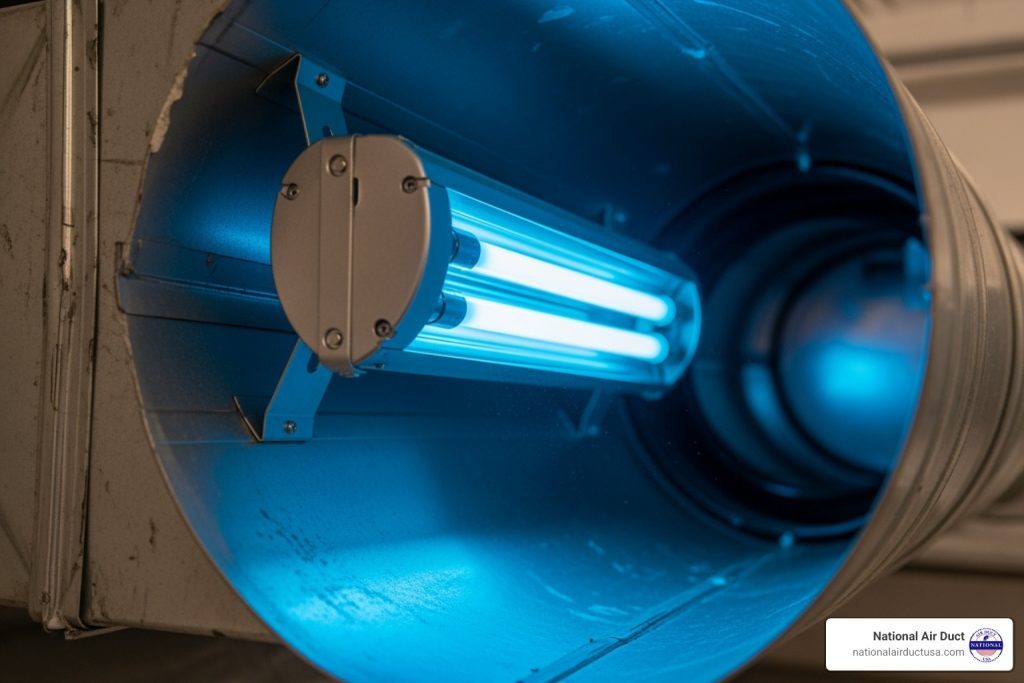
Germicidal UV lights combat this by using powerful UV-C radiation at 254 nanometers to damage the DNA of these microorganisms, rendering them harmless. This is the same trusted technology used in hospitals for sterilization.
Beyond health benefits, a UV light keeps your evaporator coils clean, which can improve your HVAC system’s efficiency by up to 35% and lower utility bills for New York homeowners. While professional installation is recommended for safety and warranty purposes, this guide will help you understand the process for this valuable home upgrade.
Understanding the Power of UV Light in Your HVAC System
UV-C light acts as an invisible guardian for your home, using UV-C radiation at 254 nanometers to neutralize microscopic invaders in your HVAC system. When this light hits bacteria, viruses, and mold, it damages their DNA and RNA structure, preventing them from reproducing or causing harm. This hospital-grade microorganism inactivation power is now available for residential air systems.
By targeting the dark, moist areas of your HVAC system, UV lights perform both air sterilization and coil sterilization. This not only improves health but also boosts system efficiency. Cleaner coils mean your HVAC system doesn’t work as hard, leading to lower energy consumption, fewer breakdowns, and reduced utility bills. UV lights also help with reduced allergens, prevent mold growth, and can reduce VOCs and odors.
However, UV-C light is powerful and can cause material degradation to non-resistant plastics and wire insulation if installed improperly. It’s also crucial to use a lamp that operates at 254 nanometers and does not produce ozone, which can be harmful to respiratory health. The EPA provides detailed information about ozone.
For more details, see how UVC radiation works to kill germs from the CDC.
Types of HVAC UV Light Systems
When learning how to install germicidal uv light, you’ll choose between two main types:
- Coil Sterilization UV Lights: These are installed to shine directly on the evaporator coil and drip pan, preventing the growth of mold and bacteria on these moisture-rich surfaces. They are excellent for maintaining system efficiency.
- Air Sterilization UV Lights: These are placed in the ductwork to treat the air as it circulates, zapping airborne viruses, bacteria, and mold spores. They focus on improving the overall quality of the air you breathe.
You may also encounter PCO (Photocatalytic Oxidation) systems, which combine UV light with a catalyst to break down chemical pollutants and odors, while UVGI (Ultraviolet Germicidal Irradiation) systems focus solely on biological contaminants.
| Feature | Coil Sterilization UV Lights | Air Sterilization UV Lights |
|---|---|---|
| Placement | Directly illuminates evaporator coil and drain pan | In-duct (return or supply plenum) to treat circulating air |
| Target | Mold, bacteria, and biofilm on coil surfaces | Airborne bacteria, viruses, mold spores |
| Primary Benefit | Prevents surface growth, maintains coil efficiency | Reduces airborne pathogens, improves general air quality |
UV lights work best in conjunction with regular HVAC maintenance, not as a replacement for it. If your system has efficiency issues, consider professional HVAC repair services before installation.
Pre-Installation Checklist: Gearing Up for a Safe Install
Before you begin your UV light installation, proper preparation is key. While this guide covers the DIY process, professional installation is the safest option to protect your family and your HVAC warranty. Improper installation can lead to electrical hazards, UV-C exposure, or system damage.
The cost to install a UV light typically ranges from $500 to $1,500, depending on the unit and installation complexity. DIY may save on labor, but weigh this against the risks. UV-C radiation can cause severe skin and eye damage, and the bulbs contain mercury, requiring careful handling.
Essential Tools and Materials
Gather these tools before you start. Your UV light kit will contain the lamp, power supply, and mounting hardware.
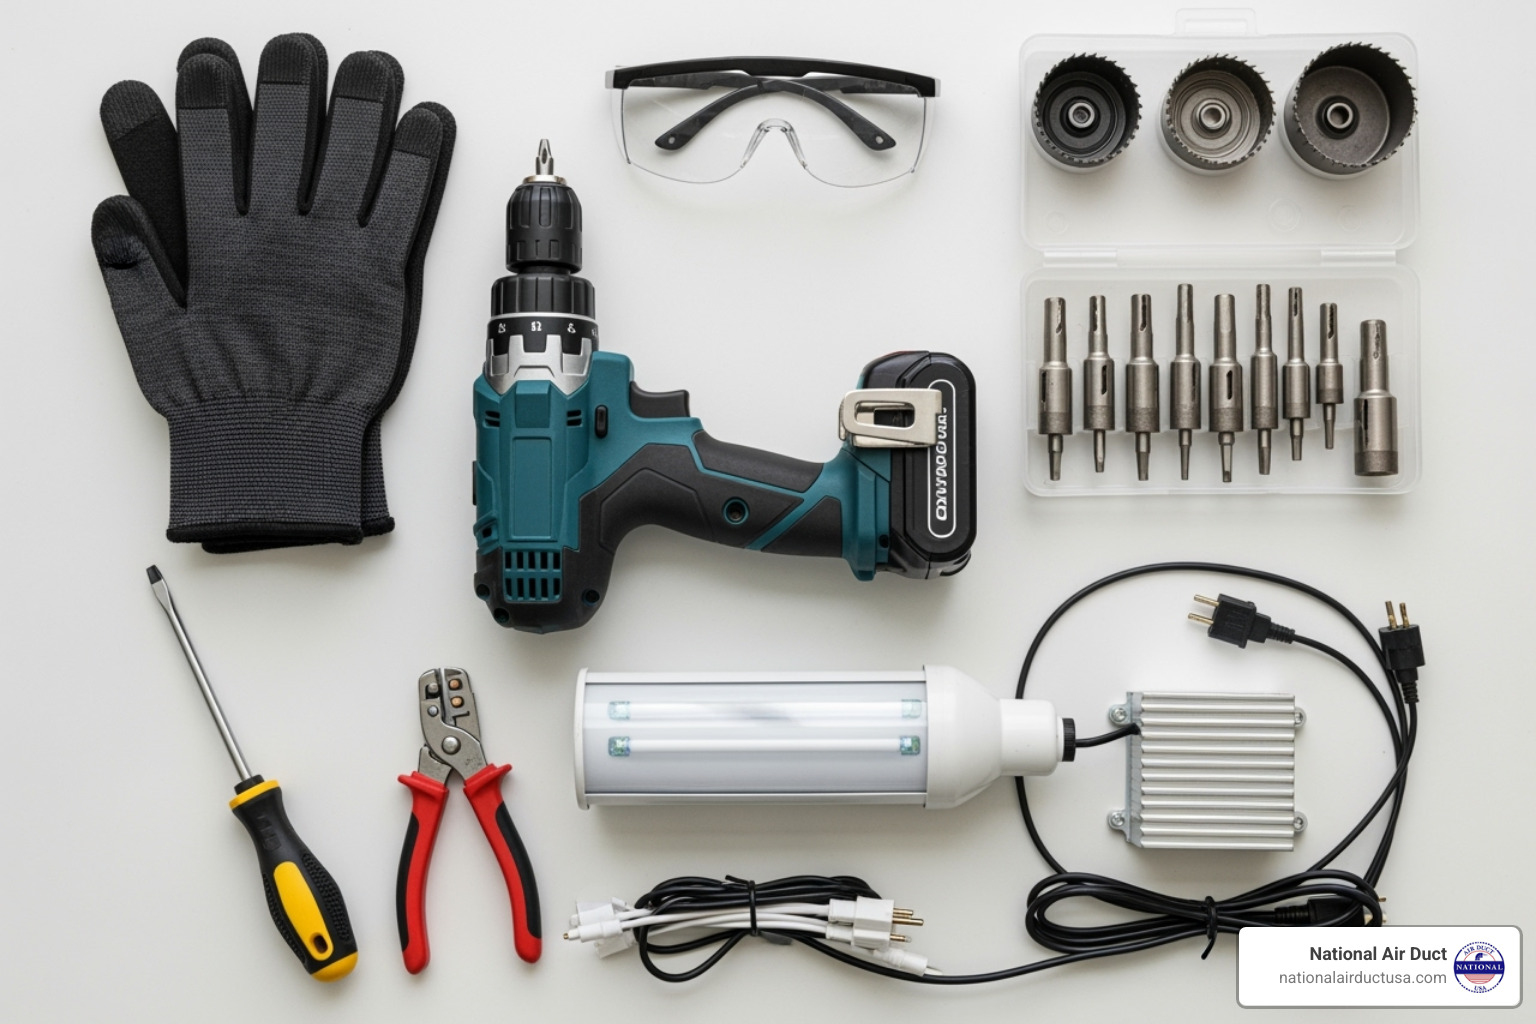
- Drill with a hole saw bit (1.5″ to 3″, check your unit’s specs)
- Screwdriver (usually Phillips head)
- Wire strippers and cutters
- Safety glasses (UV-rated)
- Gloves
- Measuring tape
- Foil tape
Finding the Optimal Installation Location
Proper placement is critical. The best location is where the light can continuously illuminate the evaporator coil and drip pan, as this is where mold and bacteria thrive. The supply plenum is another good spot to treat air as it enters your ducts.
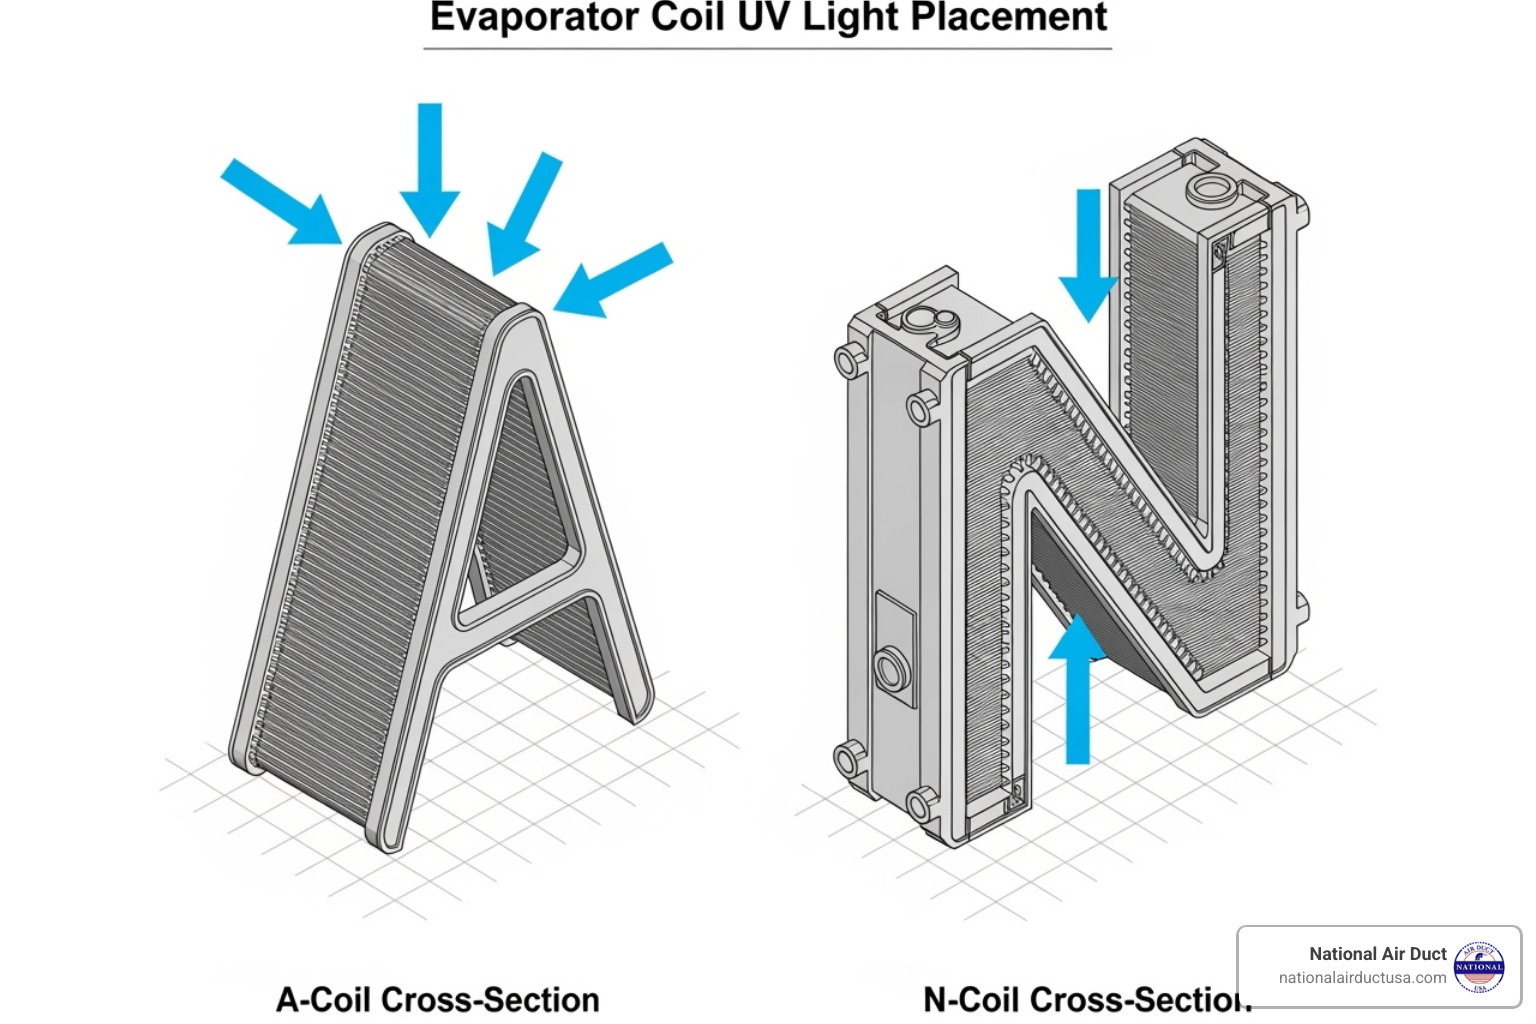
- For A-shaped coils, install the light above and centered.
- For N-shaped coils, place the light above or below, near the drip pan.
- Avoid direct exposure to plastic components (like drain pans), filter media, flex duct, and wire insulation, as UV light can degrade them. Keep the light clear of the blower motor and other moving parts.
- Ensure you have enough space for future bulb changes.
Key Safety Precautions for How to Install Germicidal UV Light
Safety is not optional when working with UV-C light.
- Turn off power to your HVAC system at the main circuit breaker. Use a lockout/tagout device if possible.
- Wear UV-protective safety glasses to prevent permanent eye damage. Never look directly at an operating UV bulb.
- Protect your skin with long sleeves and gloves to prevent burns.
- Avoid touching the bulb with bare hands. Skin oils can damage the lamp. If you touch it, clean it with rubbing alcohol and a lint-free cloth.
- Handle mercury-containing lamps with care to prevent breakage. If a bulb breaks, ventilate the area and follow proper cleanup procedures.
- Ensure proper ventilation in your work area.
How to Install Germicidal UV Light: A Step-by-Step Guide
This is a general guide; always prioritize the manufacturer’s instructions for your specific model. For any electrical work or complex installations, we recommend consulting a qualified professional.
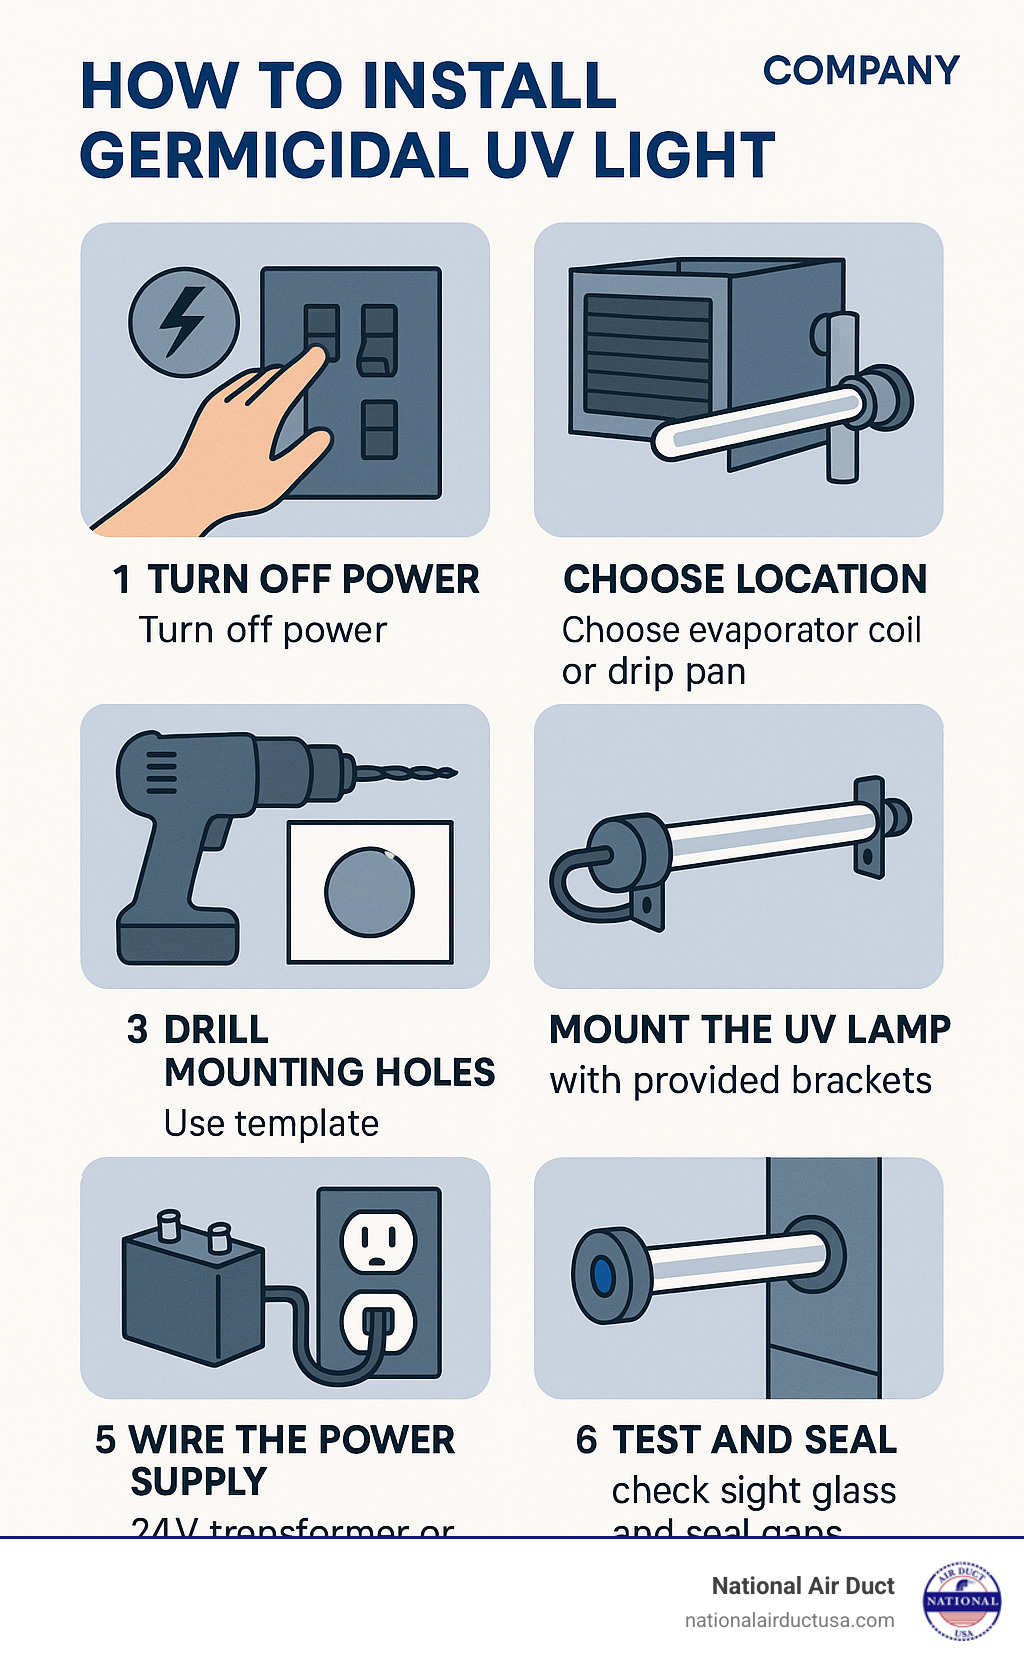
Step 1: Drilling the Mounting Holes
After choosing the optimal location, it’s time to create openings in the ductwork. Use the paper template from your kit to mark the spot. For sheet metal ductwork, use a drill with the correct size hole saw bit. Apply steady pressure and let the tool do the work. For duct board, a utility knife may provide a cleaner cut. After drilling, de-burr the sharp edges with a metal file or sandpaper for a proper fit and to prevent injury.
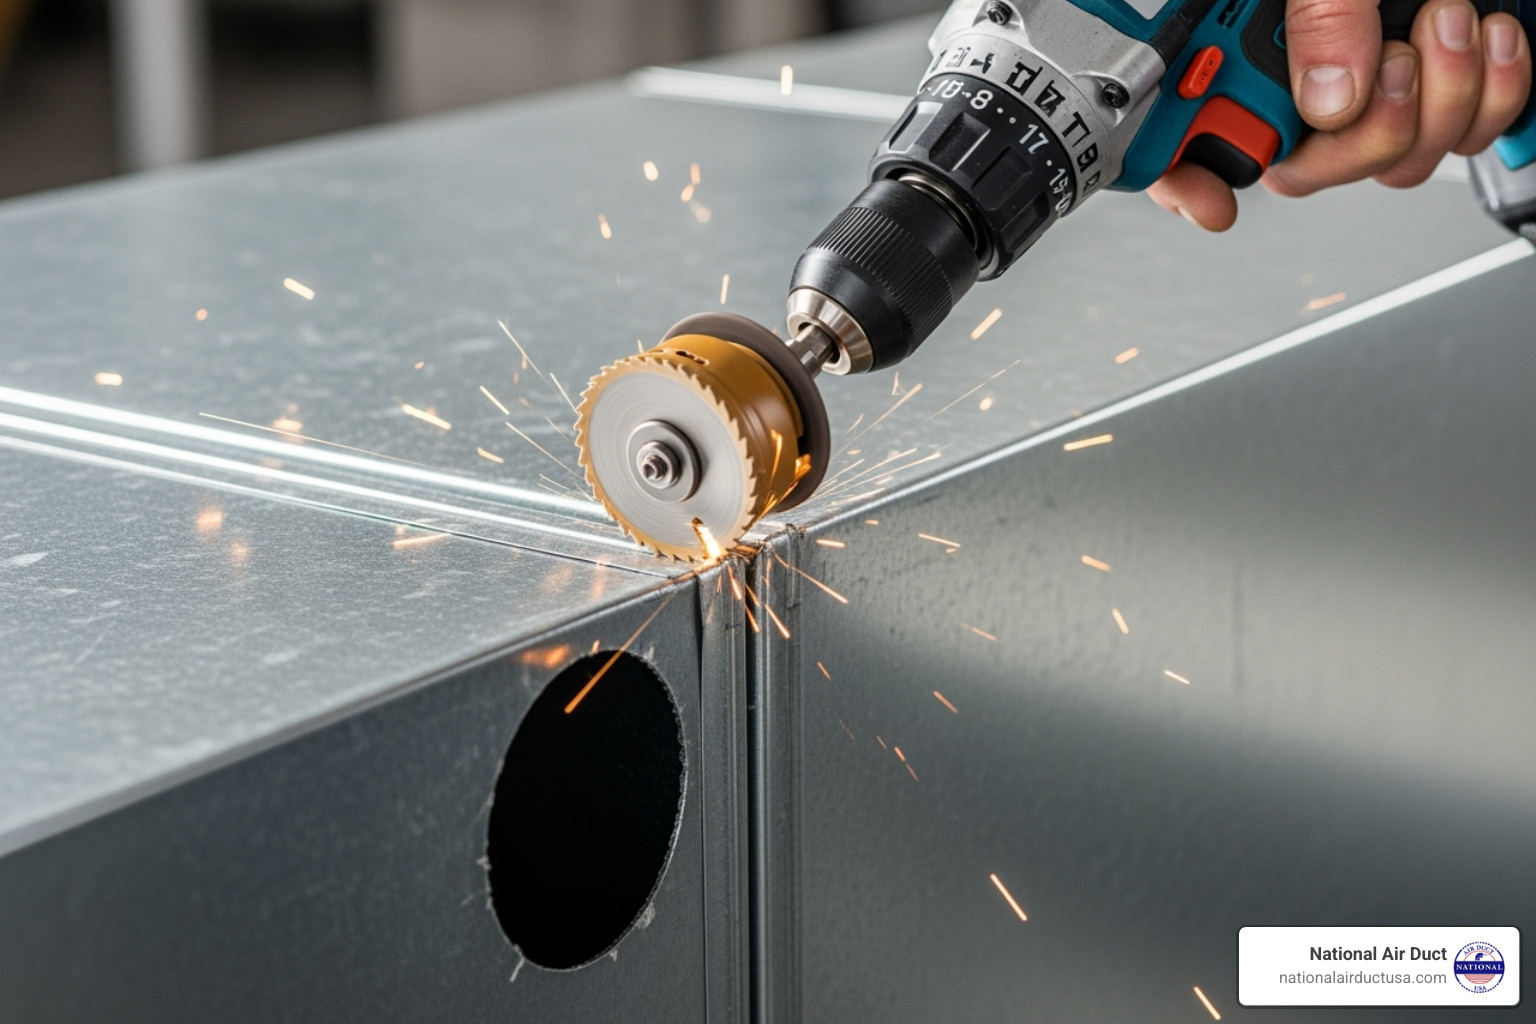
For a demonstration, this handy video on using a hole saw shows the proper technique.
Step 2: Mounting the UV Lamp
Secure the UV light fixture using the provided mounting hardware. Magnetic brackets are convenient for metal surfaces, while self-tapping screws provide a permanent hold. Align the housing with the drilled holes and secure it so it’s flush and stable. When inserting the UV bulb, handle it by the ends or with gloves to avoid touching the glass. Skin oils can reduce the bulb’s lifespan. Finally, connect the lamp cable to the housing, ensuring it clicks securely into place.
Step 3: Wiring the Power Supply: A Critical Step in How to Install Germicidal UV Light
This step requires electrical knowledge. If you are not confident, call a professional. There are several powering options:
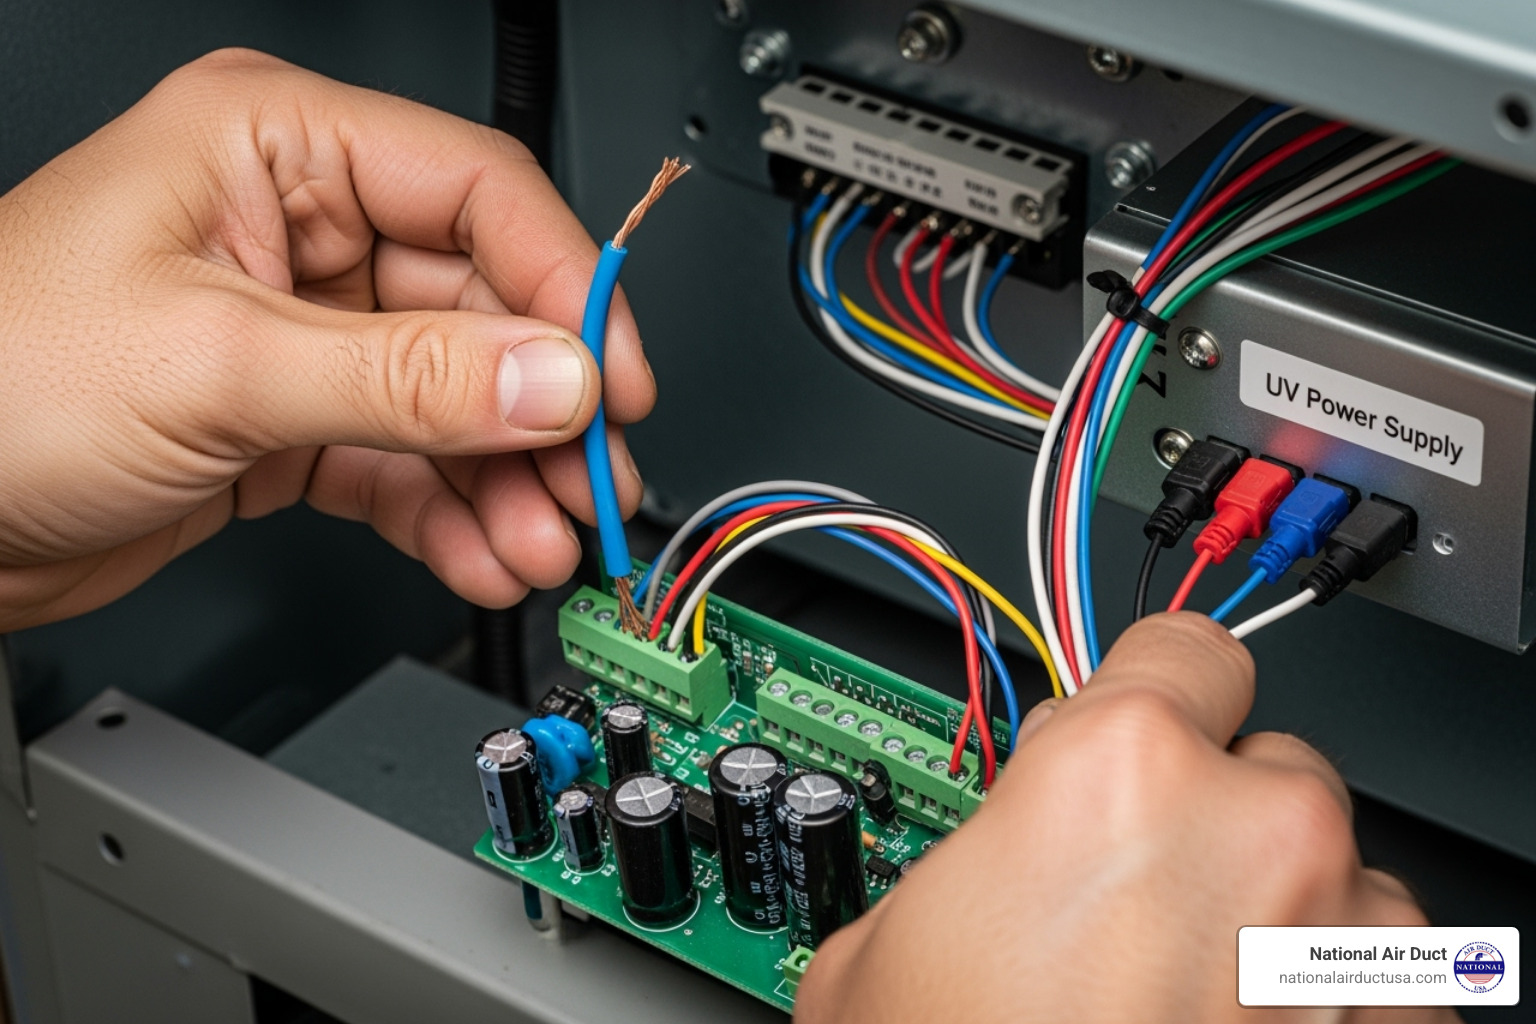
- 24V Transformer: Connects to your HVAC’s low-voltage system. Verify your existing transformer can handle the extra load; a separate transformer may be needed.
- 120V Outlet: The simplest option if a nearby outlet is available. Many units come with a standard plug.
- Hardwiring to Blower Motor: Syncs the UV light with your HVAC’s operation, which can save energy. However, some manufacturers recommend constant power for maximum germicidal effect.
Always follow the wiring diagrams provided with your unit. If you are unsure, seek professional HVAC installations for complex wiring.
Step 4: Final Checks and Sealing
Now, complete the installation. Briefly restore power to test the unit. The blue glow should be visible through the sight glass (if included), which allows for safe monitoring. With the light on, check for light leaks around all seams and joints. Any escaping blue light is a safety hazard. Seal all holes and gaps with foil tape to prevent air leaks and contain the UV radiation. Finally, reassemble all access panels and restore power permanently.
Keeping the Light Alive: UV System Maintenance and Care
Regular maintenance is essential to ensure your UV light system remains effective. The two primary tasks are bulb replacement and cleaning. Neglecting these will render your system useless for protecting your family’s health.
How to Replace and Clean Your HVAC UV Bulb
Replace your UV bulb annually, even if it’s still glowing. The visible blue light does not indicate its germicidal effectiveness, which diminishes significantly after about 12 months of use. An old bulb may only operate at 70% effectiveness or less, allowing contaminants to pass through your system.
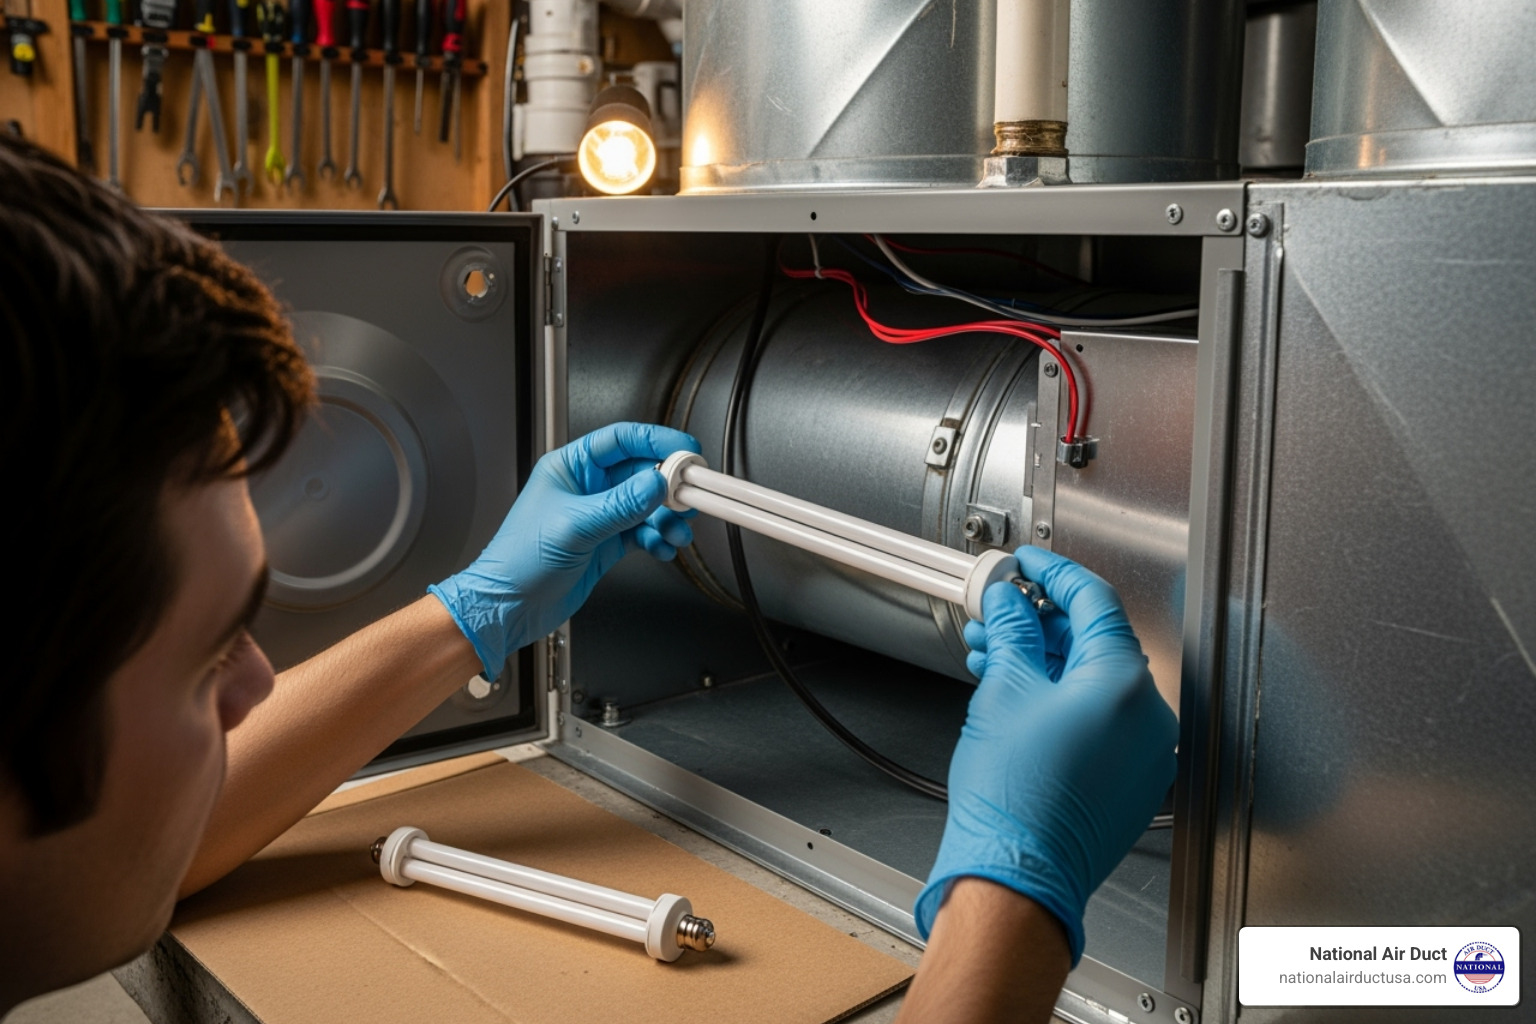
Clean the bulb every six months. Dust and debris can block the UV-C light. First, turn off the power. Then, wearing gloves, gently wipe the bulb with a lint-free cloth and rubbing alcohol. Oils from your skin can damage the bulb, so never touch the glass with bare hands.
For comprehensive care, you can Schedule a professional HVAC system disinfection and have an expert handle the maintenance.
Signs Your UV Bulb Needs Replacement
Stick to the annual schedule recommended by the manufacturer, as the decline in UVC effectiveness is invisible. The most obvious sign of failure is a loss of the blue glow when looking through the sight glass. Check your manual, as some bulbs that run 24/7 may need more frequent replacement, while others may last up to two years.
Proper Disposal of Mercury-Containing UV Lamps
Used UV bulbs cannot be thrown in the regular trash because they contain small amounts of mercury. Mercury handling is subject to environmental regulations.
- Check with your local hazardous waste authority for collection days or drop-off sites.
- Many hardware stores offer lamp recycling programs.
- Handle the old bulb carefully to prevent breakage. If a bulb breaks, do not use a vacuum. Ventilate the area and follow local guidelines for cleanup and disposal.
Frequently Asked Questions About HVAC UV Light Installation
Here are answers to some of the most common questions homeowners have when considering how to install germicidal uv light systems.
How much does it cost to install a UV light in an HVAC system?
The typical investment for a professionally installed UV light is between $500 and $1,500. The final cost depends on the type of unit (basic coil vs. advanced air sterilization), the complexity of the installation, and local labor rates in areas like New York. While there is an upfront cost, the long-term value comes from improved air quality, improved HVAC efficiency, and fewer allergy symptoms. Replacement lamps are affordable, typically costing $50 to $200.
Should a UV light be installed on the HVAC system’s return or supply side?
The best placement depends on your goal. Supply side placement (after the coil) is generally recommended for coil sterilization. This targets the evaporator coil and drain pan, preventing mold and biofilm growth at the source. Return side installation (before the filter) is effective for air sterilization, treating air as it enters the system. Since most microbial growth starts on the coil, targeting that area often provides the most significant benefit. Always follow the manufacturer’s placement recommendations for your specific unit.
Can a DIY installation of a UV light be done safely?
While a DIY installation is possible for those with strong electrical and mechanical skills, the risks are significant. These include electrical shock, fire hazards, and damage to your HVAC system. Direct exposure to UV-C light can cause severe and permanent eye and skin damage. Furthermore, improper installation can void your HVAC or UV light system warranties. For these reasons, we strongly recommend professional installation. A qualified technician ensures the system is installed safely, correctly, and for maximum effectiveness, providing valuable peace of mind.
Conclusion: A Healthier Home is Just an Installation Away
Learning how to install germicidal uv light is an investment in your family’s health and your home’s efficiency. By neutralizing bacteria, viruses, and mold, UV-C technology provides cleaner air while helping your HVAC system run more efficiently. This leads to lower energy bills and fewer costly repairs.
Safety is paramount during installation. Always disconnect power, use protective gear, and handle bulbs with care. While a DIY approach is possible for the experienced, the electrical work and risk of exposure make professional installation the smartest choice for most homeowners.
For a guaranteed safe and effective setup, trust a NADCA-certified professional from National Air Duct USA to handle your UV Lights Installation. We serve homeowners across Westbury NY and greater New York with solutions that improve air quality and efficiency.
To achieve the ultimate defense against indoor pollutants, combine your UV light system with regular Air Duct Cleaning. This ensures your freshly treated air travels through a clean, debris-free system. Your home should be a sanctuary, and with a properly installed UV light, every breath can support your family’s well-being.

