Why Installing UV Light in HVAC Systems is a Smart Move
Installing UV light in HVAC systems is an effective way to improve your home’s air quality and protect your family’s health. Here’s a quick overview:
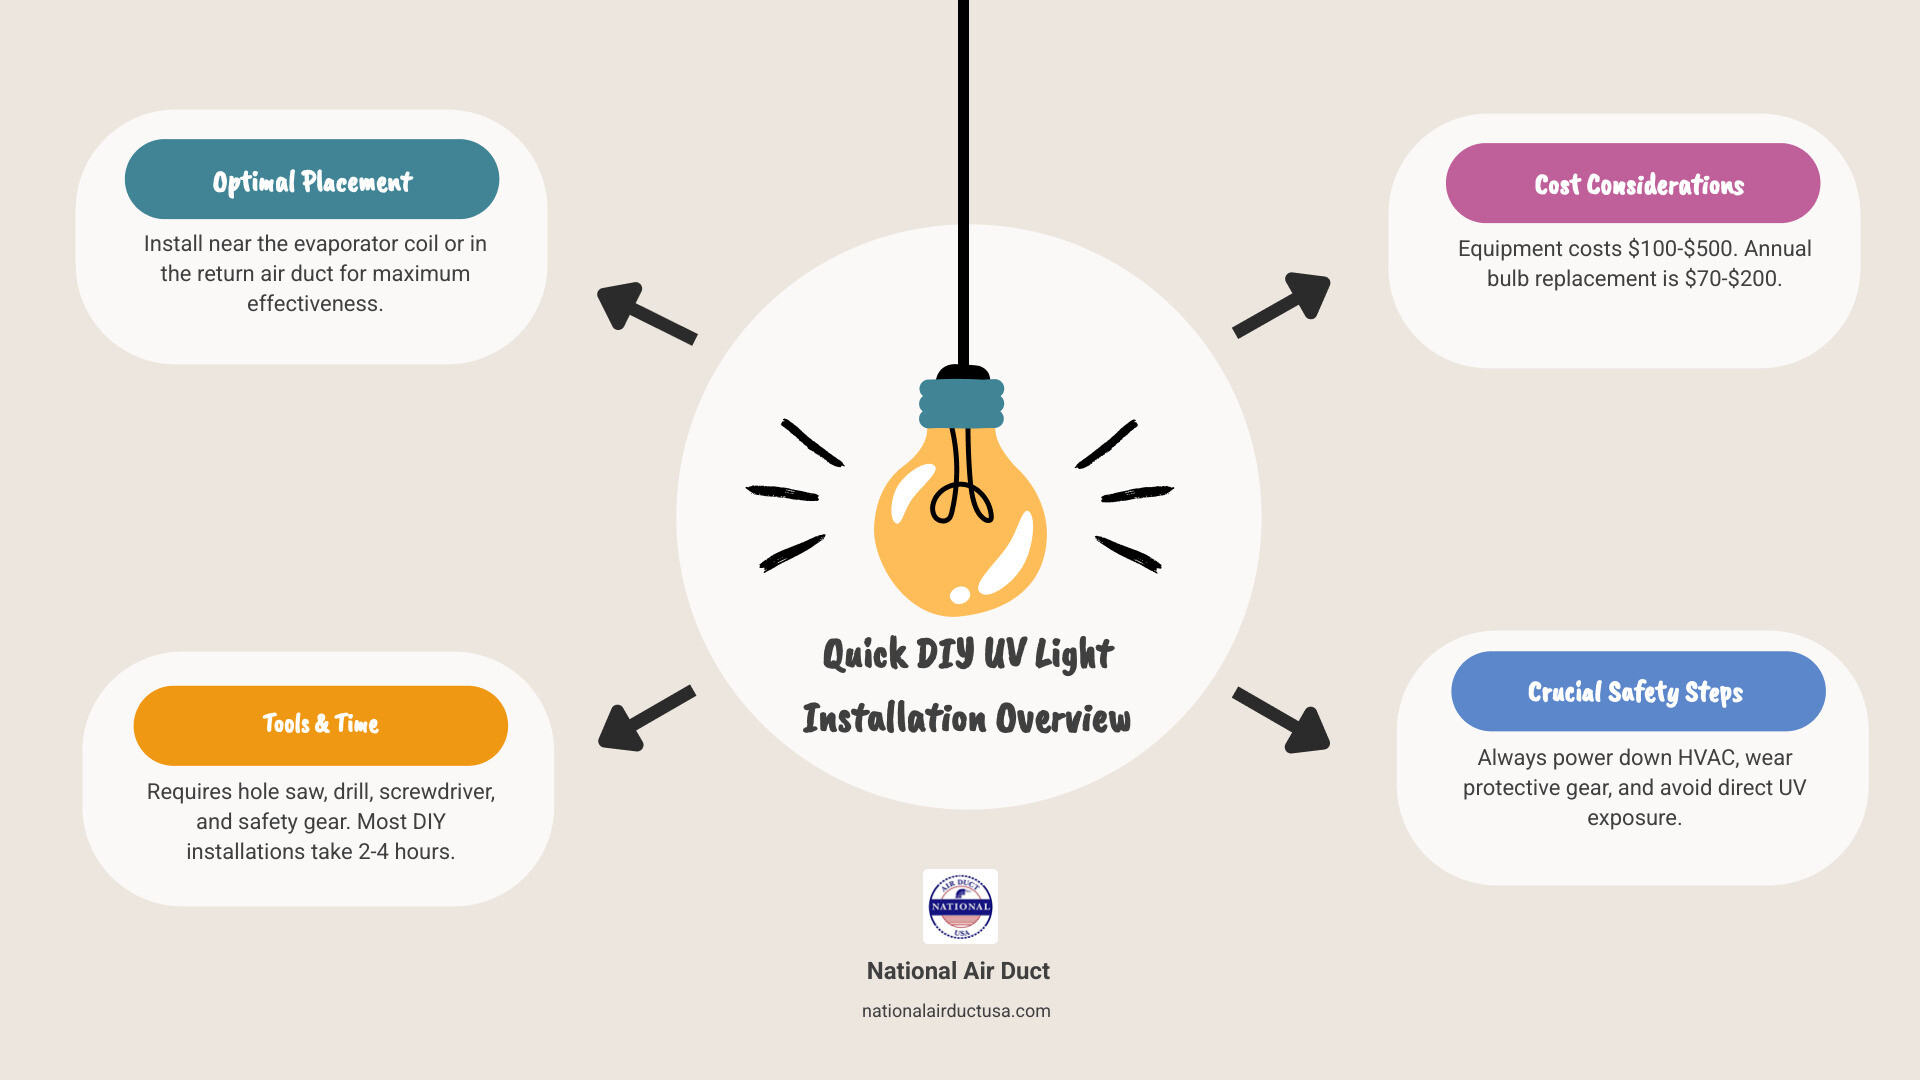
Quick Installation Overview:
- Location: Install near the evaporator coil or in the return air duct
- Tools Needed: Hole saw, drill, screwdriver, safety gear
- Time Required: 2-4 hours for most DIY installations
- Cost: $100-$500 for equipment, plus annual bulb replacement ($70-$200)
- Safety: Turn off power, wear protective gear, avoid direct UV exposure
If you’ve noticed musty odors, increased allergies, or mold growth around your HVAC system, a UV light installation can help. These germicidal lamps use UV-C light at 254 nanometers to destroy the DNA of harmful microorganisms like bacteria, viruses, and mold spores.
The science is simple: UV-C radiation disrupts the genetic material of these contaminants, rendering them harmless. According to industry research, UV lights can neutralize up to 90% of microorganisms on ducts and evaporator coils and may reduce your energy consumption by 10-25%.
For New York homeowners battling humidity, mold, and allergens, UV lights offer a proven, 24/7 solution for cleaner air. The installation is manageable for many DIYers but requires careful attention to electrical safety and proper placement.
Understanding HVAC UV Lights: The What, Why, and How
Before installing UV light in HVAC systems, it’s important to understand what these devices do and why they are essential for healthier homes.
The Science Behind UV-C Germicidal Power
HVAC UV lights are specialized germicidal lamps that emit ultraviolet light in the UV-C spectrum to eliminate biological invaders. Unlike UV-A and UV-B rays, UV-C light operates at shorter wavelengths (100-280 nanometers). The ideal wavelength for germicidal action is 254 nanometers, which is why the technology is called UV germicidal irradiation (UVGI).
UV-C light disrupts the DNA and RNA structures of microorganisms. When bacteria, viruses, and mold spores are exposed to this wavelength, their genetic code is scrambled, preventing them from reproducing and often killing them.
Hospitals have used UV-C light to sterilize equipment for decades. This same technology can now be used in homes, turning HVAC systems into air purifiers. Starting with a clean ventilation system provides the best foundation for any air purification efforts.
Key Benefits for Your Home and Health
When installing UV light in HVAC systems, the benefits are significant for your family’s health and your budget.
- Mold and bacteria elimination: HVAC evaporator coils are damp and dark, ideal for microbial growth. UV lights installed near the coils prevent this buildup and eliminate musty odors, neutralizing up to 90% of microorganisms on surfaces.
- Allergen and pathogen reduction: As air circulates, the UV light neutralizes airborne viruses, bacteria, and mold spores. This is a significant benefit for family members with allergies, asthma, or other respiratory issues.
- Improved HVAC performance: Biological buildup on the evaporator coil insulates it, forcing your system to work harder. Clean coils improve airflow and heat transfer, boosting performance.
- Energy savings: By keeping coils clean and optimizing airflow, UV lights can decrease energy consumption by 10-25%.
- Extended system lifespan: Preventing corrosive biological buildup reduces wear and tear on HVAC components, helping the system last longer.
- Reduced maintenance: UV lights reduce the need for frequent coil cleaning, though regular professional care, like our AC vent disinfection services, is still recommended.
Potential Drawbacks and Considerations
While UV lights are beneficial, there are a few considerations to keep in mind.
- Upfront costs: DIY kits start around $100, while professional installations can range from $200 to over $1,000, depending on the system.
- Bulb replacement: Bulbs lose effectiveness over time and typically need annual replacement, costing between $70 and $200. Some premium models last longer.
- Ozone production: This is a concern with older or poorly made lamps. Modern UV-C lamps designed for HVAC use (operating at 254 nanometers) do not produce ozone.
- Material degradation: Direct, prolonged UV exposure can damage plastic or rubber components. Proper placement and shielding are crucial to prevent this.
- Not a filter replacement: UV lights kill germs but don’t capture particles like dust or dander. You must continue to use and change your standard air filters.
Pre-Installation Checklist: Planning Your Project
Installing UV light in HVAC systems requires thoughtful preparation to ensure the light works as intended and to avoid issues later.
Choosing the Right Type of UV Light
Choosing the right type of UV light is critical. There are two main types for residential use:
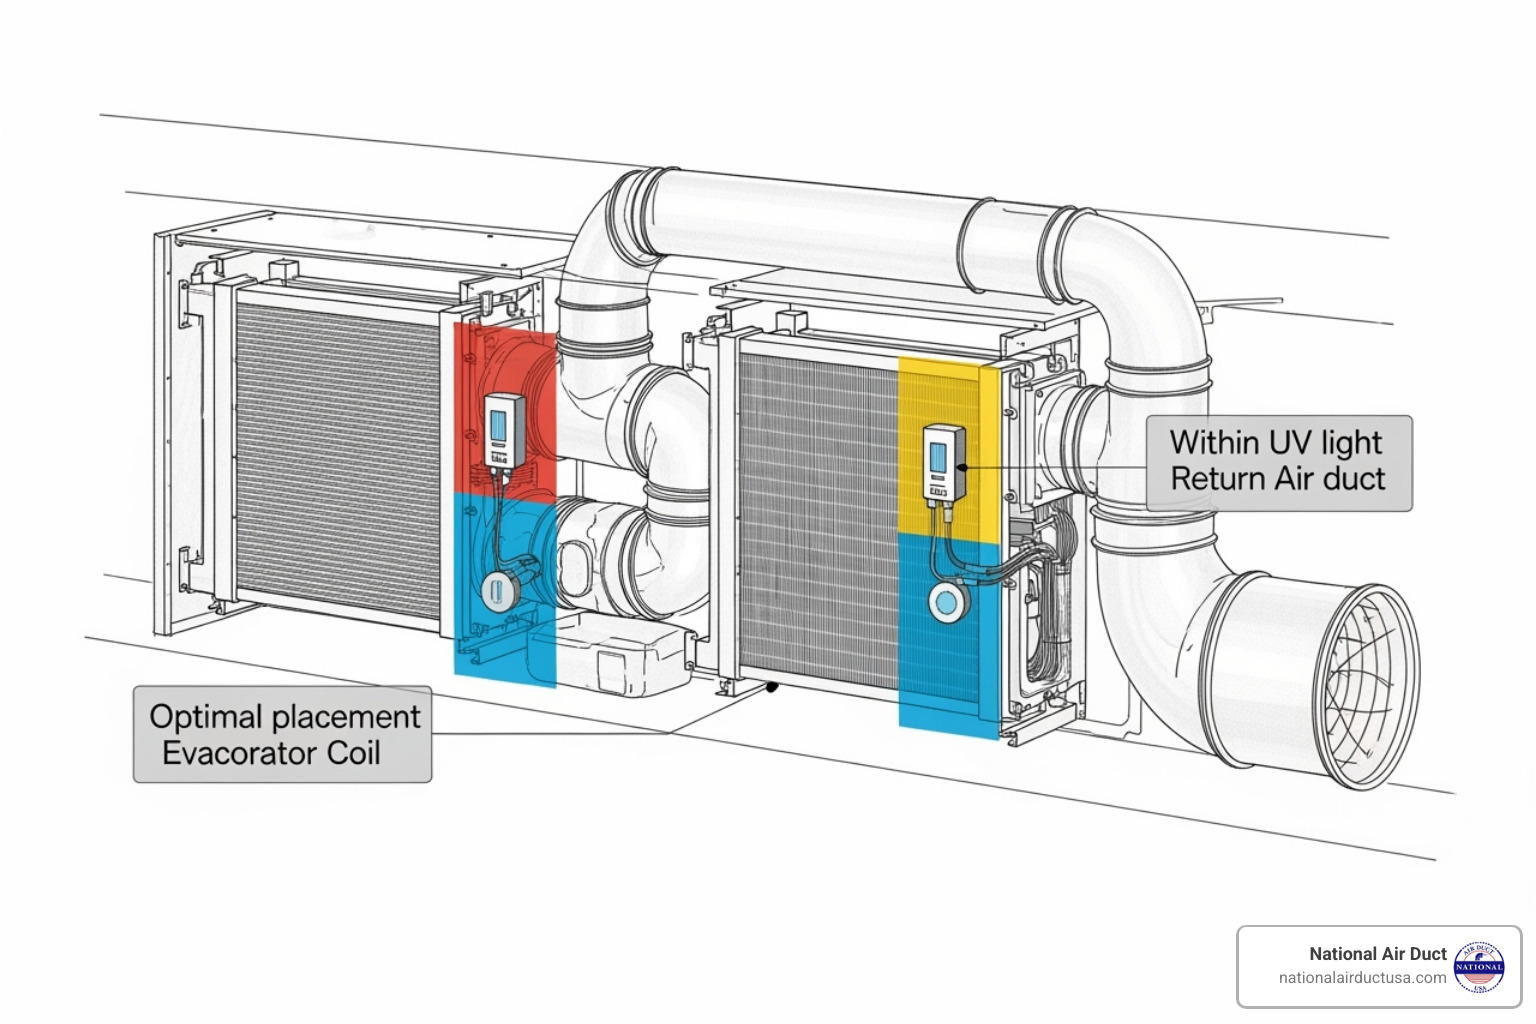
- Coil-sterilizing lights: These units are installed near the evaporator coil and run 24/7 to prevent mold and bacteria growth on the coil’s damp surfaces.
- Air-sterilizing lights: These are installed in the return or supply ductwork to treat the air as it circulates. They typically operate only when the HVAC fan is running.
Other options include UVGI (UV germicidal irradiation) and PCO systems, which use catalysts to break down odors. For most homes, a coil-sterilizing light offers the best value. For bulb wattage, most residential systems use 14-36 watt bulbs.
Key Considerations Before Installing UV Light in HVAC
Next, assess your HVAC system and gather the necessary tools.
- System compatibility: Most modern HVAC systems are compatible, but the specific type (e.g., furnace with A-coil vs. air handler) will affect installation. Familiarize yourself with your system’s layout.
- Power source availability: Most UV lights use the HVAC system’s 24V transformer, allowing them to run with the system. Ensure your transformer can handle the additional load. Some units use a standard 120V outlet.
- Evaporator coil location: Know where your coil is and how to access it. This is the primary target for the UV light.
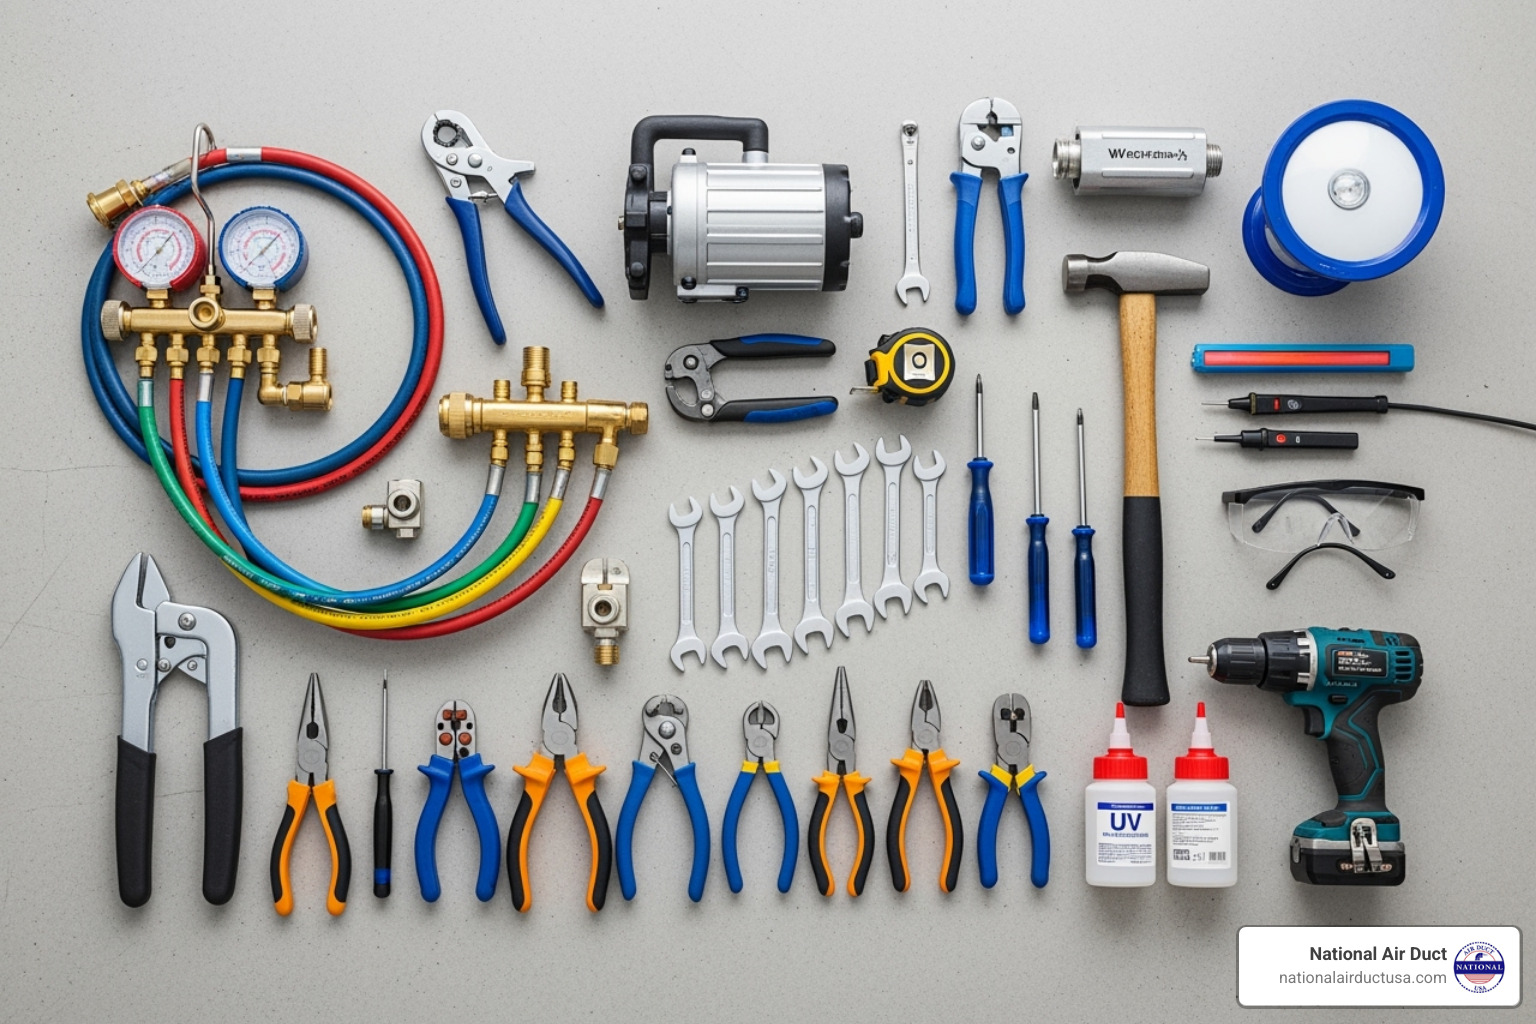
- Tools needed: You will need a hole saw, drill, screwdrivers, safety glasses, work gloves, measuring tape, a voltage tester, and foil tape.
Finding the Best Location for Installation
The right installation location maximizes effectiveness and simplifies future maintenance.
- Near the evaporator A-coil: This is the ideal spot for coil-sterilizing units. The light should shine on the coil and drain pan, where moisture collects and mold can grow. The best position depends on your coil’s shape and system layout.
- Return air plenum: This is a strategic location for air-sterilizing units, as it treats all air before it reaches the coil.
- Supply duct: Placement here is less common and treats air as it leaves the system, requiring careful consideration of airflow.
Ensure the chosen location provides a clear line of sight to the target area and allows easy access for bulb changes. For more on system design, see our resources on HVAC Installations.
Step-by-Step Guide to Installing UV Light in HVAC
Installing UV light in HVAC systems is a manageable DIY project if approached methodically and safely. This guide will walk you through the process.
Step 1: Safety First – Power Down the System
Before starting, you must cut power to the HVAC system for safety. Find the breaker for your furnace or air handler in your main electrical panel and turn it completely off. Shut off the breaker for the outdoor unit as well. Verify the power is off by trying to turn on the system at the thermostat. Use a non-contact voltage tester on the unit’s wiring to confirm there is no current. Wear your safety glasses and work gloves.
Step 2: Mark and Cut the Opening
Use the template from your UV kit to mark the cutting location on the ductwork, typically near the evaporator coil.
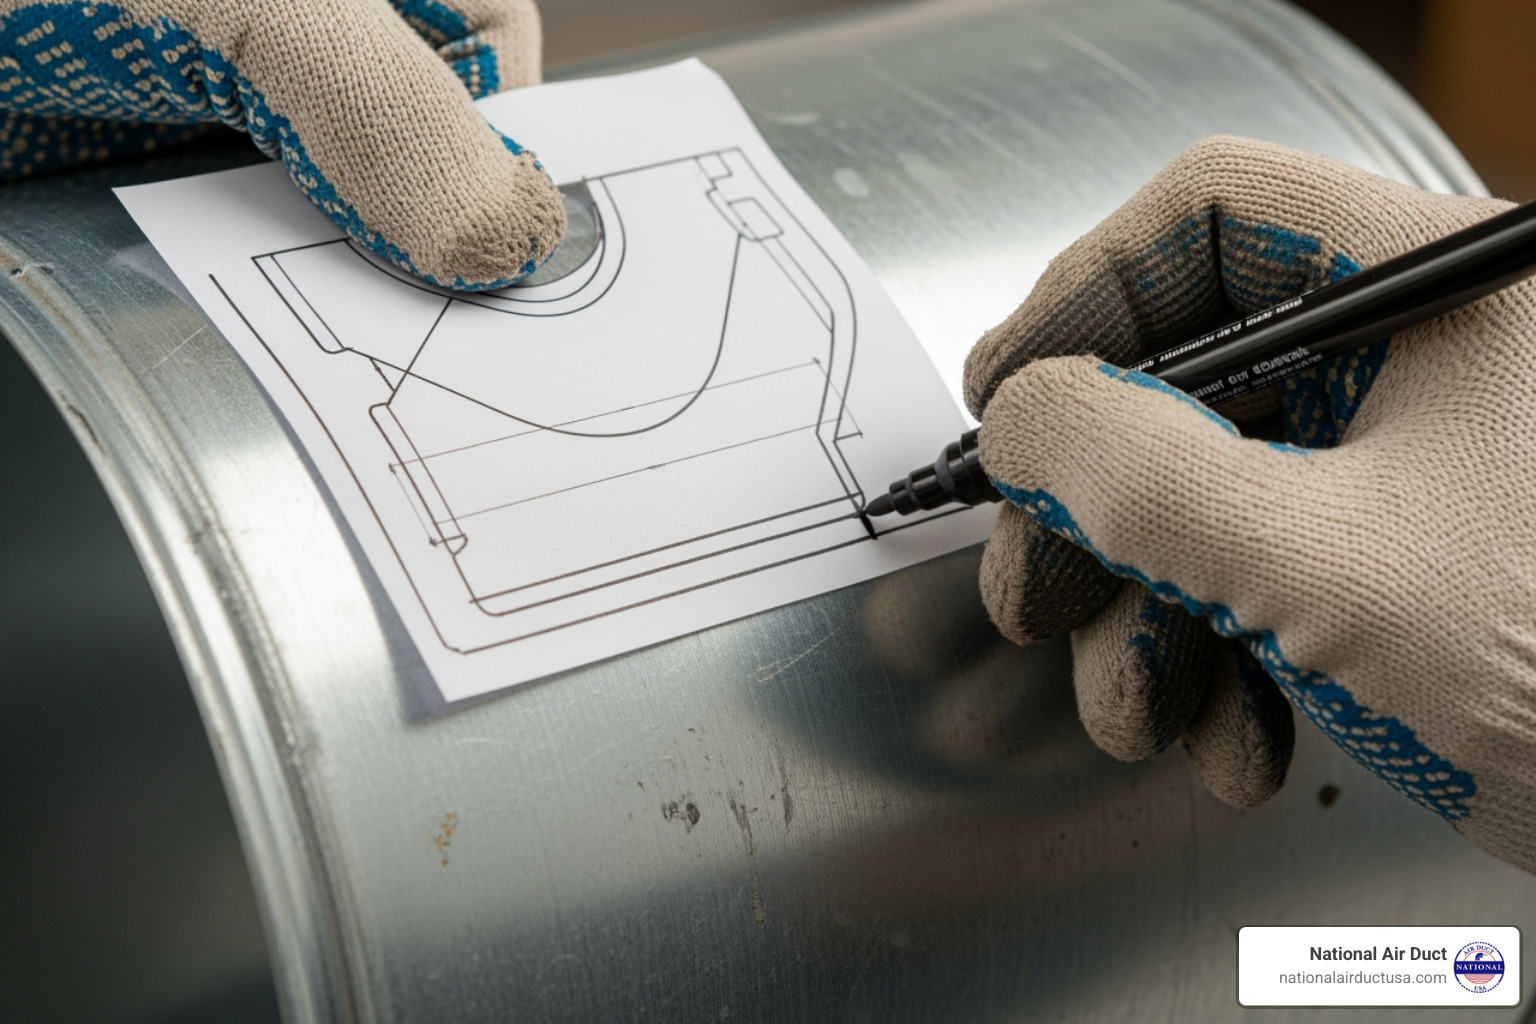
For sheet metal ductwork, use a drill with a hole saw. For duct board, use a sharp utility knife. Cut carefully to avoid air leaks. After cutting, smooth any rough edges to ensure the mounting plate sits flush.
Step 3: Mount the UV Lamp
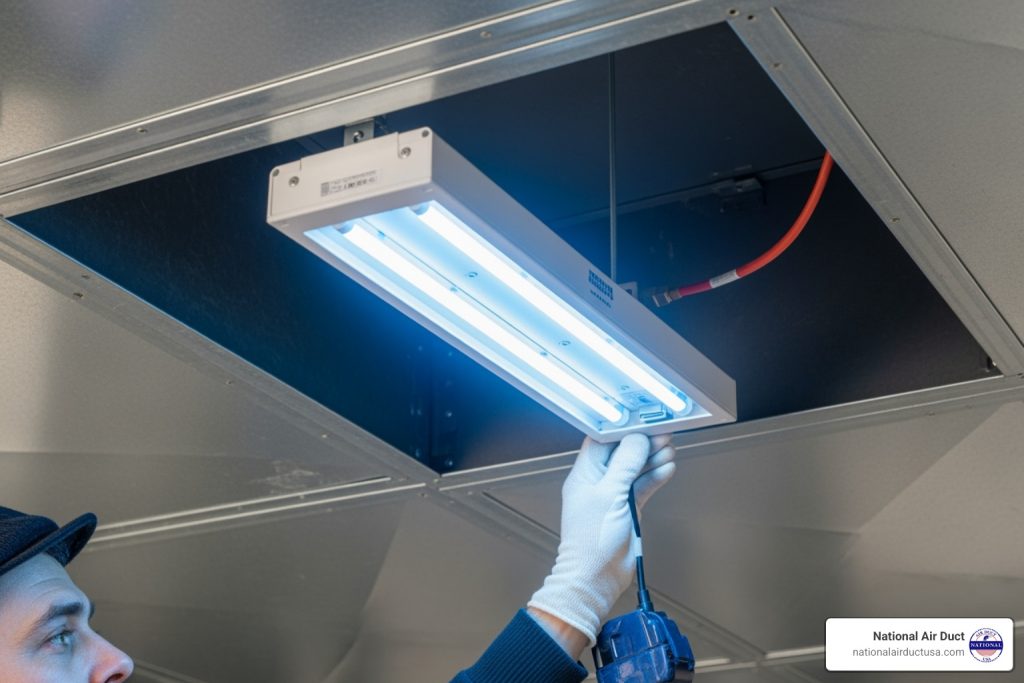
Attach the mounting bracket to the ductwork with the provided screws, ensuring it sits flush. Never touch a UV bulb with bare hands, as skin oils can damage it. Wearing gloves, carefully insert the bulb into the lamp housing according to the manufacturer’s instructions. The bulb should extend into the ductwork, aimed at the target area (e.g., the evaporator coil). Ensure it is securely seated. Connect the lamp’s cable to the power supply unit.
Step 4: Wire the Unit and Test
Mount the power supply unit in a secure, dry location, such as inside the air handler’s control panel. Most units connect to the HVAC system’s 24-volt transformer, using the common (C) and hot (R or G) terminals on the control board. If your transformer is already heavily loaded, you may need a separate one. Some units require a hardwired 120V or 240V connection; hire a licensed technician if you are not comfortable with this work.
Once wired, turn the breaker back on. Use the included sight glass or viewing port to confirm the bulb is lit and working. Apply the provided warning sticker near the lamp to alert service technicians to its presence.
Maintenance and Safety Best Practices
Proper maintenance and safety protocols are key to ensuring your UV light remains effective and safe long after installation.
How to Maintain Your UV Light System
- Annual bulb replacement: This is crucial. A bulb’s germicidal effectiveness decreases significantly after a year, even if it still lights up. Plan to replace it every 12 months.
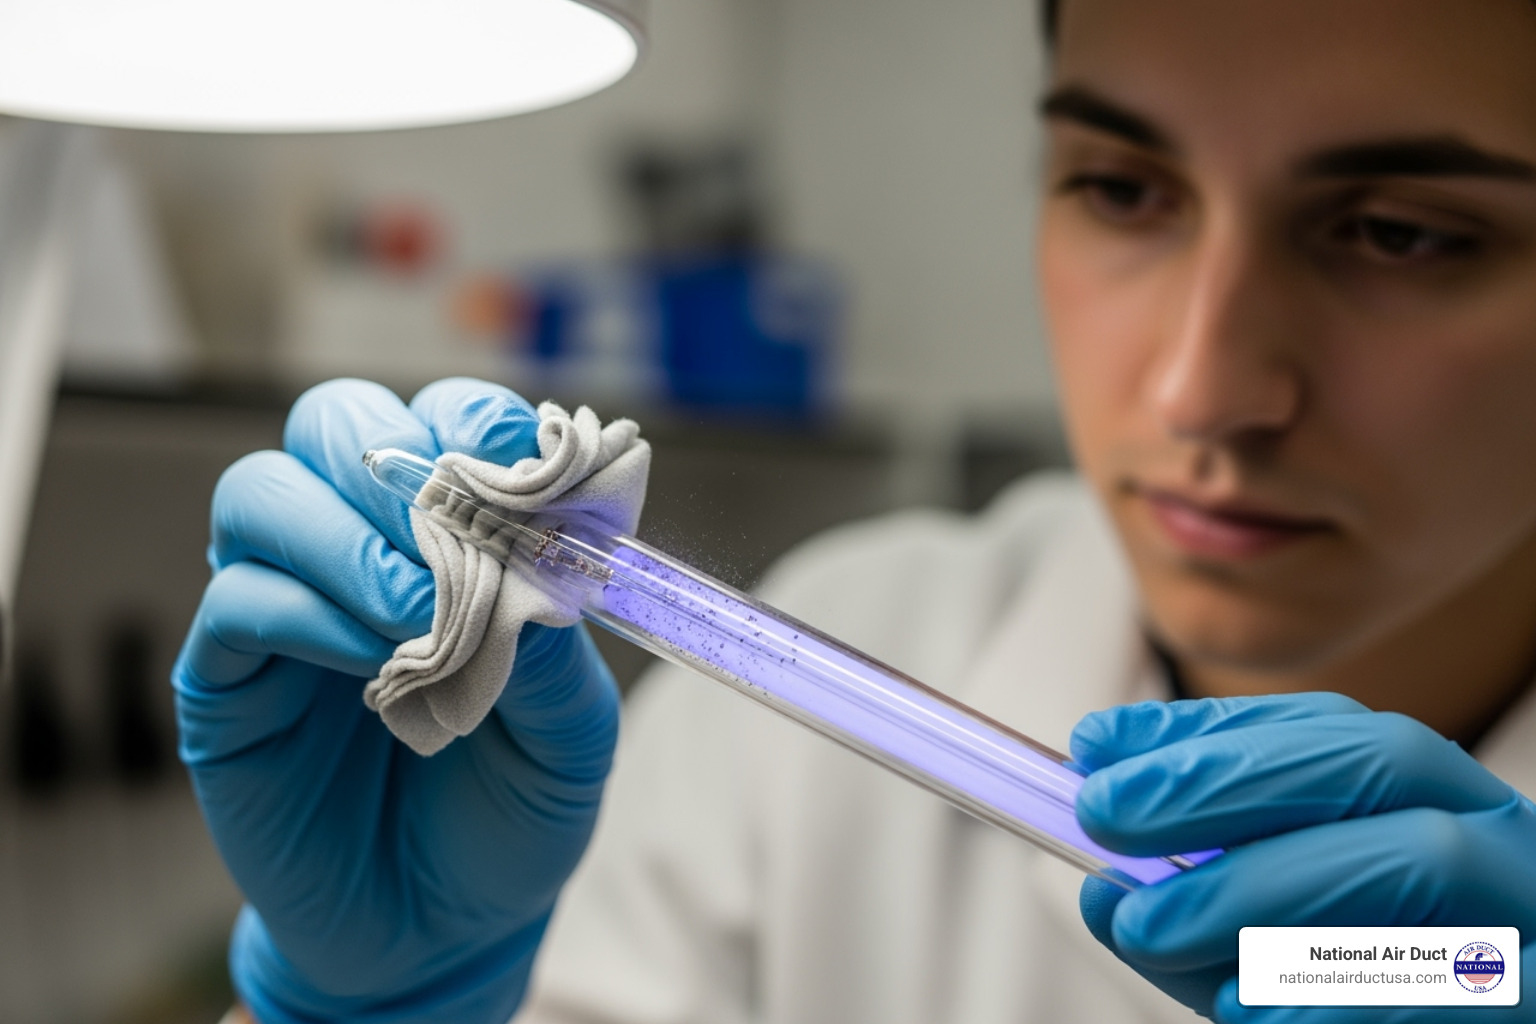
- Cleaning the lamp: Dust and debris can block the UV rays. When replacing the bulb, gently wipe the lamp with a soft, lint-free cloth (with the power off).
- Inspect wiring and mounting: Periodically check for loose connections or brackets caused by system vibrations.
- Regular HVAC maintenance: A UV light is most effective in a well-maintained system. Continue to change air filters regularly and consider professional services like Air Duct Maintenance to keep your entire system clean.
Safety Precautions for Installing UV Light in HVAC
UV-C light is powerful and requires strict safety precautions.
- Never look directly at a lit UV lamp. Direct exposure can cause severe eye damage. Always power off the system before performing any maintenance.
- Avoid direct skin exposure. UV-C light can cause burns similar to a severe sunburn. Wear protective clothing and gloves when working near the lamp.
- Ozone: Modern HVAC UV-C lamps do not produce ozone. If you notice a “bleach” or electrical smell, turn the unit off and consult the manufacturer. Learn more about ozone from the EPA.
- Protecting plastic components: UV-C light can degrade plastic and rubber over time. Proper placement is critical to focus light on the coil and away from vulnerable parts. Use shields or reflective tape as needed.
- Bulb disposal: UV lamps contain a small amount of mercury. If a bulb breaks, ventilate the area and clean it up carefully, following local hazardous waste disposal guidelines.
Following these practices will ensure your installing UV light in HVAC investment provides cleaner air for years, protecting both your system and your family.
Frequently Asked Questions about HVAC UV Lights
Here are answers to some frequently asked questions about installing UV light in HVAC systems.
Can UV lights damage my HVAC system?
Yes, but only if installed improperly. Prolonged direct exposure can degrade non-UV-resistant materials like plastic drain pans or wiring insulation. This damage is preventable. Quality kits include shields and placement guidelines to target the evaporator coil while protecting vulnerable components. If needed, use a metal shield or UV-resistant tape to protect sensitive materials. Strategic placement is key.
How much does it cost to install and maintain a UV light?
The initial purchase price for a DIY kit ranges from $100 to over $500, depending on the brand and features. Professional installation typically costs between $200 and $1,000, including the unit and labor. Replacement bulbs cost $70 to $200 and need to be replaced every 1 to 2 years. The cost is often offset by energy savings and reduced maintenance needs.
Do UV lights replace my standard air filter?
No. UV lights are not a replacement for air filters. UV lights neutralize biological contaminants like bacteria and viruses. They do not capture physical particles like dust, dander, or pollen. Your standard air filter traps these particles. You must continue to use and regularly change your air filter. Think of them as a team: the filter traps particles, and the UV light neutralizes germs. Together, they provide a multi-layered defense for cleaner, healthier air. You need both for optimal results.
A Brighter, Cleaner Future for Your Home’s Air
You now have a complete roadmap to installing UV light in HVAC systems. By understanding the science and following the installation and maintenance steps, you can implement a real solution for musty odors and allergies.
Once installed, your UV light will work quietly to break down microorganisms and keep your evaporator coil clean. The result is fresher air, fewer allergy symptoms, and potentially lower energy bills from improved system efficiency.
The DIY satisfaction from this project is significant. You save money on installation and gain valuable knowledge about your home’s air quality system.
However, not everyone is comfortable with electrical work or cutting ductwork. If you prefer professional help, that’s a smart decision. Experts can ensure a truly pristine system before installation and handle the entire process safely.
For a professional touch, National Air Duct USA offers expert UV Lights Installation services in New York. Our NADCA-certified team will ensure perfect placement and safe wiring. We also provide comprehensive Air Duct Cleaning to give your system a fresh start.
Whether you DIY or hire a professional, you are taking a meaningful step toward a healthier living environment. Clean air is something every family deserves, and a UV light helps make that a reality.

