The Heart of Your Home’s Comfort
Clean coils hvac unit maintenance is essential for keeping your home comfortable and your energy bills in check. Here is a quick overview:
- Evaporator coils (indoor) absorb heat from your home’s air.
- Condenser coils (outdoor) release that heat outside.
- Dirty coils can reduce cooling capacity by up to 30% and increase energy use by 37%.
- Annual cleaning is recommended, more often in dusty or coastal areas.
- DIY cleaning is suitable for outdoor coils, but indoor evaporator coils require professional service.
That refreshing cool air in your home on a hot Long Island summer day is thanks to two hidden components in your HVAC system: the evaporator and condenser coils. The indoor evaporator coil absorbs heat and moisture, while the outdoor condenser coil releases it, working together in the refrigeration cycle.
When these coils get dirty, the system’s efficiency drops. A layer of dust, pollen, and debris acts like an insulating blanket, forcing your system to work harder. This leads to higher energy bills, reduced cooling capacity, and added strain that can cause costly breakdowns and shorten your system’s lifespan.
Properly maintained evaporator coils can last up to 15 years. Neglecting them can lead to compressor failures and refrigerant leaks. Regular coil cleaning is a simple, cost-effective way to protect your investment and keep your Long Island or Westbury home comfortable.

Important clean coils hvac unit terms:
Why Cleaning Your HVAC Coils is Non-Negotiable
Imagine trying to run a marathon with a heavy blanket draped over you. That’s what your HVAC system does when its coils are dirty. The evaporator and condenser coils handle the crucial heat exchange that keeps your home comfortable. When they’re caked with dust and debris, they can’t work properly.
Dirty coils trigger several problems:
- Higher energy use: Your HVAC unit works harder to reach the desired temperature, using up to 37% more energy.
- Reduced cooling power: Cooling capacity can drop by as much as 30%, so your home may never feel as cool as you’d like.
- Added mechanical stress: Increased pressure and temperatures can damage the compressor’s lubricant, leading to expensive compressor failure.
- Shorter equipment life: Well-maintained evaporator coils last about 15 years, but neglect cuts that lifespan substantially short.
- Poor indoor air quality: Dust, mold, and allergens on dirty coils circulate through your Long Island home, aggravating allergies.
For National Air Duct USA, helping Nassau and Suffolk County neighbors maintain healthy indoor environments and efficient systems is a top priority.
The Telltale Signs Your Coils Need Cleaning
Watch for these distress signals from your HVAC system:
- Reduced cooling efficiency: Your home doesn’t get as cool or the AC runs constantly.
- Weak airflow: Air from vents feels weaker than normal.
- System freezing up: Ice on the evaporator coil from restricted airflow.
- Unusual noises: Louder humming or rattling from strained components.
- Musty odors: Indicates mold or mildew growth on coils.
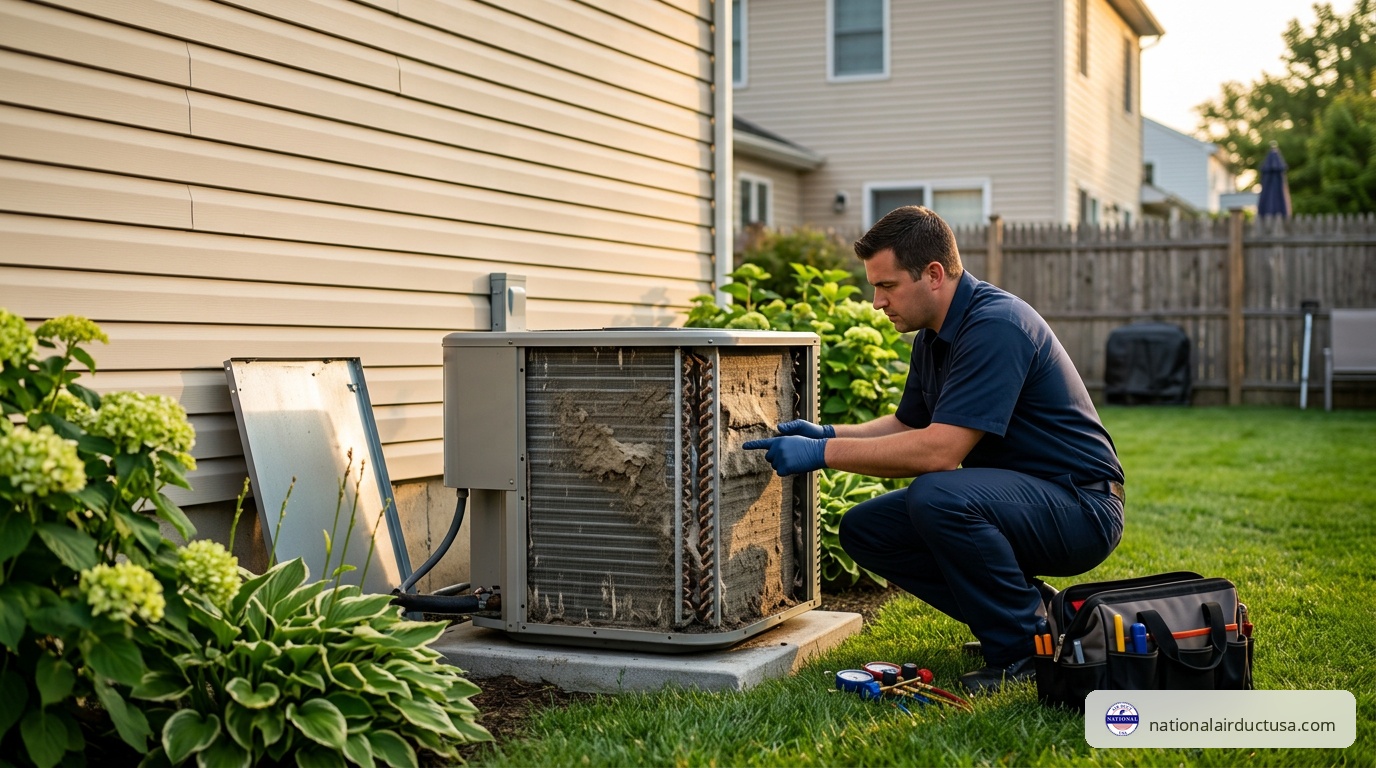
- Visible dirt: Dirt caked onto outdoor condenser coil fins.
- Higher utility bills: Energy bills climb without increased usage.
The Hidden Costs of Dirty Coils
Neglecting HVAC coils affects comfort and your wallet:
- 37% increased energy use
- 30% reduced cooling capacity
- Faster wear on components
- Costly compressor repairs
- Higher utility bills
Just as regular air duct cleaning is essential, so is coil cleaning. Learn more about regular air duct cleaning in Long Island and Westbury.
How Often Should You Clean HVAC Coils?
Clean coils at least once a year, ideally in spring before peak cooling season. You may need more frequent cleaning if:
- You live in a dusty environment
- Your area has high pollen levels
- Your home is near the coast (salt spray accelerates buildup)
- You have pets
- Family members have allergies or respiratory issues
Regularly inspect outdoor condenser coils. If you notice the signs above, it’s time for cleaning.
Your How-To Guide to Clean Coils on an HVAC Unit
Cleaning HVAC coils is manageable with the right approach and safety precautions.

Safety first: Always turn off power at the thermostat and circuit breaker before starting. Protect electrical components from water. Handle delicate coil fins gently to avoid damage. When using chemical cleaners, wear gloves and eye protection, ensure ventilation, and never mix chemicals.
Essential tools:
- Screwdriver set
- Work gloves and safety glasses
- Soft-bristled brush
- Fin comb
- Shop vacuum with soft brush
- Garden hose with spray nozzle
- Approved non-acidic coil cleaner
- Old rags or towels
Step-by-Step: Cleaning Outdoor Condenser Coils (DIY-Friendly)
- Turn off power: Set thermostat to “off” and flip the breaker.
- Clear debris: Remove leaves and trash around the unit (2-foot clearance).
- Remove top grille (optional): Carefully lift without straining wiring.
- Brush away dirt: Use soft brush or vacuum from top to bottom.
- Straighten fins: Use fin comb on bent areas.
- Rinse gently: Spray with garden hose from inside out (not pressure washer).
- Apply cleaner: Use foaming coil cleaner for stubborn grime.
- Rinse if required: Follow product instructions.
- Reassemble: Reattach components and restore power.
For more guidance, see Air Conditioner Maintenance tips from Energy.gov.
The Professional Approach to Clean Evaporator Coils on an HVAC Unit
DIY cleaning of evaporator coils is not recommended because:
- Difficult access inside furnace/air handler
- Risk of damage to delicate fins and electrical components
- High-voltage hazards
- Warranty concerns
NADCA-certified technicians from National Air Duct USA:
- De-energize the system safely
- Remove access panels
- Inspect for damage and leaks
- Vacuum with specialized tools
- Apply approved cleaners
- Clean drain pan and condensate line
- Reassemble and test operation
For comprehensive HVAC health in Long Island and Nassau/Suffolk Counties, explore our HVAC System Cleaning services.
Common Mistakes to Avoid
- Using pressure washers: Bends fins, restricts airflow
- Wire brushes: Can puncture coils, cause refrigerant leaks
- Bending fins: Reduces efficiency
- Harsh chemicals: Bleach/ammonia corrode coils
- Skipping power shutoff: Risk of electrical shock
- Soaking electrical parts: Causes corrosion
- Ignoring drain system: Leads to water damage and mold
DIY vs. Professional Coil Cleaning: Making the Right Choice
Deciding whether to tackle coil cleaning yourself or call in the pros is a common dilemma. While some basic tasks are homeowner-friendly, others are best left to experienced technicians. The goal is to help you choose the option that keeps your system efficient and safe in Long Island, Westbury, and the surrounding areas.

When considering DIY, think about your skill level and comfort with mechanical tasks. Do you have the required tools? Are you aware of the safety risks, including electrical hazards and the potential to damage delicate components? Improper cleaning can void your system’s warranty and may not be as thorough as a professional service.
For outdoor condenser coils, a homeowner with basic tools and a careful approach can often manage a light cleaning. However, the indoor evaporator coil is different. Its location, delicate construction, and proximity to electrical components make it a job that usually warrants professional attention. NADCA-certified technicians from National Air Duct USA are trained to handle these complexities safely and effectively, ensuring a truly clean coils hvac unit.
When to DIY vs. Hire a Pro to Clean Coils on an HVAC Unit
Here is a simplified comparison to guide your decision:
| Factor | DIY (Outdoor Condenser Coil) | Professional (Evaporator & Condenser Coils) |
|---|---|---|
| Cost | Low (mainly cleaner and basic tools). | Higher upfront cost, but helps prevent major repair expenses later. |
| Time | Short, especially for light debris and basic rinsing. | Visit typically includes inspection, full cleaning, and system check. |
| Risk | Moderate. Possible fin damage or minor electrical risk if safety steps are skipped. | Low. Technicians are trained, insured, and follow safety and warranty guidelines. |
| Effectiveness | Good for surface-level dirt on the outdoor unit. Limited reach into tight spaces. | High. Thorough cleaning of both indoor evaporator and outdoor condenser coils with specialized tools. |
| Best for | Routine touch-ups between professional visits and basic maintenance. | Annual servicing, performance issues, frozen coils, or suspected refrigerant or drainage problems. |
If you notice frozen coils, persistent musty odors, frequent system short cycling, or suspect a refrigerant leak, always call a professional rather than attempting DIY repair.
For more information about expert HVAC services, including coil cleaning for homes in Long Island, Westbury, Hempstead, Garden City, Hicksville, Freeport, and across Nassau and Suffolk Counties, visit our professional services page.
Introduction: The Heart of Your Home’s Comfort
Clean coils hvac unit maintenance is critical for keeping your home cool and your energy bills low. Here’s what you need to know:
- Evaporator coils (indoor) absorb heat from your home’s air
- Condenser coils (outdoor) release that heat outside
- Dirty coils reduce cooling capacity by up to 30% and increase energy use by 37%
- Annual cleaning is recommended for most homes, more often in dusty or coastal areas
- DIY cleaning works for outdoor coils, but indoor evaporator coils need professional service
There’s nothing quite as refreshing as stepping into a cool, comfortable home on a hot, humid Long Island summer day. But that comfort depends entirely on two components most homeowners never see: the evaporator and condenser coils inside your HVAC system.
These coils are the workhorses of your air conditioning system. They handle the actual heat exchange that cools your home. The evaporator coil absorbs heat and moisture from indoor air, while the condenser coil releases that heat outside. Together, they work in what’s called the refrigeration cycle to keep your home comfortable.
When these coils get dirty, everything falls apart. Dust, dirt, pollen, pet dander, and debris accumulate on the coil surfaces over time. This buildup acts like a blanket, blocking the heat exchange process your system depends on.
The consequences are serious. Dirty coils force your system to work harder, driving up your energy bills by as much as 37%. Cooling capacity can drop by 30%. Your indoor air quality suffers as contaminants circulate through your home. And the increased strain can lead to expensive repairs or even premature system failure.
Most evaporator coils are designed to last about 15 years when properly maintained. But neglect them, and you could be looking at costly compressor failures, refrigerant leaks, and a shortened system lifespan.
The good news? Regular coil cleaning is straightforward, and it’s one of the most cost-effective maintenance tasks you can perform or have done for your HVAC system.
Important clean coils hvac unit terms:
Why Cleaning Your HVAC Coils is Non-Negotiable
Imagine trying to run a marathon with a heavy blanket on. That’s what your HVAC system does when its coils are caked with dust, grime, and debris. These coils are essential for the heat exchange that cools your home, and when they’re dirty, they can’t perform effectively.
Dirty coils lead to a cascade of problems:
- Skyrocketing Energy Bills: A dirty system works harder, consuming up to 37% more energy. That’s a significant hit to your wallet, especially during hot Long Island summers. This inefficiency leads to higher utility bills.
- Reduced Cooling Power: Cooling capacity can drop by as much as 30%, meaning your home struggles to stay comfortable even when the AC is running constantly.
- Risk of Costly Repairs: The increased strain can damage the compressor, one of the most expensive parts to replace. A well-maintained coil can last 15 years, but neglect can drastically shorten that lifespan.
- Poor Indoor Air Quality: Dirty, damp coils become a breeding ground for mold, bacteria, and allergens. These contaminants are then circulated throughout your home, potentially causing respiratory issues and worsening allergies.
Just as regular air duct cleaning is essential for a healthy home, so too is coil cleaning. Learn more about why regular air duct cleaning is essential for every home in Long Island and Westbury.
The Telltale Signs Your Coils Need Cleaning
Your HVAC system will often show signs of distress when its coils need cleaning:
- Reduced Cooling: Your home doesn’t get as cool as it used to, or the AC runs constantly.
- Weak Airflow: Air from the vents feels weaker than normal.
- System Freezing Up: You notice ice or frost on the indoor or outdoor unit. This happens when restricted airflow prevents proper heat absorption.
- Unusual Noises: The system hums louder or makes rattling sounds as it strains to work.
- Musty Odors: A sign of mold or mildew growth on the damp coils.
- Visible Dirt: You can see a layer of grime on the outdoor unit’s fins.
- Higher Utility Bills: A sudden, unexplained increase in your energy costs.
How Often Should You Clean HVAC Coils?
The general rule is to have your HVAC coils cleaned at least once a year, ideally in the spring before the cooling season. However, you may need more frequent cleanings if you live in:
- Dusty Environments: Near construction sites or unpaved roads.
- High Pollen Areas: Common across Long Island in spring and summer.
- Coastal Areas: Salt spray can accelerate corrosion and buildup on outdoor coils.
- Homes with Pets: Pet dander and hair can quickly clog indoor coils.
- Homes with Allergy Sufferers: Clean coils are crucial for maintaining good indoor air quality.
Regularly inspect your outdoor unit for visible debris. If you notice any of the telltale signs, it’s time for a cleaning.
Your How-To Guide to Clean Coils on an HVAC Unit
Cleaning your HVAC coils can be a manageable task if you take the right precautions. Here’s how to approach it safely and effectively.
Safety is paramount. Before starting, turn off all power to the HVAC unit at the thermostat and the circuit breaker to prevent electrical shock. Be gentle with the delicate metal fins on the coils, as bending them will restrict airflow. If using chemical cleaners, wear gloves and eye protection, ensure good ventilation, and read all instructions carefully.
Here’s a list of essential tools and materials you might need:
- Screwdriver set
- Work gloves and safety glasses
- Soft-bristled brush
- Fin comb (for straightening bent fins)
- Shop vacuum with a soft brush attachment
- Garden hose with a spray nozzle
- Approved, non-acidic coil cleaner spray
Step-by-Step: Cleaning Outdoor Condenser Coils (DIY-Friendly)
Cleaning the outdoor condenser coil is a manageable DIY task.
- Power Down: Turn off the thermostat and the corresponding circuit breaker. Use the outdoor disconnect switch for added safety.
- Clear Debris: Remove leaves, grass, and other debris from around and on top of the unit.
- Clean the Fins: Use a soft brush or a shop vacuum with a brush attachment to gently remove dirt from the exterior fins.
- Straighten Fins: If you see any bent fins, carefully straighten them with a fin comb.
- Apply Cleaner (Optional): For heavy grime, spray the coils with a commercially available, non-acidic foaming coil cleaner. Follow the product’s directions.
- Rinse Gently: Using a garden hose with a spray nozzle (NOT a pressure washer), gently rinse the coils from the inside out to push debris away from the unit. Avoid spraying electrical components directly.
- Reassemble: Once dry, reattach any panels or grilles you removed.
- Restore Power: Turn the breaker and thermostat back on.
For more official guidance, see these Air Conditioner Maintenance tips from Energy.gov.
The Professional Approach to Clean Evaporator Coils on an HVAC Unit
While you can clean the outdoor coil, we strongly recommend hiring a professional for the indoor evaporator coil due to:
- Accessibility: It’s located inside the air handler, making it difficult to reach without specialized tools.
- Risk of Damage: The fins are extremely delicate, and nearby electrical components can be easily damaged by moisture.
- Safety Hazards: The unit contains high-voltage wiring.
- Warranty: DIY work can void your manufacturer’s warranty.
A professional technician will safely de-energize the system, access the coil, use specialized tools and cleaners to thoroughly clean the coil and the condensate drain pan, and ensure everything is working correctly before leaving. This comprehensive service prevents water damage and ensures optimal performance. For a complete cleaning, explore our HVAC System Cleaning services.
Common Mistakes to Avoid When Cleaning Coils
- Using a pressure washer: This will bend the delicate fins and restrict airflow.
- Using wire brushes: These can puncture the coils, causing refrigerant leaks.
- Using harsh chemicals: Bleach or household cleaners can corrode the coils. Use only approved HVAC coil cleaners.
- Forgetting to turn off the power: This poses a serious risk of electrocution.
- Neglecting the drain pan and line: A clogged drain can cause water damage and mold growth.
DIY vs. Professional Coil Cleaning: Making the Right Choice
Deciding whether to clean your coils yourself or call in the pros is a common dilemma. While some basic tasks are homeowner-friendly, others are best left to experienced technicians. Our goal is to empower you with the knowledge to make the right choice for your home in Long Island or Westbury.
When considering DIY, think about your skill level, the tools required, and the safety risks involved. Improper cleaning can void your system’s warranty and may not be as thorough as a professional job.
For outdoor condenser coils, a homeowner with basic tools and a careful approach can often manage a light cleaning. However, the indoor evaporator coil’s location, delicate nature, and proximity to electrical components make it a job that warrants professional attention. Our NADCA-certified technicians are trained to handle these complexities safely and effectively, ensuring a truly clean coils hvac unit.
When to DIY vs. Hire a Pro to Clean Coils on an HVAC Unit
Here’s a breakdown to help you decide:
| Factor | DIY (Outdoor Condenser Coil) | Professional (Both Coils) |
|---|---|---|
| Cost | Low (cost of cleaner/tools) | Higher initial cost, but prevents expensive future repairs. |
| Scope | Surface-level cleaning of the outdoor unit only. | Deep cleaning of both indoor evaporator and outdoor condenser coils. |
| Risk | Moderate. Risk of bending fins or minor electrical shock if not careful. | Low. Technicians are trained and insured. Protects your warranty. |
| Effectiveness | Good for light, external debris. May not remove deeply embedded grime. | Highly effective. Uses specialized tools and chemicals for a complete clean. |
| Best For | Routine maintenance between professional visits. | Annual servicing, addressing performance issues, or if you’re not comfortable with DIY. |
For a truly clean system, especially when dealing with the inaccessible indoor evaporator coil, professional service is the safest and most effective option. If you’re experiencing issues like frozen coils or suspect a refrigerant leak, always call a professional.